
Overview
QuickBooksIntegration in Browser Settings is where Club Caddie connects to QuickBooks Online, brings in your QuickBooks accounts, and keeps track of which sales have already been sent. Club Caddie remembers the last synced sale, so the next sync starts after it. QuickBooks Reset Sync moves that marker back inside Club Caddie; it does not delete or change anything in QuickBooks. Mapping your accounts to transactions on the Journal Entry Setup tab is covered in QuickBooks: Journal Mapping.
Before you start
Your accounts need to exist and be active in QuickBooks Online before you import them. Support recommends signing in to QuickBooks with an admin user when you import or sync. This screen connects to QuickBooks Online and has no QuickBooks Desktop tab; QuickBooks Desktop clubs use the QuickBooksIntegration screen in the Club Caddie Desktop app.
Open QuickBooksIntegration
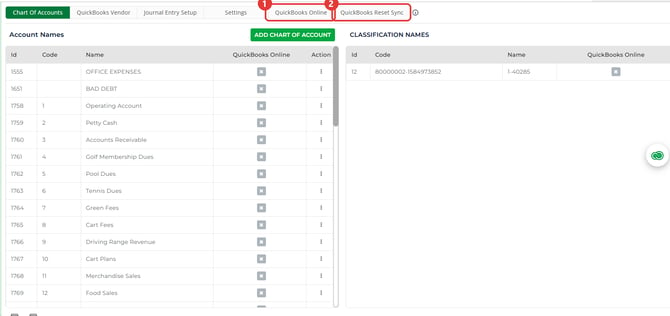
- Click the Settings gear and choose QuickBooksIntegration. The screen opens on the Chart Of Accounts tab.
- The tabs across the top are Chart Of Accounts, QuickBooks Vendor, Journal Entry Setup, Settings, QuickBooks Online and QuickBooks Reset Sync.
Connect Club Caddie to QuickBooks Online
- Click the QuickBooks Online tab. The page reads SYNC WITH QUICKBOOKS, with a QB Online section.
- Click Connect to QuickBooks. A new browser tab opens to complete the QuickBooks authorization.

- In the new tab, follow the prompts to sign in to QuickBooks Online and approve the connection for your company.
- When the new tab says the authorization was successful, go back to the Club Caddie tab. Within a few seconds the QB Online section shows that you are connected and names your company, and the sections for importing your chart of accounts and syncing with QuickBooks appear.
If the approval is not finished within about five minutes, Club Caddie shows a timeout message. Click Connect to QuickBooks again.
Import your Chart of Accounts
Run the import after you first connect, and again whenever you add or rename accounts in QuickBooks Online.
- On the QuickBooks Online tab, find the section for importing your chart of accounts. It shows while Club Caddie is connected.
- Click its import button and wait while it runs. The import brings in your active accounts, vendors and classes.
- When it finishes, the section shows how many accounts, vendors and classes were synced. The accounts number is the total in your Club Caddie list after the import, so it includes accounts that were already there.
- Open the Chart Of Accounts tab to check the result. The QuickBooks Online column shows a check mark on each account linked to QuickBooks Online and an X on each account that is not.
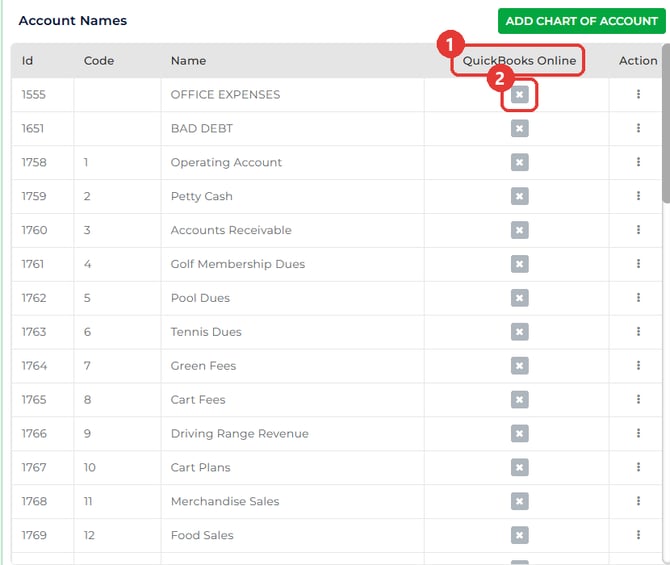
The import matches accounts by name. An account whose name already exists in Club Caddie gets its account number updated from QuickBooks; an account with a new name is added. Accounts in Club Caddie that are not in QuickBooks Online are left as they are.
Check the sync history
- Click the QuickBooks Reset Sync tab. The history grid sits under the reset controls. The same grid shows in the sync section of the QuickBooks Online tab while you are connected.
- Read the columns: ID, Sync From Date, Sync To Date, Sync Start Date Time, Sync Completion Date Time and Last Sync Order ID. The newest row is at the top, and more rows load as you scroll.

A row tells you Club Caddie recorded a sync or a reset for those dates. Rows record each run, not its result, so to confirm a date, compare QuickBooks with the GL Code Report for that date, which shows the Club Caddie side.
Reset the sync date
Reset the sync date to redo days that are already in QuickBooks, and work through it with Support. A reset does not remove anything from QuickBooks, so a day that is synced again while its first entry is still in QuickBooks posts twice.
- In QuickBooks Online, delete the entries for the day you are redoing.
- In Club Caddie, click the QuickBooks Reset Sync tab. The Sync Date box opens on the Sync To Date of the last sync.
- In Sync Date, choose the last day before the day you are redoing that had a sale. The red note on the screen gives an example: to sync 09/01, reset to 08/31 or an earlier date.

- Click Reset Sync Date. A Confirmation box asks Are you sure? Do you want to reset Sync date?
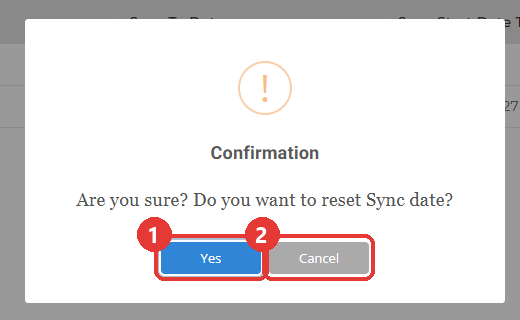
- Click Yes. A message confirms the reset, and the grid refreshes. If the message says no sale was found, the date you chose had no paid sale and nothing changed; choose an earlier date that had a sale.
- Refresh the page in your browser so the QuickBooks Online tab picks up the new sync date.
- On the QuickBooks Online tab, in the sync section, sync the day you are redoing by itself.
Reconnect QuickBooks Online
- If an error message says the authorization is not done when you open the QuickBooks Online tab, and the tab shows the Connect to QuickBooks button, the saved authorization has expired. Click Connect to QuickBooks and approve again, as in Connect Club Caddie to QuickBooks Online. Your account links stay in place.
- Disconnect only when you mean to remove the connection, for example before connecting a different QuickBooks company. Club Caddie asks you to confirm before it disconnects.
- Disconnecting removes the QuickBooks Online links from your accounts, vendors and classes. Your Club Caddie accounts and your Journal Entry Setup mappings stay. After you connect again, run the chart of accounts import so the links come back, then check the QuickBooks Online column on the Chart Of Accounts tab.
Common Questions
I added an account in QuickBooks Online. How do I get it into Club Caddie?
Make sure the account is active in QuickBooks Online, then run the chart of accounts import on the QuickBooks Online tab. You do not need to disconnect first. The new account then shows on the Chart Of Accounts tab and in the Journal Entry Setup lists.
Why does an imported account have no Code?
The Code comes from the account number in QuickBooks Online. An account with no number in QuickBooks comes in with a blank Code. Add the number in QuickBooks and import again.
I renamed an account in QuickBooks Online. What happens in Club Caddie?
The import matches by name, so the renamed account comes in as a new account and the old name stays in your Club Caddie list. Check Journal Entry Setup and point any mapping at the account you want.
Why does the QuickBooks Online column show an X on some accounts?
That account has no link to QuickBooks Online, for example an account added only in Club Caddie, or accounts after a disconnect. When Club Caddie syncs, it leaves out a journal line whose account has no link. Run the chart of accounts import to link accounts whose names match QuickBooks.
Does Reset Sync remove entries from QuickBooks?
No. It moves Club Caddie's marker for the last synced sale and changes nothing in QuickBooks. Delete the entries in QuickBooks yourself before you sync those days again.
Can I reset to a date after my last sync?
The screen accepts it, but sales up to that date would then be treated as already synced and left out of the next sync. Pick a date before the day you are redoing.
I redid one day. Do I need to worry about the days after it?
The reset moves the marker back for the later days too, so a later day that is still in QuickBooks would post again if you sync it. Sync the day you redid by itself, and talk to Support before syncing past it.