.png?width=200&height=89&name=CC%20%20fiserv.%20(3).png)
This article explains how to set up the Epson TM-m30II receipt printer with your Club Caddie system, covering requirements, purchasing, connecting, loading paper, installing the printer driver, and troubleshooting common issues.
How do I set up the Epson TM-m30II receipt printer?
Step 1: Ensure that you meet the requirements for using the Epson TM-m30II receipt printer with your Club Caddie system. Requirements include a compatible Windows operating system, a local area network (LAN) connection, and an available power outlet for the AC adapter.
Step 2: Purchase the Epson TM-m30II receipt printer from the Club Caddie Hardware Store for merchants.
Step 3: Connect the printer by following these steps in order:

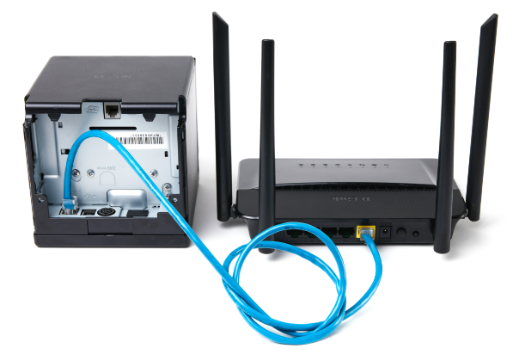
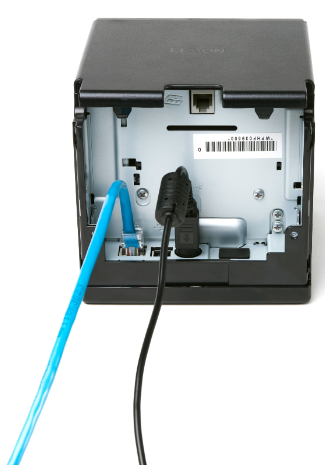
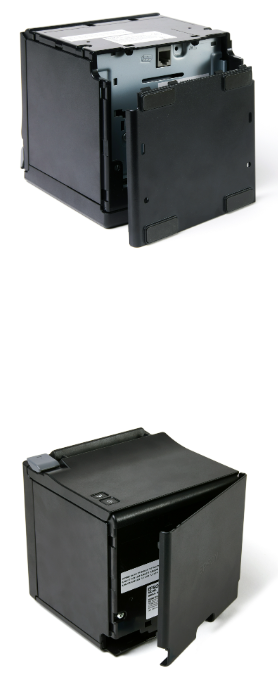
- Remove the back and bottom covers.
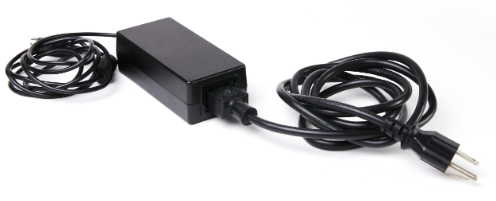
- Plug in the LAN cable, AC adapter, and AC cable.
- Reattach the back and bottom covers.
- Turn on the printer.
Step 4: Insert a paper roll by opening the printer cover, placing the paper roll in the correct orientation, pulling the paper past the cutter, and closing the cover.
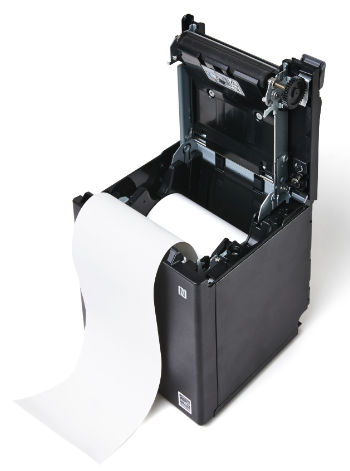
Step 5: Download the latest printer driver for Windows from Epson's website by selecting the "Windows Printer Driver" option and following the download instructions. Click here for instructions.
Step 6: Install the printer driver by extracting the downloaded file, double-clicking on the install file, and following the installation guide instructions.
Step 7: Set up the printer in the printer setup screen by following these steps in order:
- Select the correct printer model (Epson TM-m30II).
- Enter a name for the printer.
- Set the port type to Ethernet.
- Leave the port field set to Auto setup.
- Enter the printer's IP address. To find the IP address, switch the printer off and back on, then wait for the network configuration slip to print — the IP address is listed on that slip.
Step 8: Troubleshoot common issues, such as the ERROR indicator blinking red (caused by no paper in the printer) or paper jams (caused by feeding paper at an angle or trying to make the receipt narrower than 3 inches without using the provided divider).