.png?width=200&height=89&name=CC%20%20fiserv.%20(3).png)
Step-by-Step:
Step 1: Open the page in Elementor:
From the WordPress dashboard, click Pages, then click All Pages. Hover over the page you want to edit and click Edit with Elementor. If you are already viewing the page while logged in, click the Edit with Elementor button in the top admin toolbar.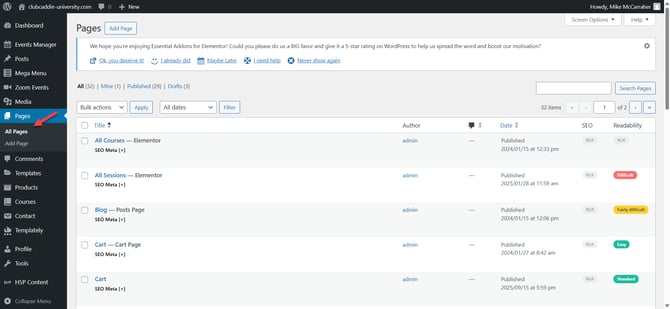
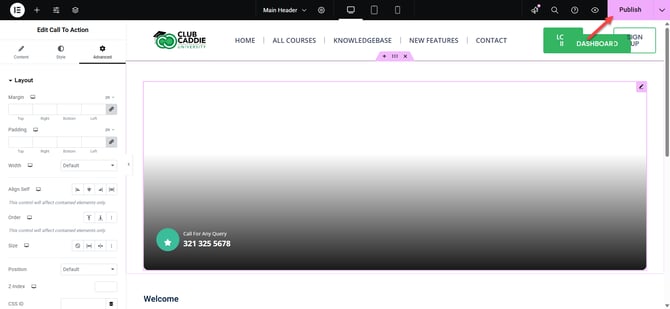
Step 2: Locate and select the button:
In the Elementor editor, scroll to the section where the existing button is located. Click directly on the button to select it, or click the Navigator icon (bottom-left panel icon) and choose the button from the list. The left sidebar will update to show the Button widget settings.
In the left sidebar under the Content tab, update the Text or Button Text field with the wording you want (for example, “Book Now”). In the Link field, enter the full URL or internal page path (for example, https://yoursite.com/contact). Use the Alignment options to set the button to left, center, right, or justified within its column.
Step 3: Adjust button style (colors and typography):
Click the Style tab in the left sidebar. Change Text Color to control the label color and set Background Color for the button’s normal state. Use Border Radius to round the corners (for example, 20px for a pill-shaped button). Under Typography, adjust font family, size, weight, and letter spacing so the button text is clear and readable.
Still in the Style tab, go to the Hover section. Choose a Hover Background Color and Hover Text Color if desired. Select a Hover Animation (such as Grow or Shrink) and set Transition Duration so the hover effect feels smooth when visitors move their mouse over the button.
Step 4: Set spacing and behavior in Advanced:
Click the Advanced tab. Use Padding and Margin to control space inside and around the button so it lines up with other elements. Under Motion Effects, you can add entrance animations (such as Fade In) if you want the button to appear with movement. If you have Elementor Pro, you can also use the Custom CSS area to apply advanced styling (optional).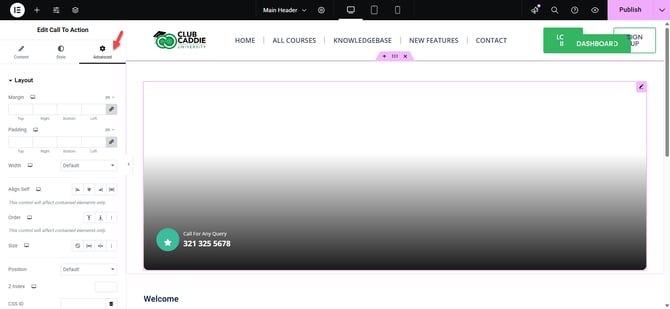
Step 5: Preview and test the button:
At the bottom of the Elementor panel, click the eye (Preview Changes) icon. In the preview window, confirm that the button is clickable, the link opens the correct page, and hover styles (color and animation) work as expected.
Step 6: Save and publish your changes:
Return to the Elementor editor and click the green Update button in the bottom-left corner to save and publish your edits to the live site.