.png?width=200&height=89&name=CC%20%20fiserv.%20(3).png)
If you do not see a Header option under Edit with Elementor, your header may not be built with Elementor or Elementor Pro may not be active.
Step-by-Step:
Step 1: Open Your Site While Logged In:
Visit your website homepage or any page while you are logged into WordPress. Confirm you can see the black WordPress admin bar at the top of the screen.
Step 2: Open Elementor Options from the Admin Bar:
In the black admin bar at the top, locate the Edit with Elementor button. Click the ▼ down arrow next to it to expand additional options.
Step 3: Select the Header Template:
In the dropdown menu, click Header. Elementor will open and load the global header template that appears across your site.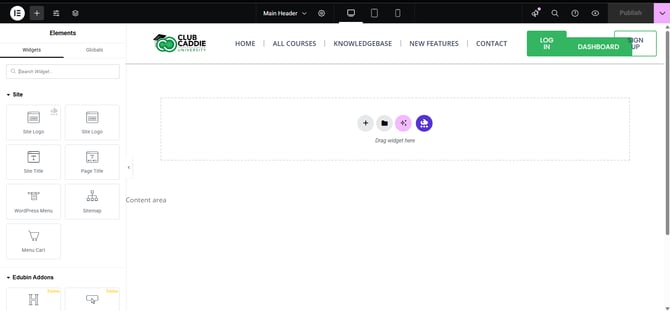
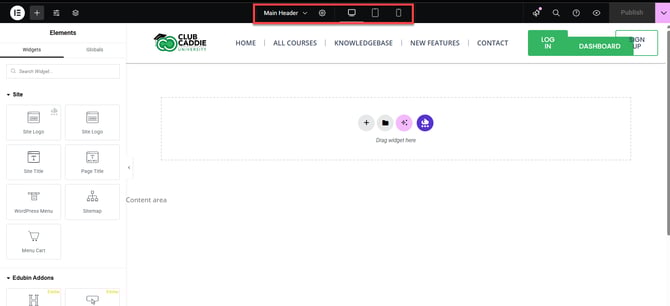
Step 4: Edit Header Content:
In Elementor, click on items in the header (such as the logo, navigation menu, buttons, social icons, or contact details) to edit them. Use the left panel to replace the logo, choose which menu to display, change button text, update links, or adjust colors and fonts.
Step 5: Adjust Header Layout and Behavior:
Use the section and column controls to arrange the logo, menu, and buttons. Right-click columns to adjust widths and spacing. In the section settings, you can turn on Sticky behavior if you want the header to remain visible while users scroll.
Step 6: Check Mobile and Tablet Views:
Click the Responsive Mode (screen icon) at the top of the Elementor panel. Switch between desktop, tablet, and mobile views, then adjust font sizes, spacing, and layouts so the header looks good and functions correctly on all devices. Click Update when you are done.