Activity Center - Activity Resource Type
Article Contents:
This article contains a step-by-step guide of creating an Activity Resource Type, located within the Activity Center of Club Caddie software. It explains how to add, edit, and delete activity resources and outlines the required fields for creating a new activity resource type.
Step-By-Step:
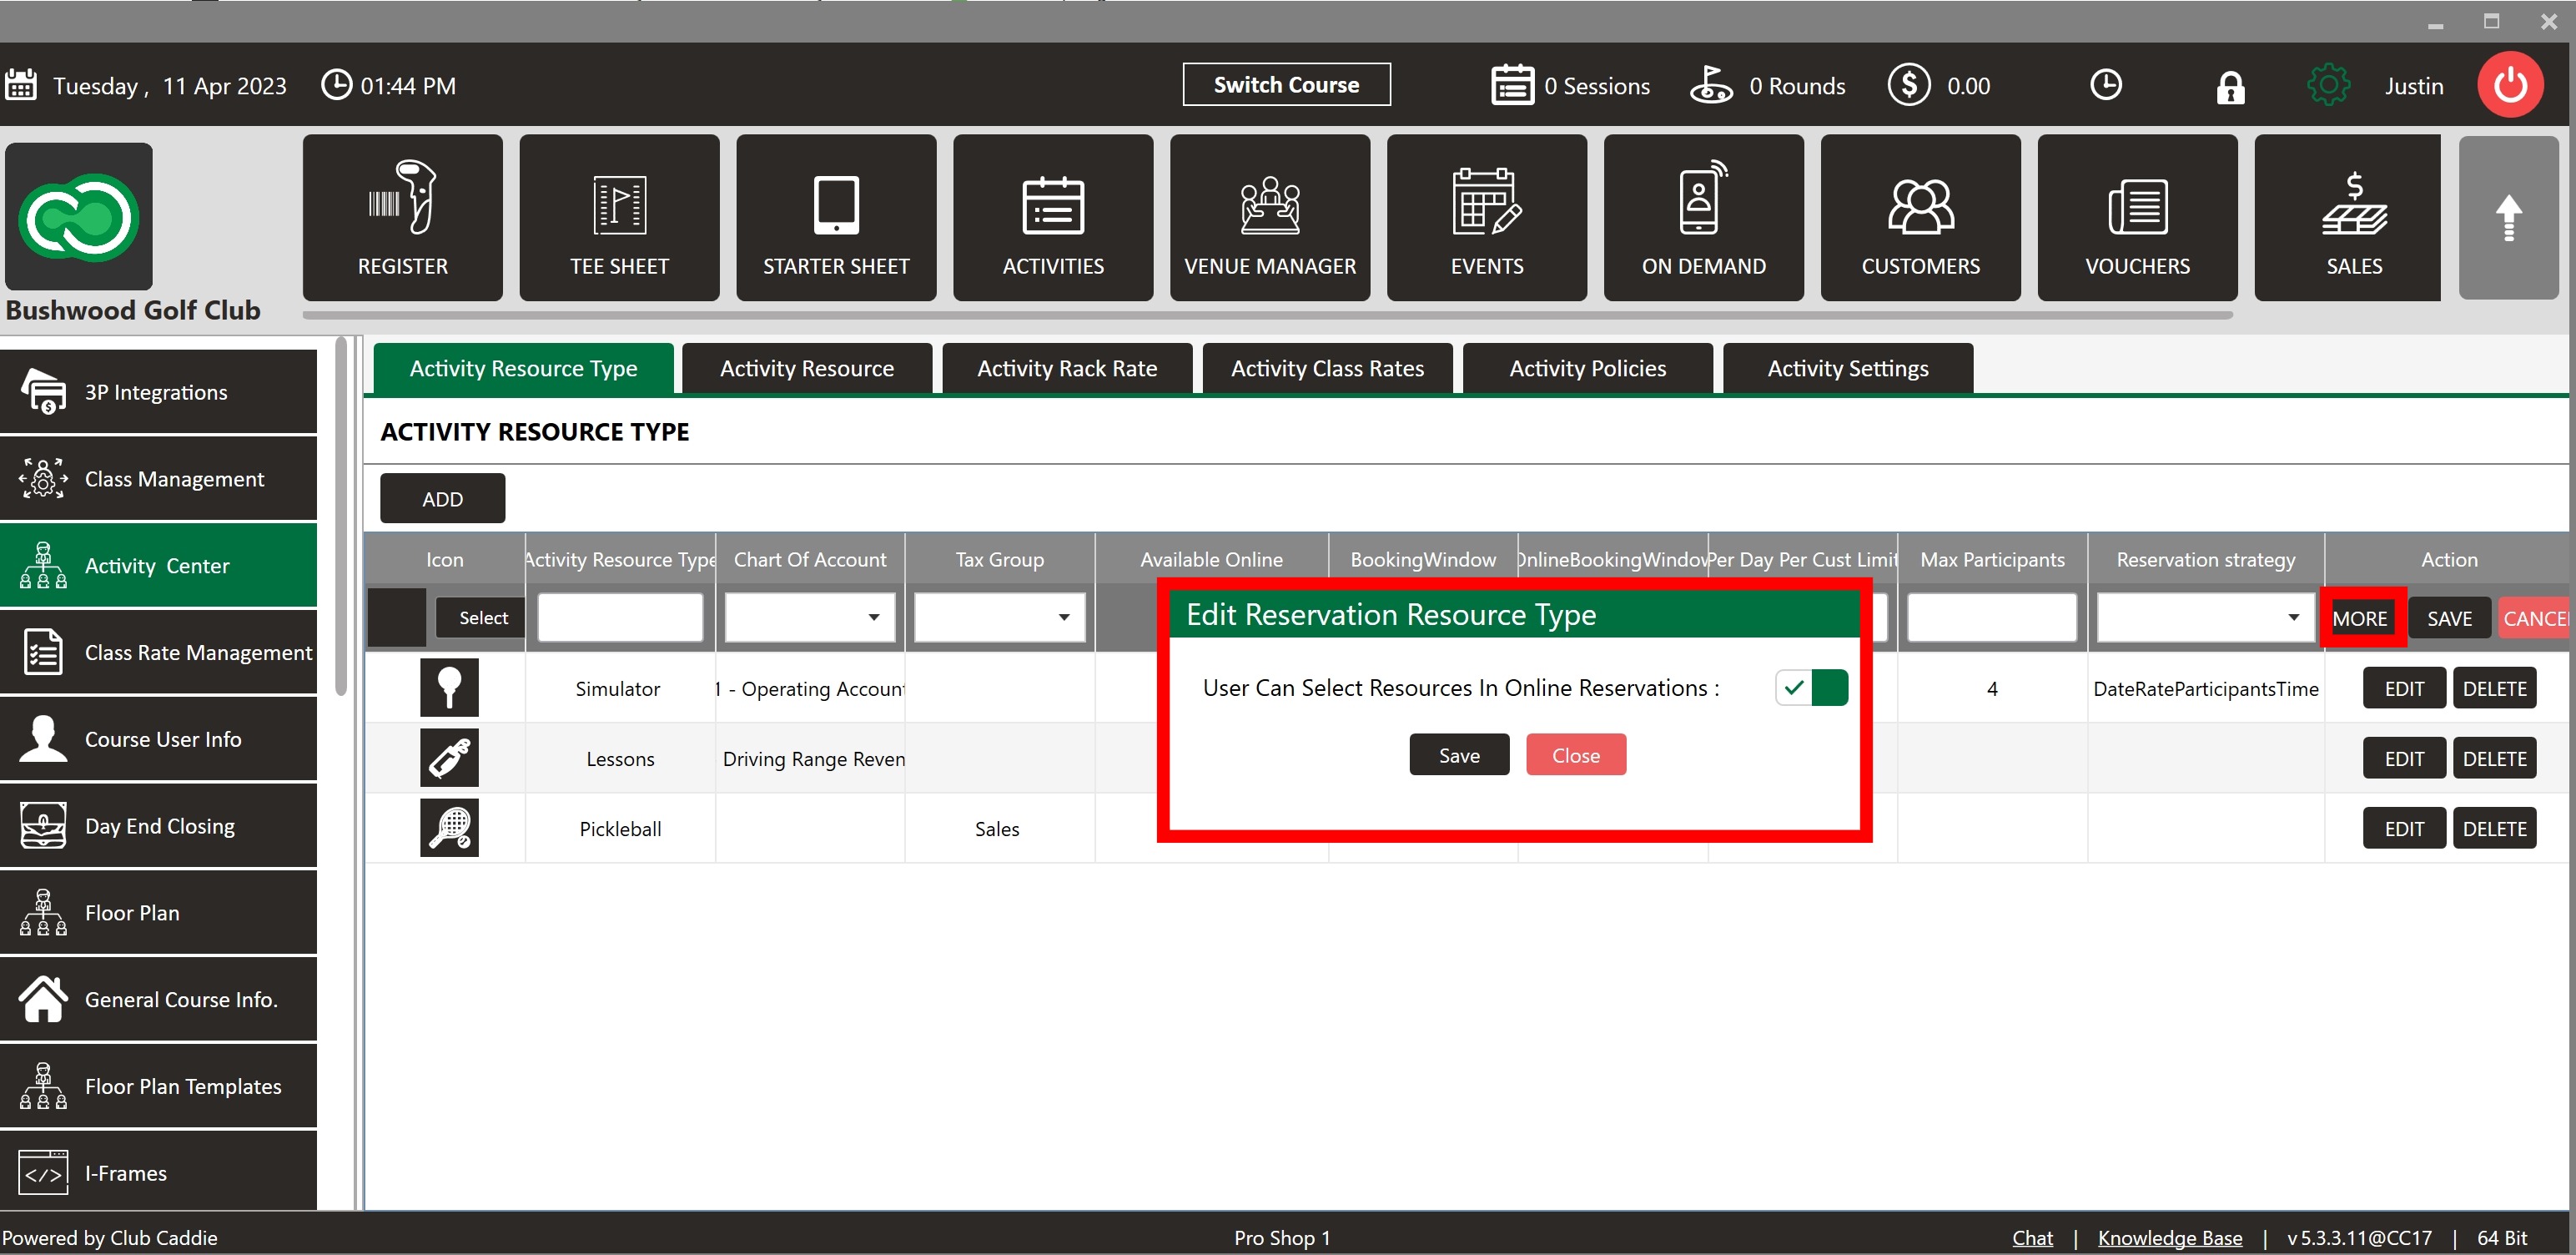
Step 1: Navigate to the Activity Resource Type tab within the Activity Center of your Club Caddie software located at Settings > Activity Center > Activity Resource Type.
Step 2: Click the ADD button in the top left corner of the screen to begin creating a new activity resource.
Step 3: Fill out the required fields: Icon selection, Activity Resource Type, Chart of Account, Tax Group, Available Online, Booking Window, Online Booking Window, Per Day Per Cust. Limit, Max Participants, and Reservation strategy.

Icon: Click "Select" to open the UPLOAD ICON window. Choose an icon from the predefined list or upload an SVG file by clicking the arrow icon and select the file from your computer. Preview the icon in the top right corner, and click "Select" to finalize your choice.
Activity Resource Type: Name the Activity Resource Type being established.
Chart of Account: Use the drop-down menu to associate the activity resource type with a specific chart of account.
Tax Group: Select the Sales Tax associated with the resource or choose "No tax" if no tax is applicable.
Available Online: Toggle the switch to enable or disable online availability for the Activity Resource Type.
Booking Window: Set the number of days in advance that an activity resource type can be booked.
Online Booking Window: Set the number of days in advance that an activity resource type can be booked online.
Per Day Per Cust Limit: Set a limit on the number of bookings a customer can make in a single day.
Max Participants: Set the maximum number of participants that can be booked for a booking time slot.
Reservation Strategy: Choose between four sequences for online booking: Date, Time, Participants, Rate / Date, Rate, Participants, Time / Date, Time, Duration, Rate / Date, Duration, Time, Rate.
Step 4: Click the MORE button to reveal the additional option "User Can Select Resources In Online Reservations." Toggle this switch on to allow customers to choose their preferred resource when booking online, rather than having it assigned by the software.

Step 5: Once all fields have been completed, click SAVE to finalize the creation of the new Activity Resource Type.
Step 6: To edit an existing Activity Resource Type, click the EDIT button and make the necessary changes.
Step 7: To delete an existing Activity Resource Type, click the DELETE button.
This knowledge base article provides a comprehensive guide on managing activity resources within the Club Caddie software, from creation to deletion.
Related Articles
Activity Center - Activity Resource
Article Contents: This article contains step-by-step instructions on how to create Activity Resources in Club Caddie Software. Activity Resources are the physical locations where the activities associated with a specific Activity Resource Type are ...Activity Center - Reservation Strategy
Article Contents: This article contains a step-by-step guide on how to set your Reservation Strategy as it will set your sequence options for players booking online. Step-By-Step: Step 1: Navigate to Settings and then click on Activity Center from ...Activity Center Overview
Article Contents: This article contains an overview of the Activity Center, including its functions and features for managing various activities and resources within the Club Caddie software. Overview: The Activity Center acts as the control center ...Activity Center - Activity Settings
Article Contents: This article contains step-by-step instruction on how to access and configure in Club Caddie's Activity Center. The settings covered include Default Duration, Require Credit Card to Hold Activity Reservations, and Percentage of ...Activity Center - Activity Rack Rate
Article Contents: This article contains step-by-step instructions on how to add, edit, and search for Activity Rack Rates in the Activity Rack Rate Management section of the Activity Center in Club Caddie. Before adding rack rates, ensure resource ...