Advanced Automation
Article contents:
This article contains information about Advanced Automation, including how to create automated workflows, the different types of actions available (entry trigger, send message, modify custom field, wait, list action, decision split, end automation), and how to edit, change, or delete actions.
Here are some examples of ways to use the advanced automation tool:
Engaged Subscriber Workflow: Send a specific message to those who opened your last message, and re-engage inactive subscribers with a series sent to those who did not open the message.
Creating an Advanced Automation
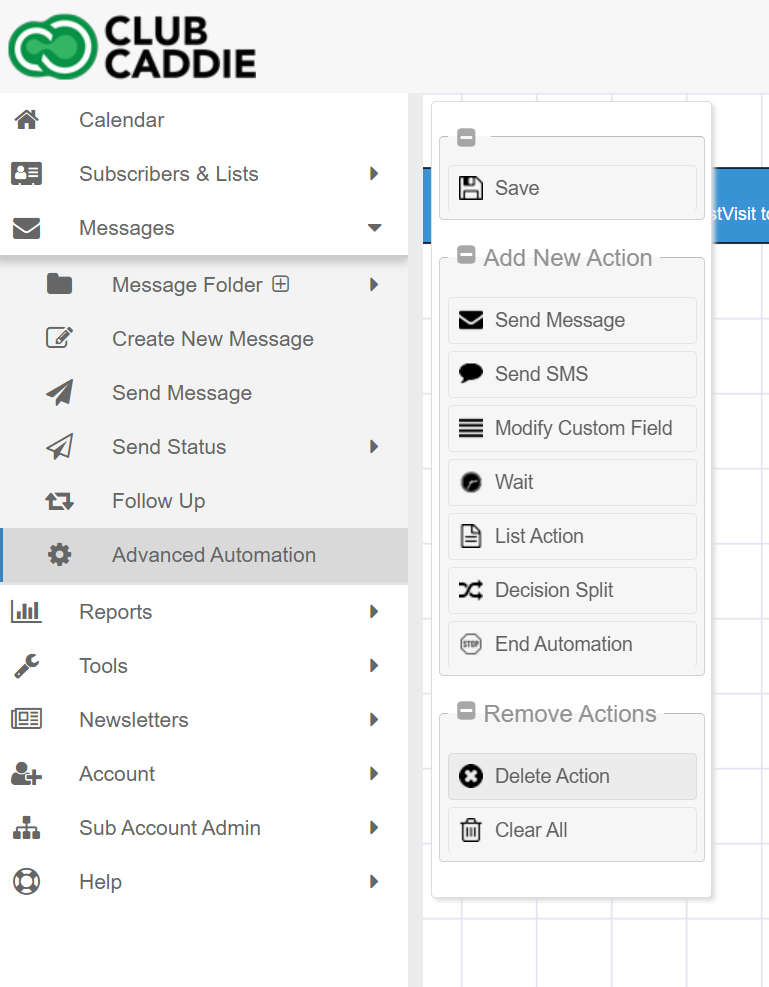
Click Messages.
Click Advanced Automation.
Click Create Automation.
Enter a name for the automation and an email address that will receive any alerts regarding your automation. You can also modify any other Automation Options in this menu.

Name
The automation name is for identifying the automation. It is used for display purposes only.
Active/Inactive
You can specify when your automation should be active. The options are inactive, always active, or active between certain dates/times.
Testing
Check the box for this option to set your automation to Testing mode. See Testing an Advanced Automation for more information.

Require Subscribers To Be On Entry List
Check the box for this option to require subscribers to be on the entry list for actions to happen. When this option is enabled, subscribers must be on the entry list at all times for them to keep progressing through the automation. If at any time a subscriber is no longer on the entry list, no further actions will be taken on that subscriber.
Email to Alert
If for any reason we encounter an issue with your automation, this is the email that we will use to notify you.
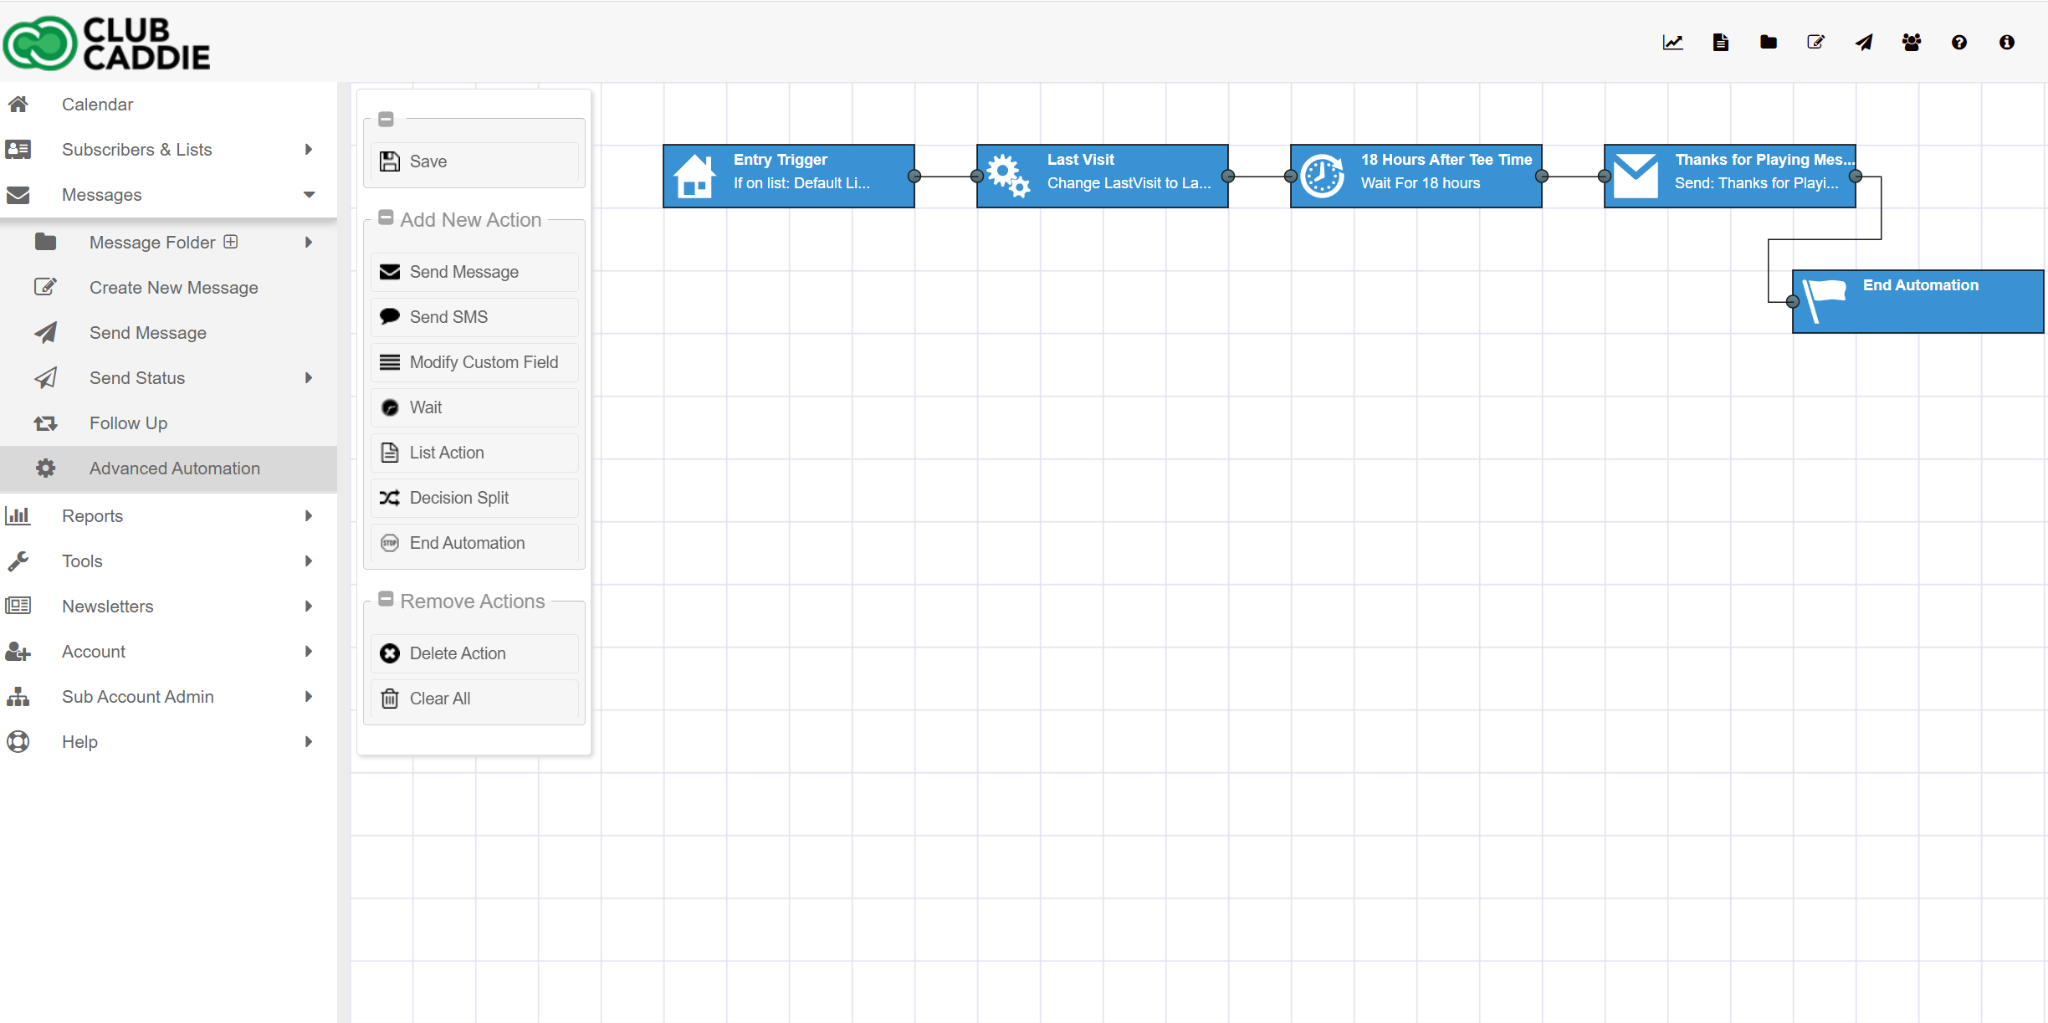
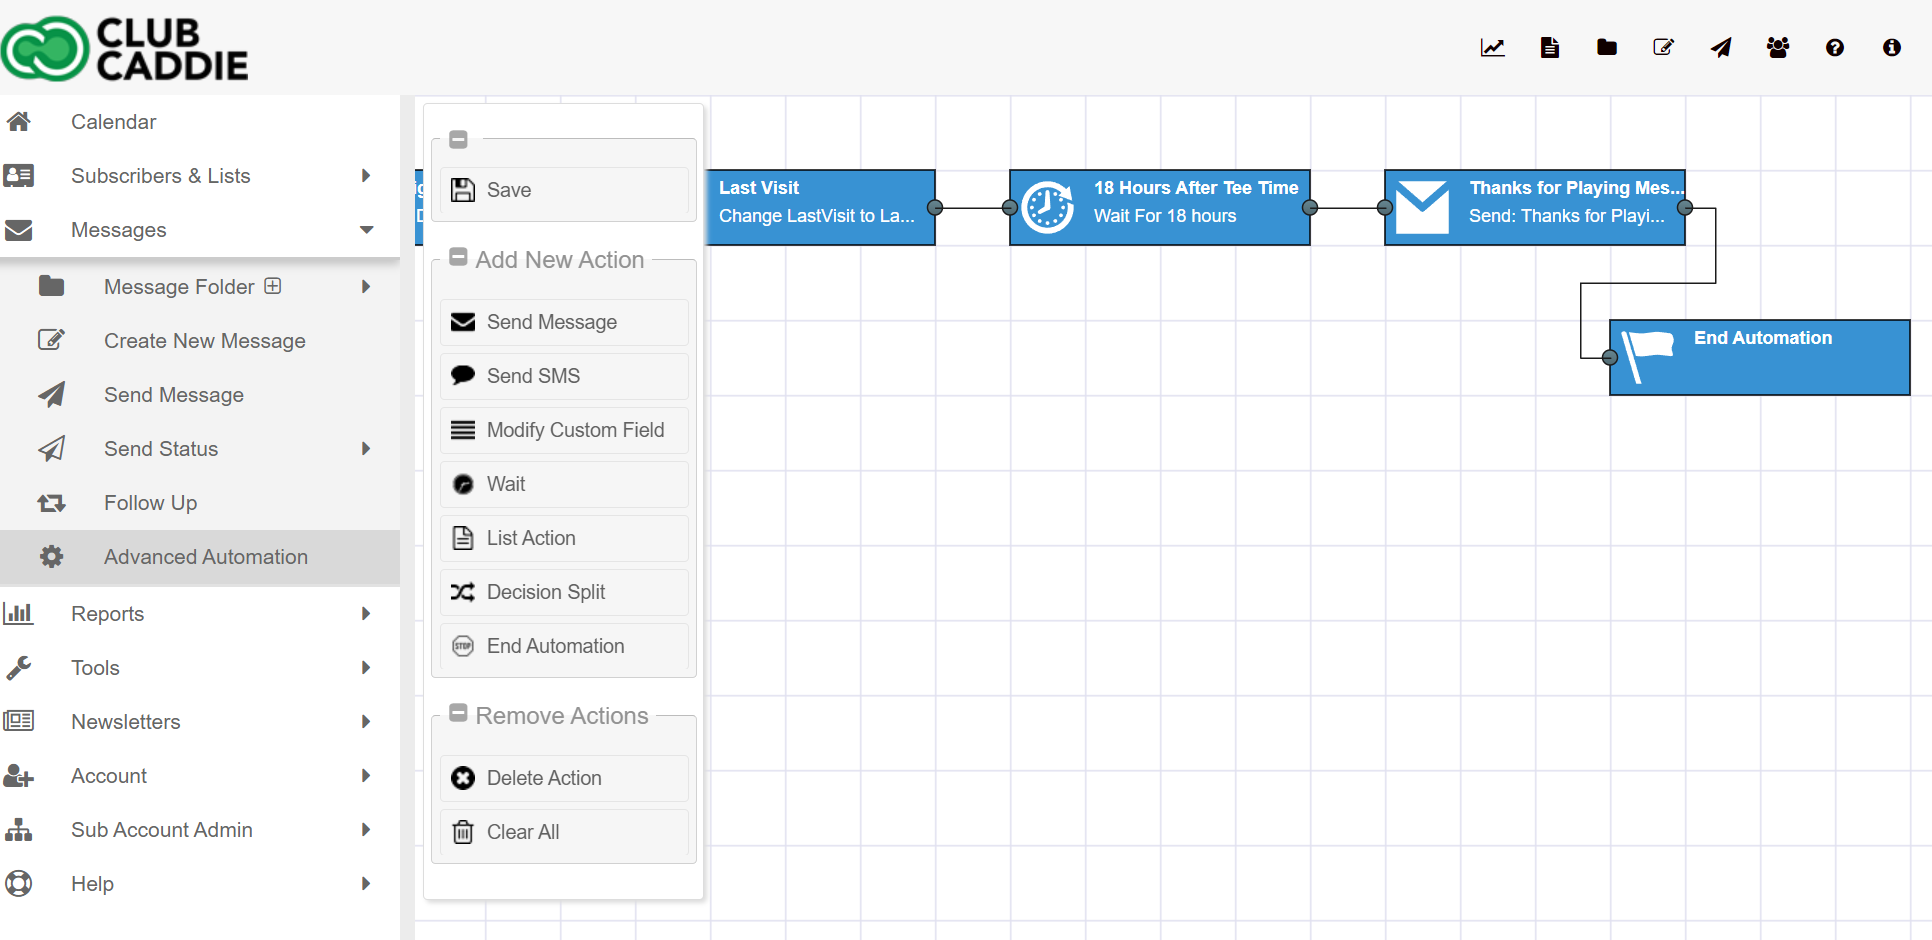
Actions are the building blocks of the advanced automation. There are different Action Types that you can string together to create your automation. As a subscriber is moved along your automation path, these actions will be performed on them.
From the main Advanced Automation grid (Messages -> Advanced Automation), select an automation and click Edit Automation.
To add an action, select an existing action on the grid and click the button of the action type that you would like added. The new action will be added after the selected action. If an action is already linked to the selected action, the new action will be inserted between the selected action and the linked action.
New actions cannot be added after End Automation actions.

Double click the entry action.
Select a list from the list selector. Both Dynamic and Static lists are valid for entry triggers.
When you have selected a list, click Save.
Double click a message action
Select a message from the list.
Only triggered messages are supported for this action type.
If you need to convert a message into a triggered message, you can click the link in the section that says: "Pick an existing triggered message below to send in this automation. If you would like to use a new copy of a message from the Message Folder, please begin by configuring an existing message for use in advanced automations."
To read more on how to create a triggered message, please see Triggered emails.

Double click a custom field action.
Select which custom field will be changed for subscribers who reach this action from the Select a Custom Field drop down.
Enter what the new value will be in the New Value text box.

Double click a wait action.
Enter the wait number/count in the number text box. Any positive integer is valid for the wait number.
Select a wait unit from the drop down. The available wait units are hours, days, weeks, and months.
Click Save.

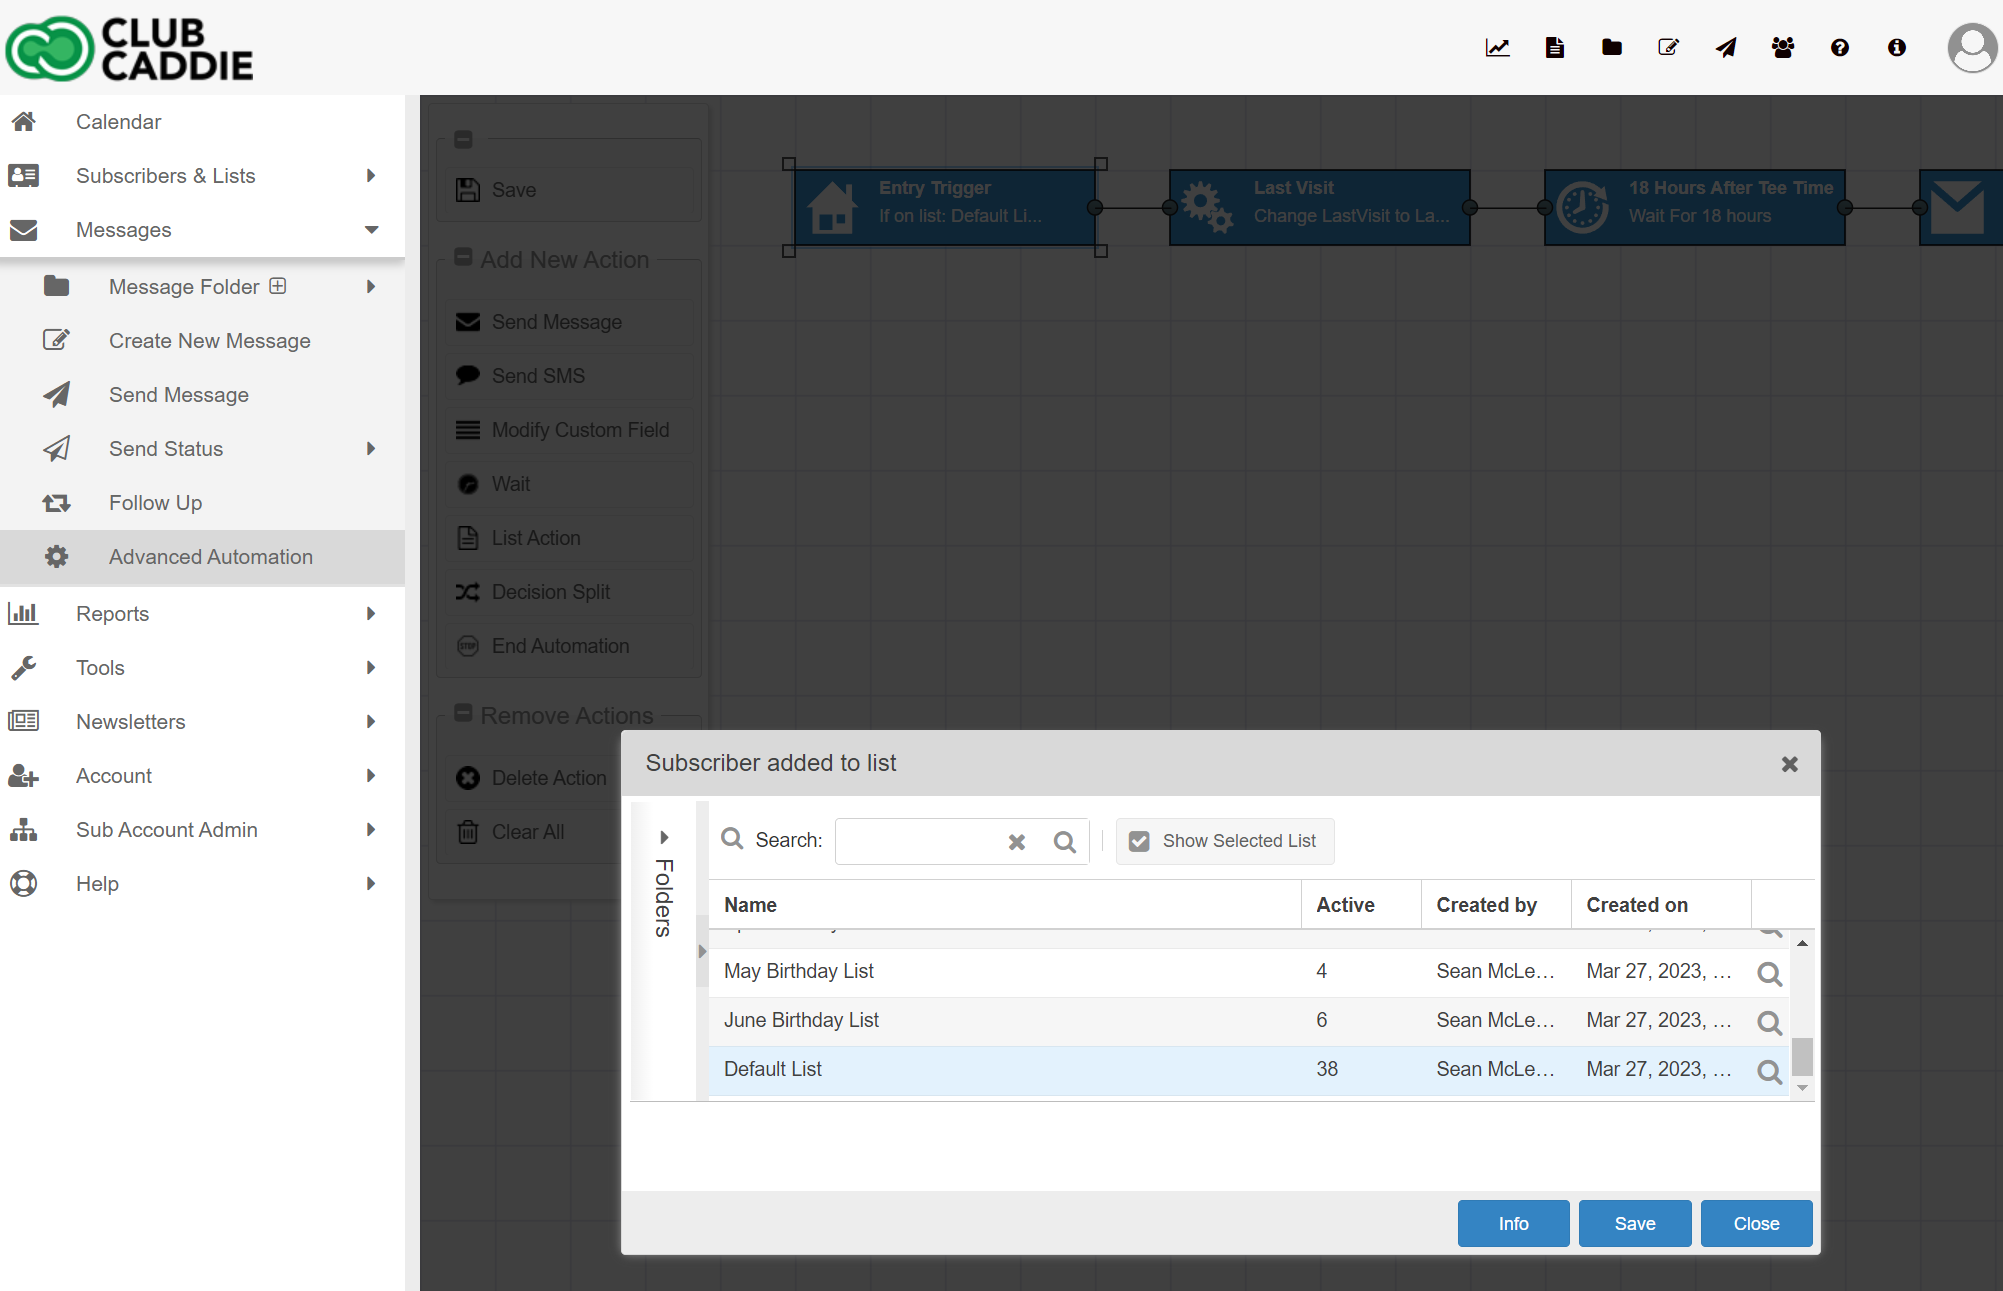
Double click a list action.
Select Add to list or Remove from list from the drop down. If the entry trigger list is a static list, then you will also be able to select Move from the entry list to selected list as an option.
Once you have selected between these options you will be able to select which list on which the action will be applied. You can only select static lists; dynamic lists do not support manually adding or removing subscribers.


Changing Action Type
To change the type of an existing action, right click the action and select the new type from the pop up menu. If you change your mind, click the red X icon to close the menu.
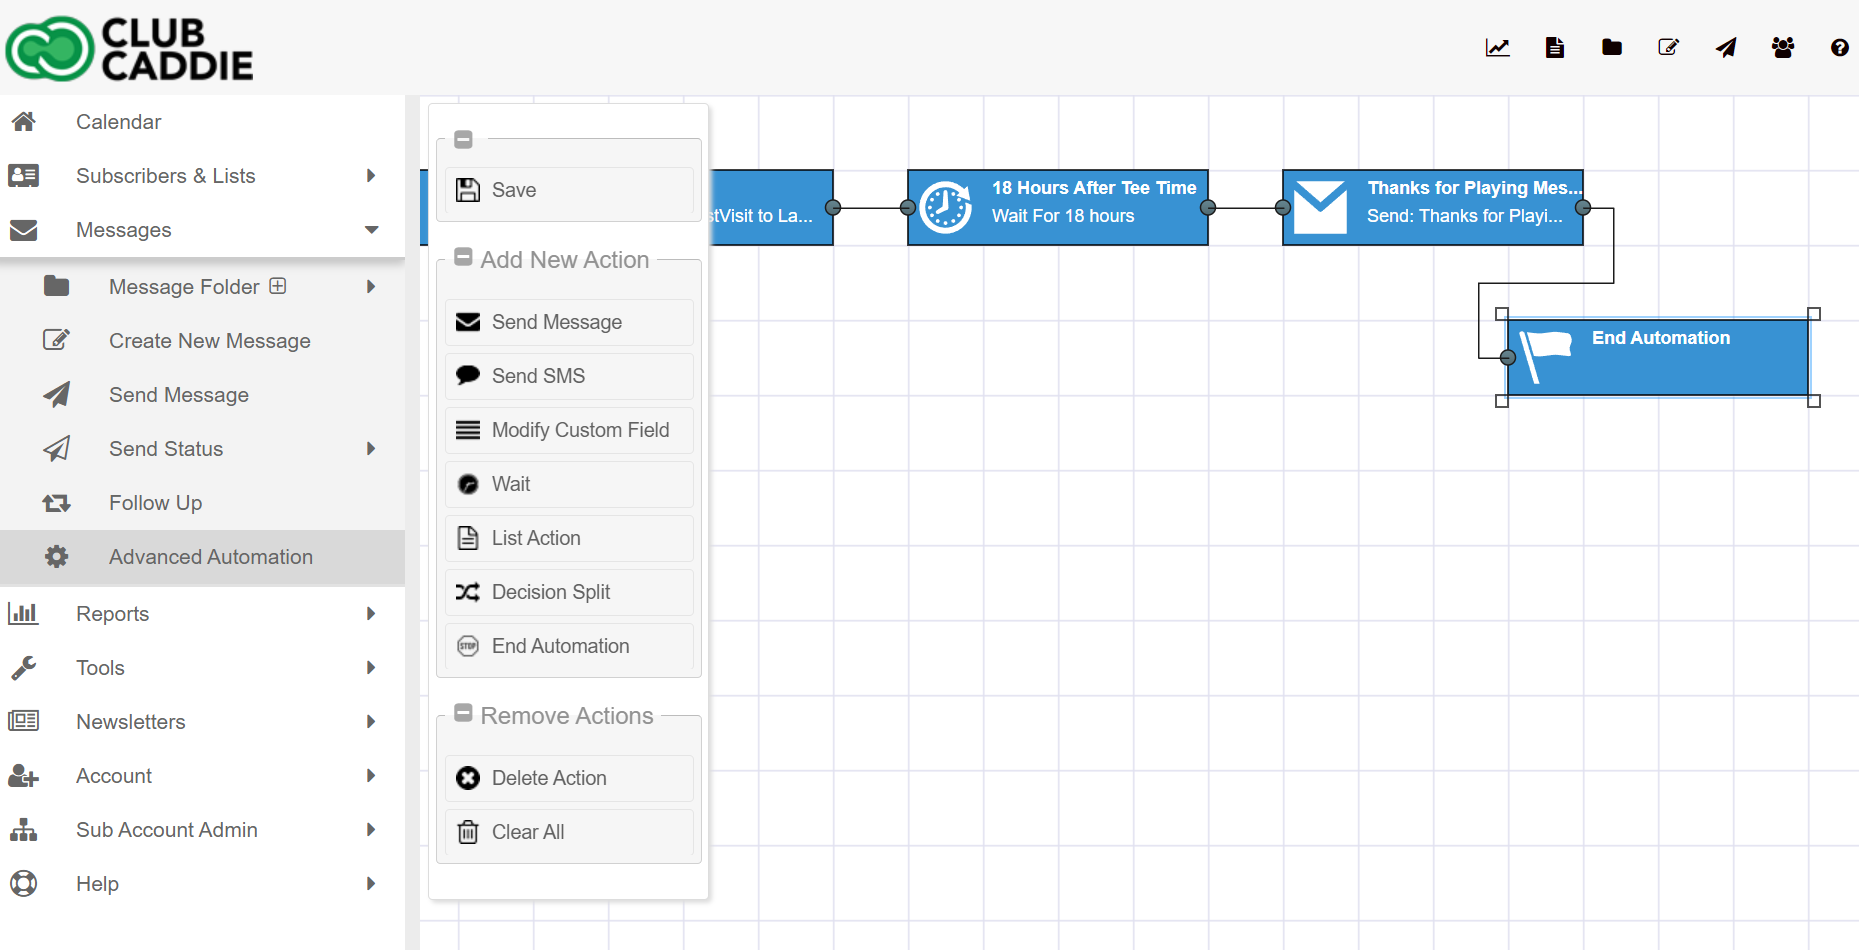
Deleting Actions
Select an action and click the Delete Action button. If you want to start from scratch, click the Clear All button. This will delete the entry trigger action as well, but you can recreate it by clicking any of the Add New Action buttons.
Related Articles
Managing Contacts and Lists in the Email Marketing Tool
Article contents: This article contains information on managing contacts and lists in the Club Caddie Email Marketing tool, including syncing customer data, lists, and custom fields from Club Caddie, creating and managing lists and subscribers within ...Automated Messages
Article Contents: This article contains information about automated messages in an email marketing system. It covers what automated messages are, how to set them up based on subscriber dates or dynamic lists, how to configure the sending frequency ...Create Your First Email
Article Contents: This article contains instructions on how to create and customize emails using the drag and drop email editor in a marketing platform. It covers creating emails from scratch or using templates, editing styles, adding and customizing ...Send Your First Email
Article Contents: This article provides a step-by-step guide on how to send your first email campaign, including instructions for sending test emails, using the Inbox Preview tool, and sending the actual email to your subscribers. Test Send Please ...Getting Started Guide
Welcome to the Getting Started Guide! Step 1: This Quick Start Guide will walk you through the 4 basic steps to get started as a new user for Club Caddie's built-in email marketing tools. Step 2: If you have elected to add email marketing to your ...