Automated Messages
Article Contents:
This article contains information about automated messages in an email marketing system. It covers what automated messages are, how to set them up based on subscriber dates or dynamic lists, how to configure the sending frequency and timing, and how to track the performance of automated messages. The article also provides some best practices and cautions when working with automated messages.
On a specific date: sent on a saved date, such as the subscriber's birthday
Need to save the date as a custom field value for the subscribers in a consistent date format
Subscribers on a specific list: sent to every subscriber on a list, sent once per specified period of time
For example, if you create a dynamic list that includes all subscribers who have a Status = "Prospect," they could be sent a reminder email to complete registration once a month until the custom field "Status" changes to "Registered."
It's a good idea to save the dynamic list in a specific List folder for automated messages. After creating an automated message based on a dynamic list, be very careful when editing the list. Any subscribers added when the list is saved will immediately be sent the automated message.

Open the Tools folder in the left menu
Click on Automated Messages
Click Create
Type in a Name for the automation
Select a list to which the message will be sent

A custom field that's a date (ex: birthday)
If a date custom field is chosen, select a date format for the field (mm-dd-yyyy)
The date format must be in the same exact format as the selected format
If a subscriber's date custom field is in a different format from the selected format, the date will be ignored
The frequency of this automated message will be limited by the send option to send the message only once (upcoming conference date) or every day (ex: check everyday to see if it's someone's birthday)
Subscriber is on a list selected above on this screen (ex: on a prospect list)
You can select a previously created dynamic list
The sending frequency of this automated message will be limited by the selected option: to send the message only once (upcoming conference date) or every year (ex: birthday)

7. Now you have to configure when to send the automated message to the subscribers
Send at: the time of day to send the message
Send Date: on the day of the event (selected date custom field)
Frequency: send the message only once (upcoming conference date) or every year (ex: birthday)
Note: By default, the Automated Message tool will only send to a subscriber a single time. If you would like to enable the use of the Frequency option, a member of the Critical Impact staff will be able to enable Duplicate Sending, which will allow the same message to be sent to the same subscriber multiple times.
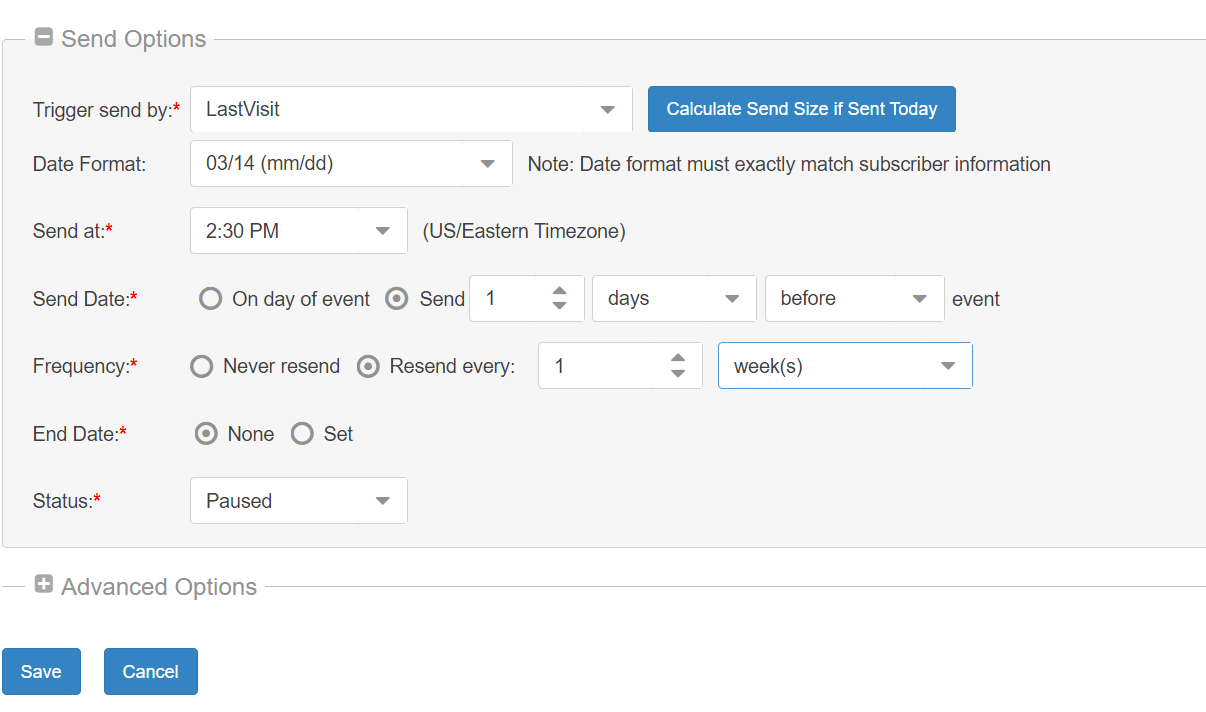
8. Status: Keep Paused until absolutely ready to start sending the message to subscribers
9. Save the message by clicking the Save button or the Save Automation and Create Message button
10. Once the Automated Message configuration is saved, you'll need to create a message in the Edit Message tab11. In this tab, create the message you would like to send to the subscribers when all of the conditions are met from the configuration screen
You'll only see the "Create New Message" page once when creating a message for the first time
This message is the only message associated with the automated message
You can edit the message at any time, but we strongly suggest keeping the message the same after activating the automation. See the Tracking an Automated Message notes below.
12. Save the message before returning to the Configure tab. Any unsaved changes will be lost
13. When you're ready to activate the automated message, select the Status: Active
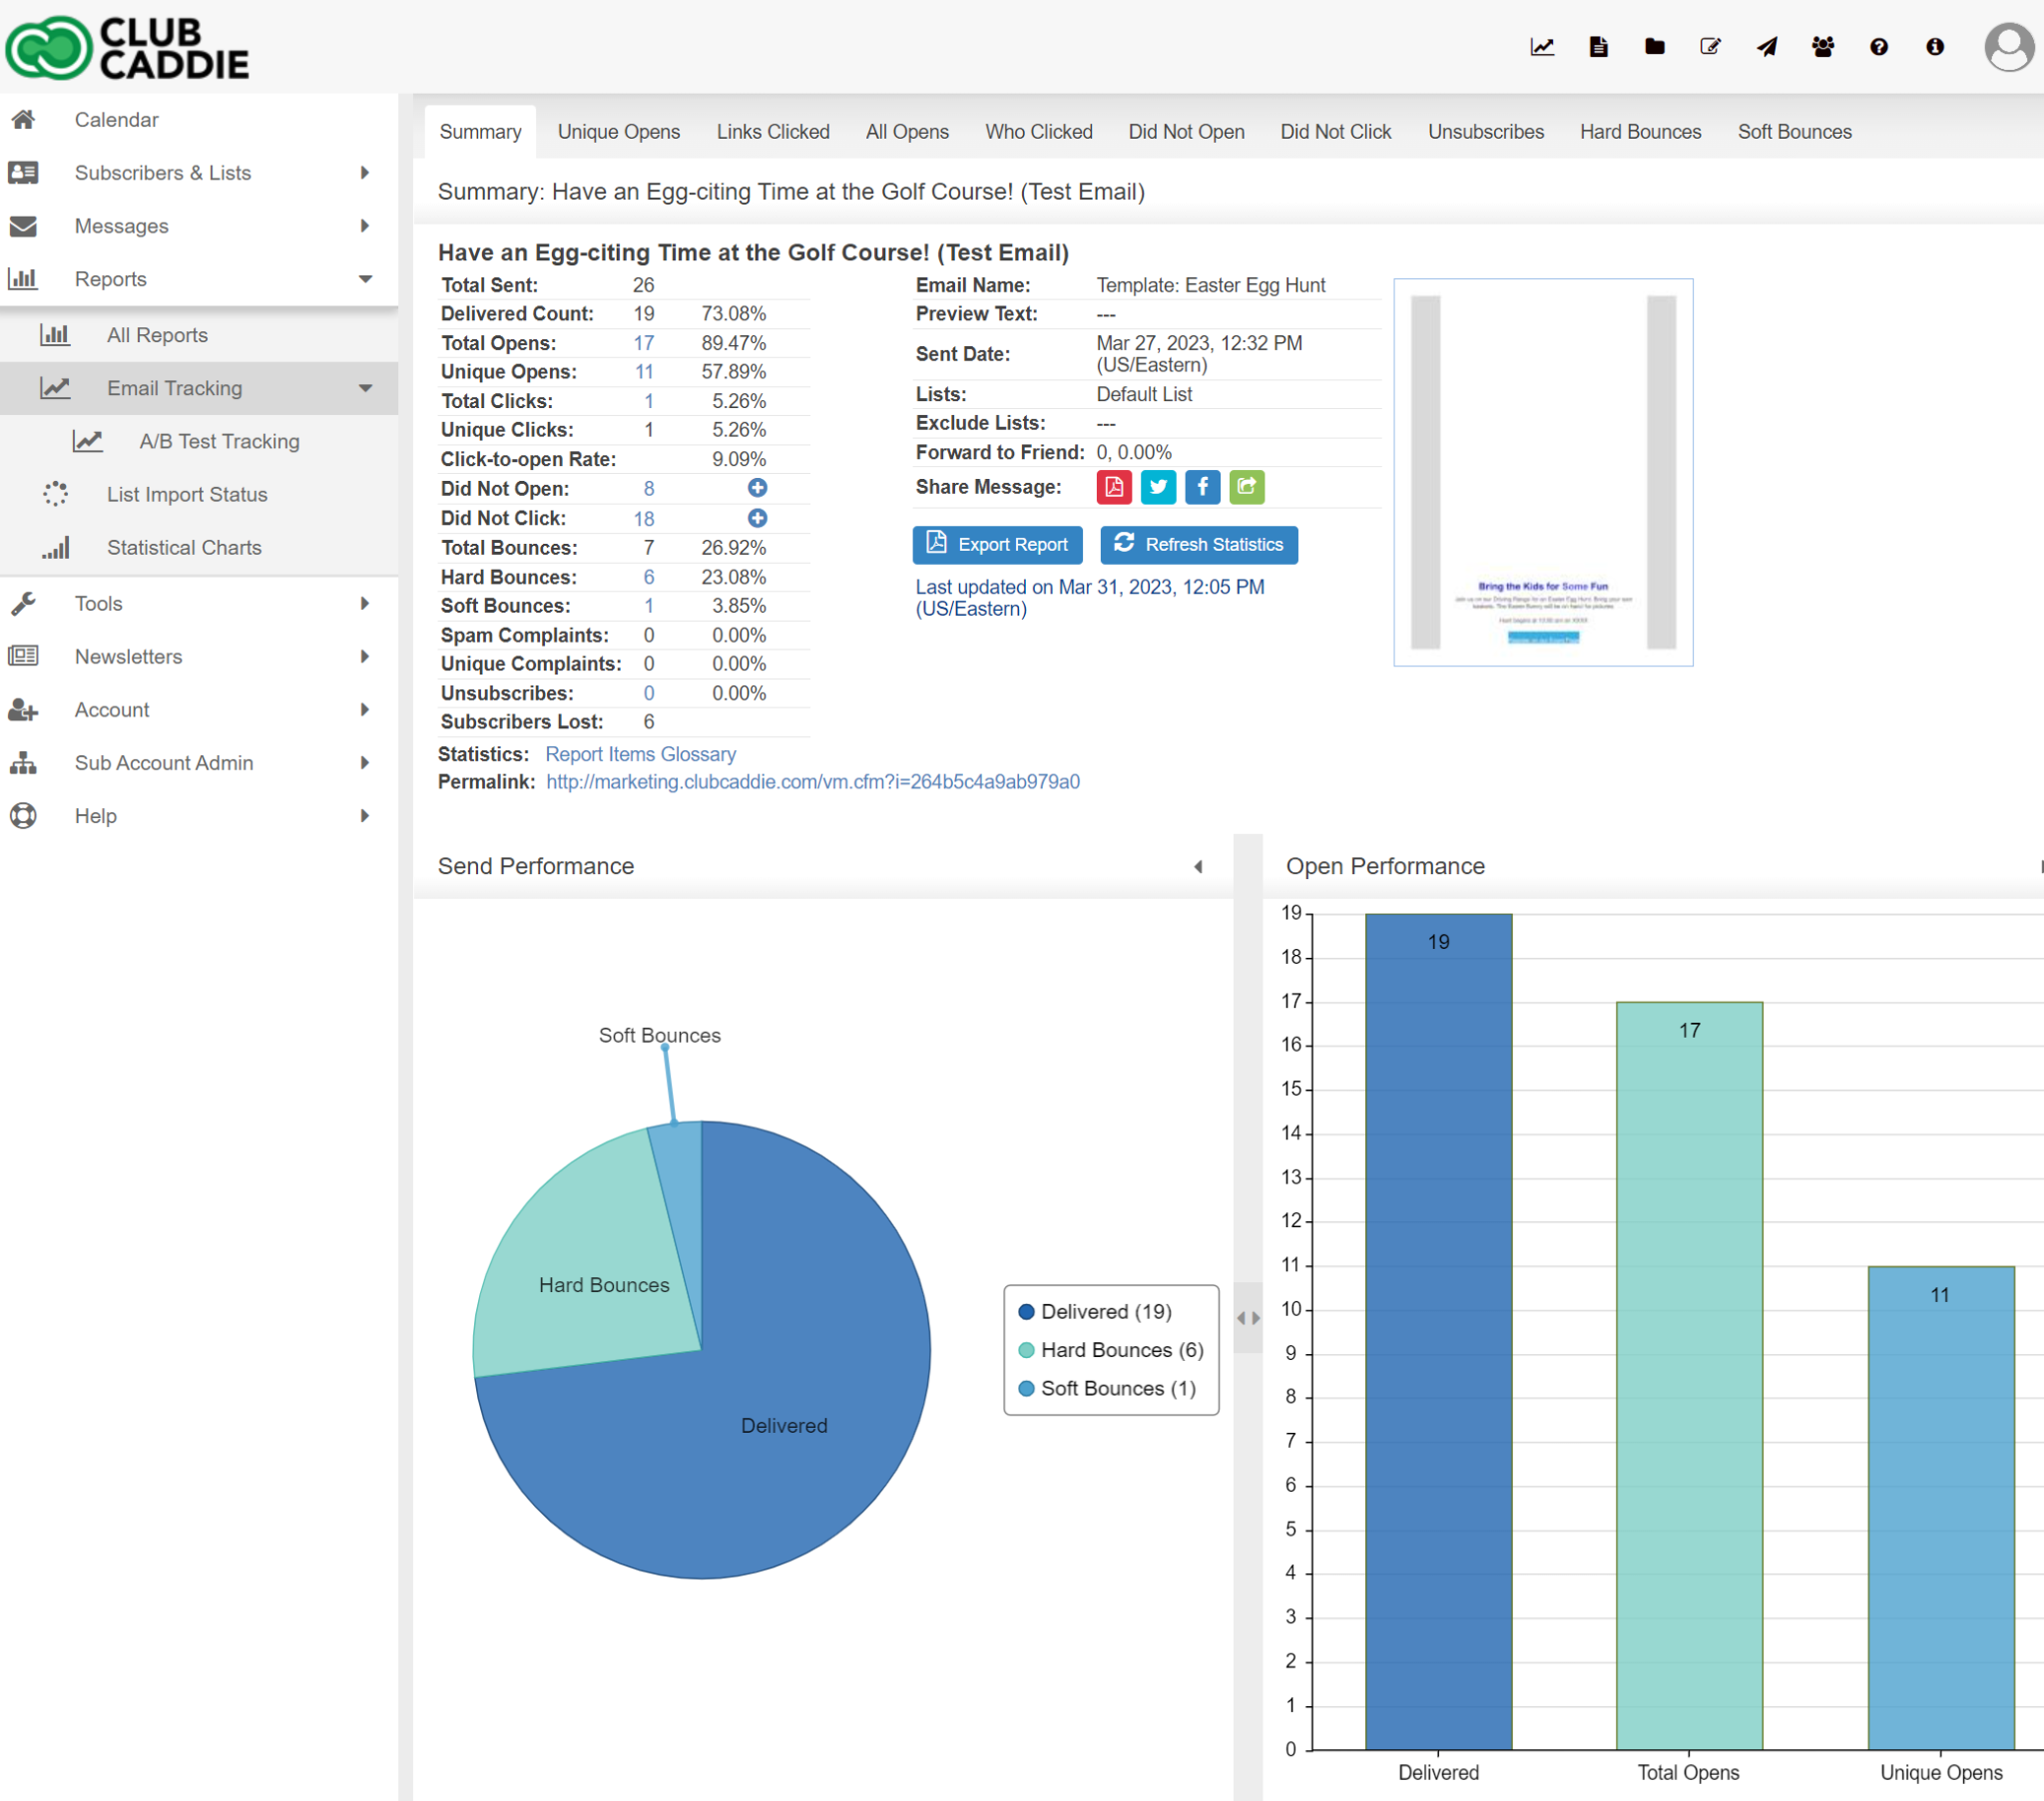
Please be aware that if the message content is edited a lot (links are edited/deleted), the stats may not look quite right. If many changes need to be made to the message, we recommend stopping the first automation and creating a new message automation.
Related Articles
Advanced Automation
Article contents: This article contains information about Advanced Automation, including how to create automated workflows, the different types of actions available (entry trigger, send message, modify custom field, wait, list action, decision split, ...Managing Contacts and Lists in the Email Marketing Tool
Article contents: This article contains information on managing contacts and lists in the Club Caddie Email Marketing tool, including syncing customer data, lists, and custom fields from Club Caddie, creating and managing lists and subscribers within ...Create Your First Email
Article Contents: This article contains instructions on how to create and customize emails using the drag and drop email editor in a marketing platform. It covers creating emails from scratch or using templates, editing styles, adding and customizing ...Send Your First Email
Article Contents: This article provides a step-by-step guide on how to send your first email campaign, including instructions for sending test emails, using the Inbox Preview tool, and sending the actual email to your subscribers. Test Send Please ...Getting Started Guide
Welcome to the Getting Started Guide! Step 1: This Quick Start Guide will walk you through the 4 basic steps to get started as a new user for Club Caddie's built-in email marketing tools. Step 2: If you have elected to add email marketing to your ...