Employee Pin Lock
Article Content:
This is a guide with instructions on setting up Pin Lock for employees, creating a 4-digit code for each employee, as well as tips to making sure your transition to employee pin lock runs smoothly.
Step-by-Step Guide:
Step 1: Turn on Employee Pin Lock. Navigate to Settings > Select Terminal Management > Chose your Terminal Location > Click on Edit for the terminal you want to enable Pin Lock > Toggle on Lock Screen > Click Save.
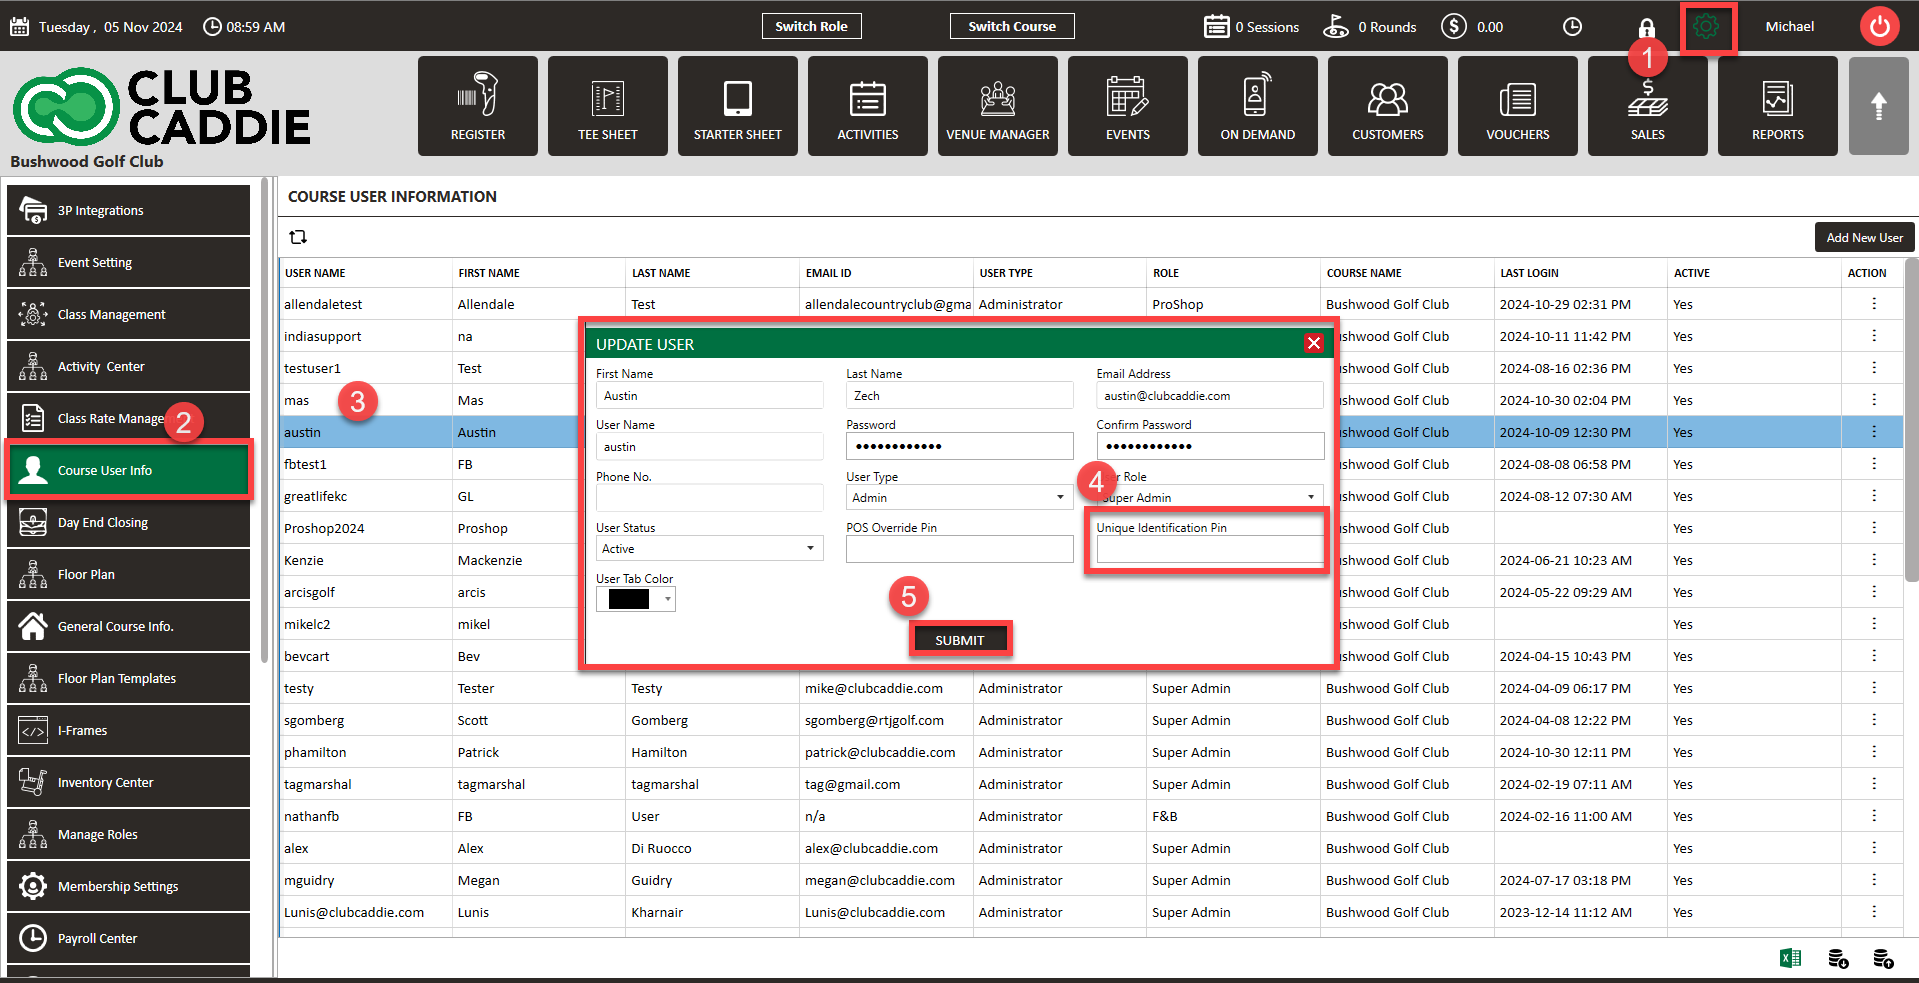
Step 2: Set a pin for each employee by navigating to your Settings > select Course User Info > select an employee to populate their profile > create and enter a 4 digit code for that particular employee under Unique Identification Pin > Click Submit. Then, log out and back in to start using this feature but first follow Step 3 on settling orders in Pull Tabs.

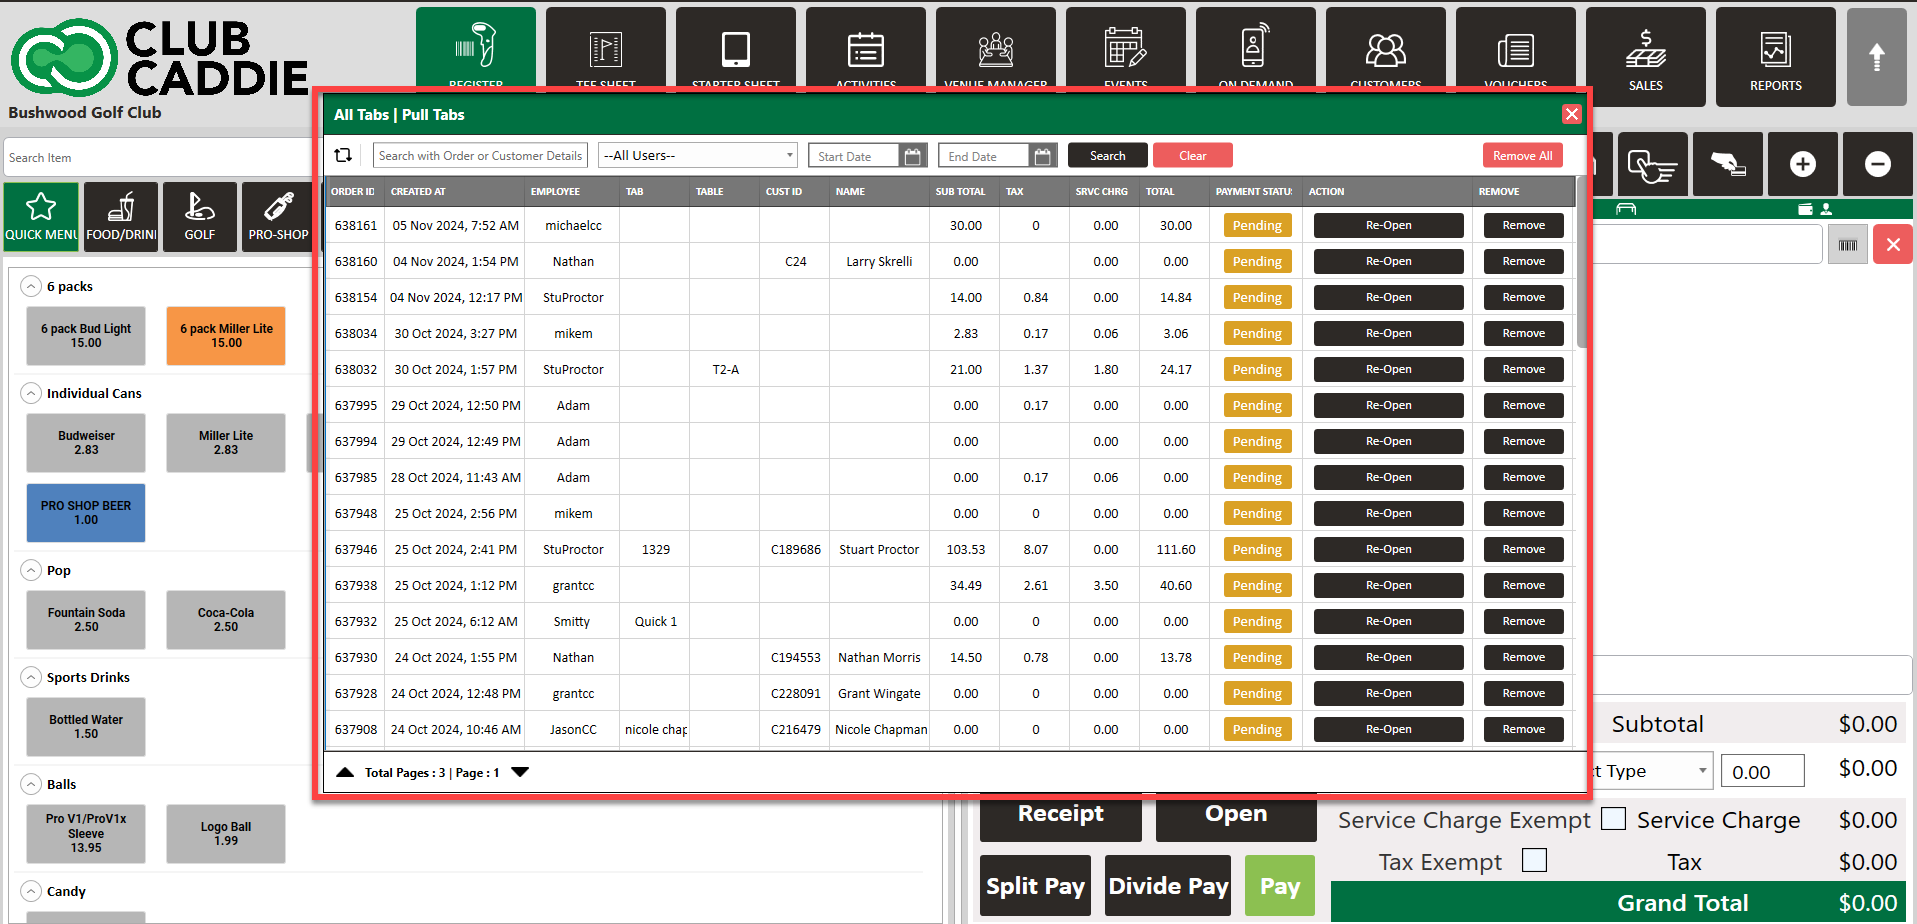
Step 3: Clear out pending orders in your Pull Tabs. When logging in to Club Caddie for the first time using Pin Lock, all orders in your pull tabs will populate under that employee. To avoid this situation, clear out all orders in Pull Tabs.


Step 4: If you want to require employees to use Pin Lock for Quick Tabs, you will need to toggle that feature on. Navigate to Settings > Terminal Management > click on Edit on the terminal that you want this feature enabled > Toggle on Requires Pin on Quick Tab, then click Save.
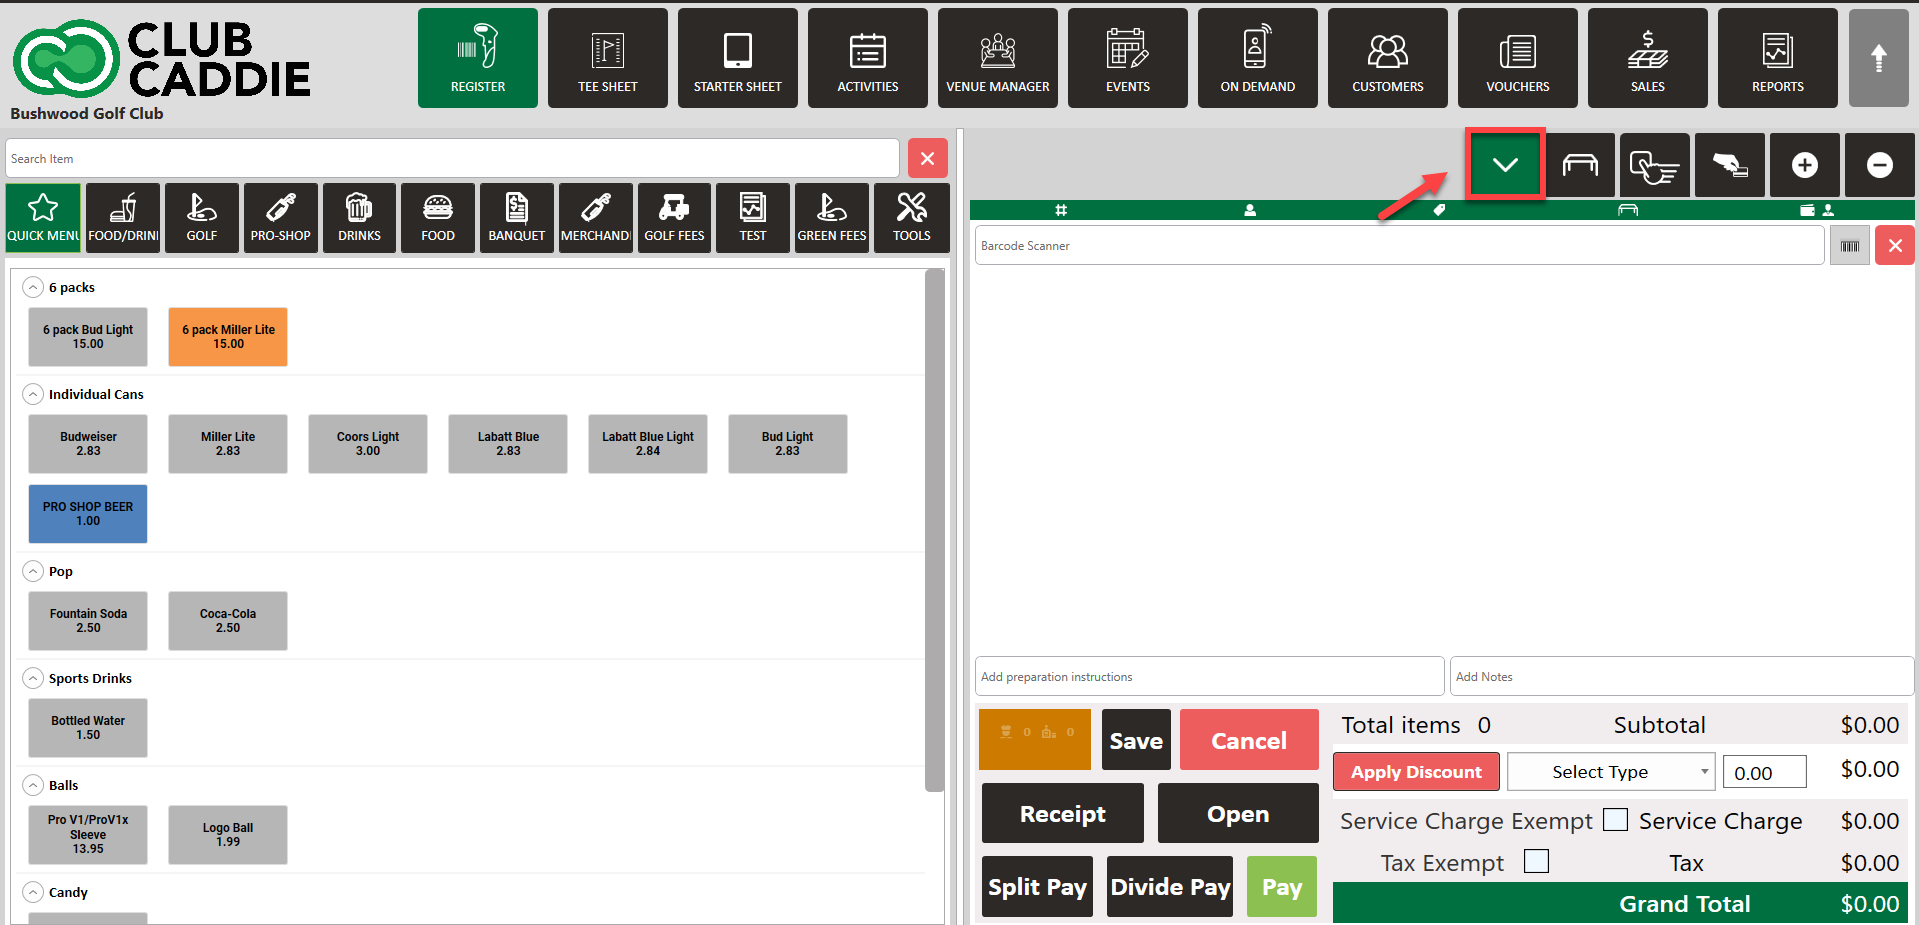
Step 5: Pin Lock is mainly used for servers to assign tabs. Before creating a new tab, the employee will select the lock icon in the top right of the screen, enter their 4-digit pin, and then start the tab. That tab and transaction will now be assigned to that employee.
Related Articles
Pin-Lock Notes
Article Contents: This article instructs how to add notes to the pin-lock window. The note will display in the Pin Lock pop-up window when creating a new tab in the register. Step-By-Step Guide: Step 1: Navigate to Settings, then select Register ...Register - Adding/Editing a Tab
Article Contents: This article contains information on Adding/Editing a tab in the Register. Step-By-Step: Step 1: The first way a user can add a new tab is by clicking on any inventory item in the register departments. The system will create a new ...Register - Deleting a Tab
Article Contents This article contains steps on how to delete a tab in the REGISTER. Step-by-Step: Step 1: Open the REGISTER (1) module and select the Tab you want to Delete (2). Step 2: You can right click on the particular tab and select Delete (1) ...Register - Assigning colors to the employee to easily identify individual employee tabs.
Article Contents This article will show you how to assign a color to the employee to help identify an employee's tab in the register. Step-by-Step: Step 1: Click on "settings" in the upper right hand corner and then click on "course user info" from ...Register - Print a Tab (receipt button)
Article Contents: This article gives step-by-step instructions on how to Print a Tab (Receipt button) from the Register. Step-By-Step: Step 1: Click on the REGISTER module from the top menu. Step 2: Select items from the left window. Items will be ...