Payment Type Options
Article Content:
The Payment Types Builder lets you customize payment options across your facility by location or terminal. You can rename and organize all payment options like, and even integrate Custom Payments for added flexibility. Payment settings can be managed centrally at the course level, with the option to override them by location or individual terminal, giving you full control payment options per terminal.

Please note that this feature of managing payments by location does NOT pertain to custom payment methods at this time.
Step by Step Guide:
Step 1: Click on Settings, then select Register Settings from the left-hand-side menu.
Step 2: If the custom payment method has not been created, click on the tab Custom Payment Methods. Then select Add to create the name of the payment method and to select the chart of account. Click Save.
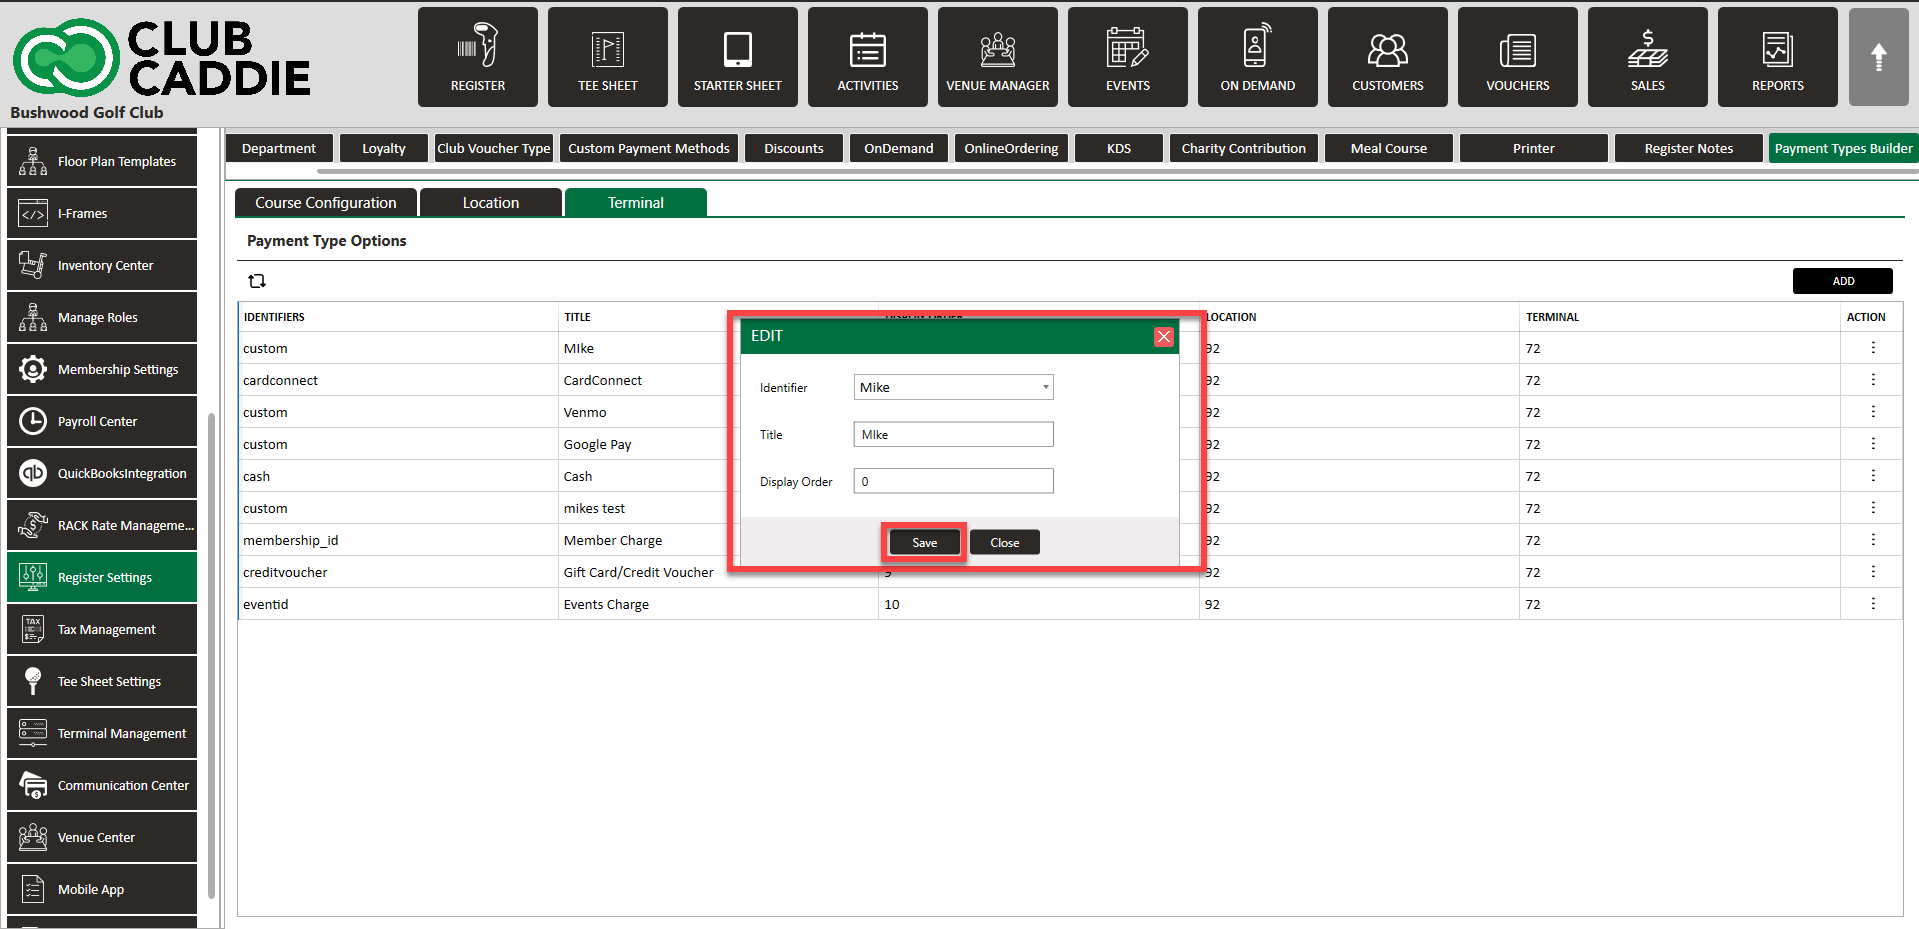
Step 3: Click on the tab Payment Types Builder, followed by either Course Configuration, Location, or Terminal. Then click Add.
Course Configuration - Will apply payment types to all terminals and locations.
Location - Will supersede any course configuration. Will need to set up all payment forms on this tab to view in the register. This will map all terminal assignments associated with this location. *Will additionally need to use “switch course” and update each location with payment options.
Terminal - Can configure each terminal with specific payment options. Will supersede any course configuration AND terminal set up. Will need to use switch course to set up all terminal locations and update each terminal.

Step 4: In the Add pop-up window, select your Identifier, Title, and Display Order. Click Save.
Step 5: See new payment type as a payment option in register.
Step 4: In the Add pop-up window, select your Identifier, Title, and Display Order. Click Save.
Step 5: See new payment type as a payment option in register.
Related Articles
Register - Payment Methods
Article Contents: This article will go through the various options of payments. You can click on the "Pay" button on the desired tab and you will be prompted with the "Payment Mode" pop-up displaying the following options: Cash Check Card Swipe ...Register - Split Payment Method
Article Contents: This article will cover how a user can split a payment into different modes of payment. Step-by-Step: Step 1: From the REGISTER module (1), select a register tab to process a payment (2). Step 2: Click on the Split Pay Button. The ...Register - Event Final Payment
Article Contents: This article contains steps for making a final payment on an event. Step-By-Step: Step 1: On the REGISTER (1) module, Click on the TOOLS (2) tab. Step 2: Under the EVENT FINAL PAYMENT section, click and choose an event type to make ...Register - Split/Divide Pay with Custom Payment Method.
Article Contents This article covers how to use the custom payment method in split/divide pay. Step-by-Step: Step 1: First you need to set up customized payment mothed in the "Register Settings". For that can refer to this article ...Register - Checkout & Payment Processing - Food and Beverage (Video 5:11)
Article Contents: This video tutorial provides a detailed guide on how to effectively process payments, apply discounts, and manage checkout for food and beverage items using Club Caddy's register system. It further delves into the practical ...