Customer Support
Article contents:-
This article contents how to use "Customer Support" for new Customers and Existing Customers.
Step- By- Step:-
Step 1:- You'll first need to navigate to our homepage found here.

Step 2:- We have support for both Existing and New Customer.
If you are looking for any assistance you can reach us through Emails, Submit a ticket, On-call and can chat with us.
Step 3:- How to chat with Us:-
There are three ways to chat with us:-
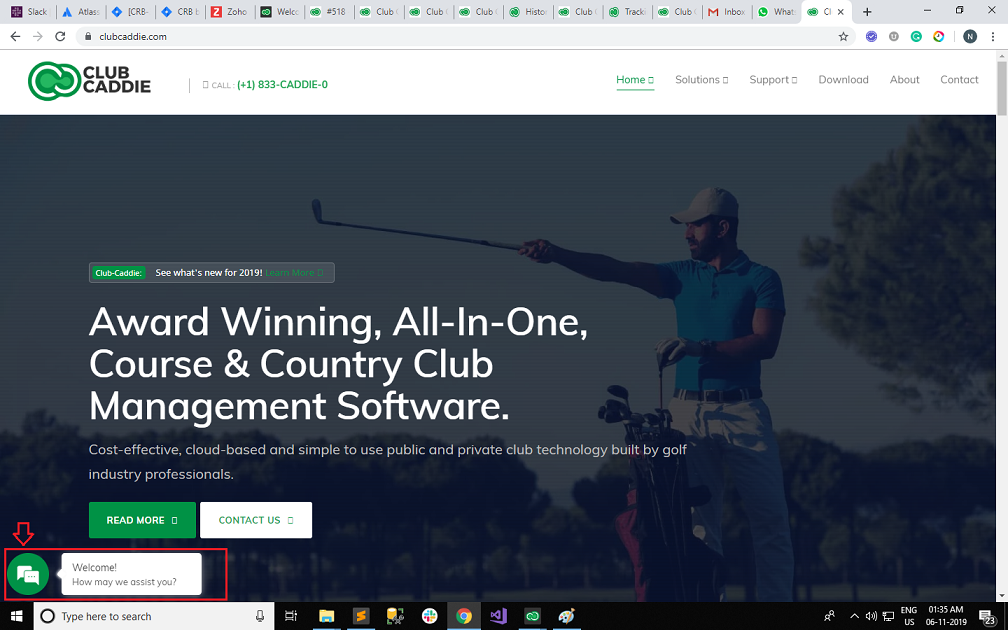
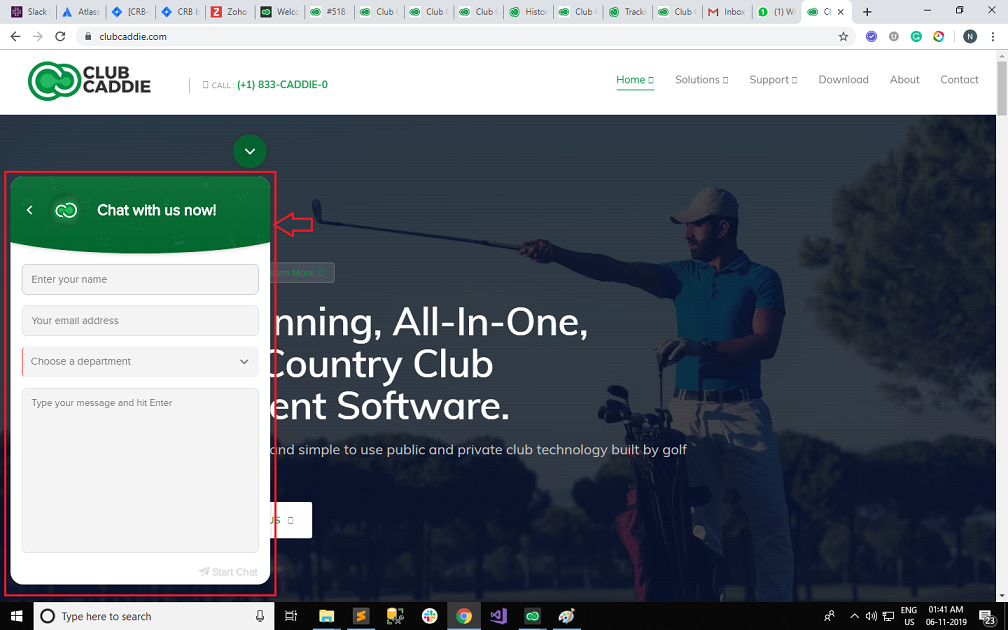
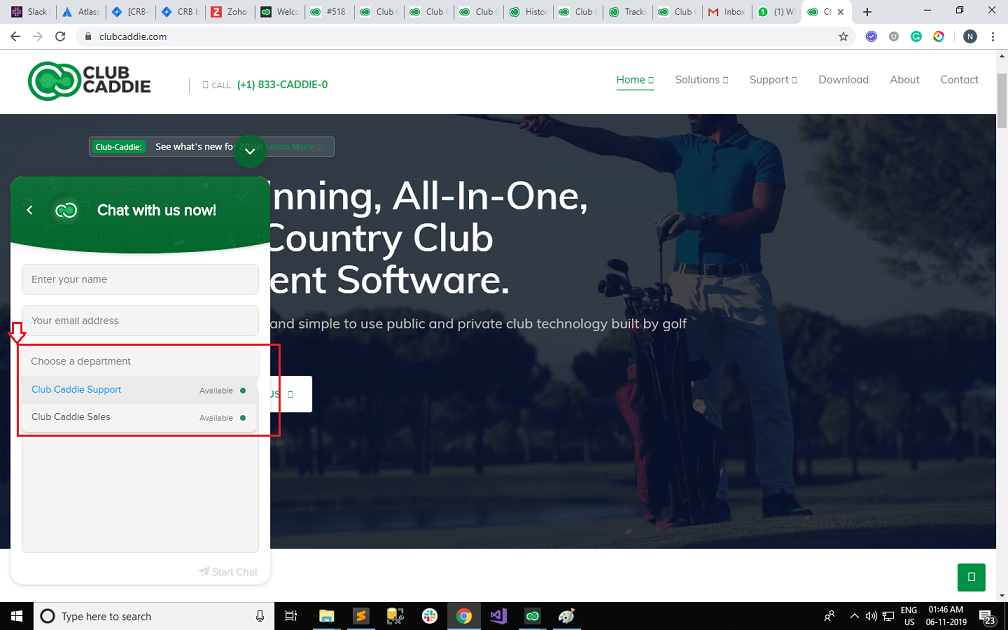
A:-On Home page of Club- Caddie, Click on the chat messaging icon in the lower corner of your screen. It will open "Chat with us now window". Enter your Name, Email, and choose a department from the Down- Down. You can type your message then hit the Enter button or can click on the "Start Chat" button to initiate a chat.
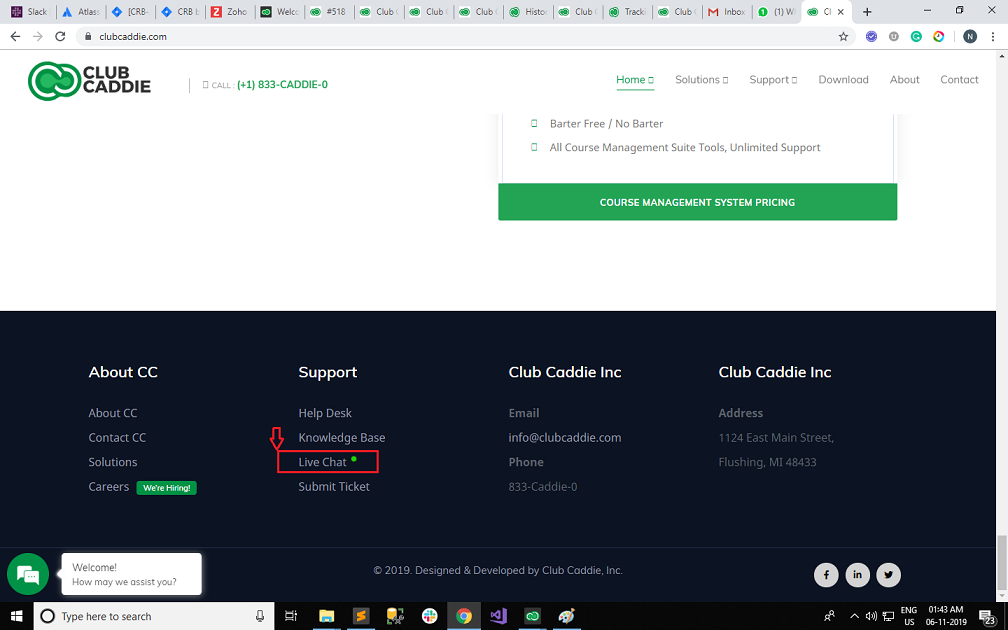
B:-On the Home page of Club-Caddie, Click on "Live Chat" from the bottom of the window under the Support section.
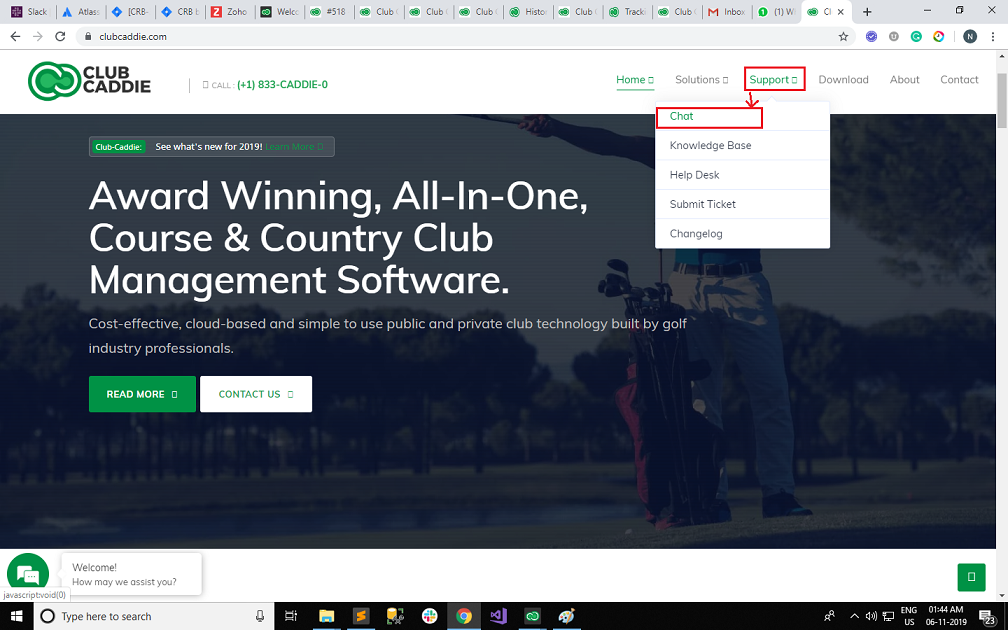
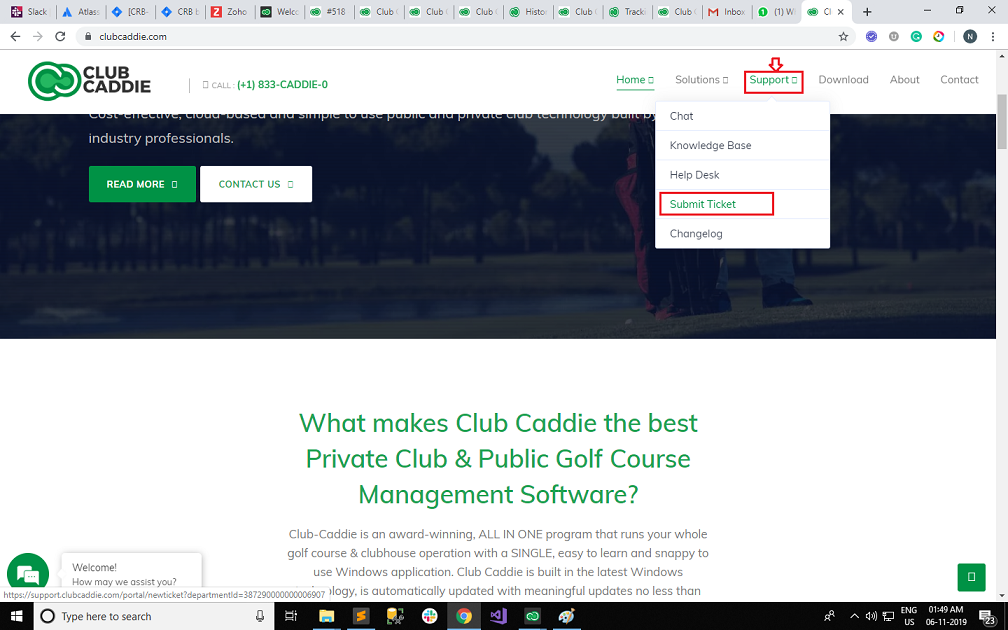
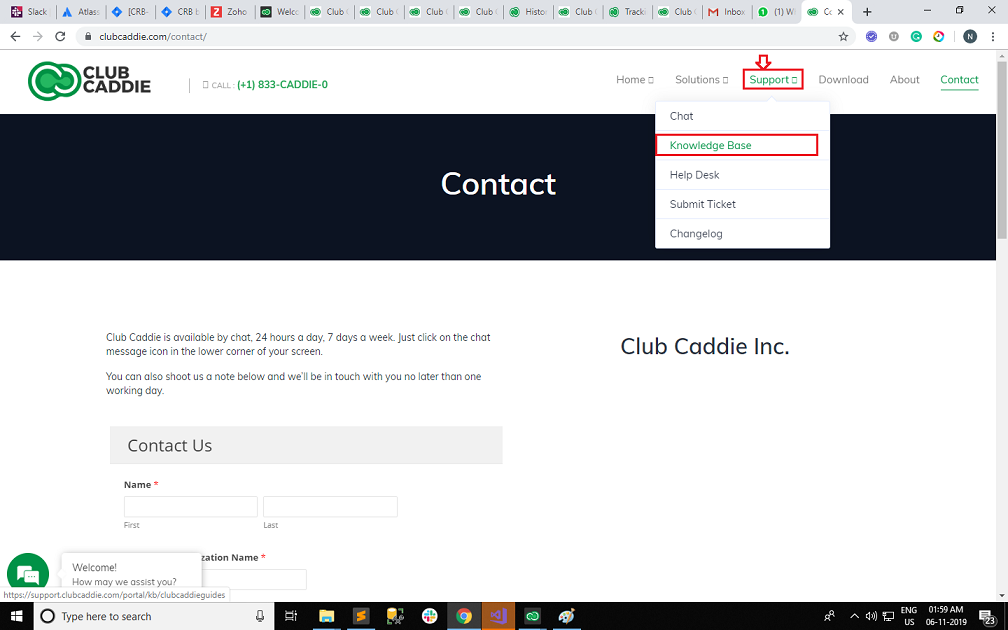
C:-On Home page of Club-Caddie, Click on the "Support" from the header of the window. It will open the Drop-Down menu. Click on the 'Chat" from the Drop-Down list.
Note:- There are two departments "Club Caddie Sales" and "Club Caddie Support". If you are a new customer you can choose "Club Caddie Sales.
If you are an existing customer, you can choose "Club Caddie Support" for any assistance.
Step 4:-How to Submit Ticket:-
There are two ways to Submit Ticket:-
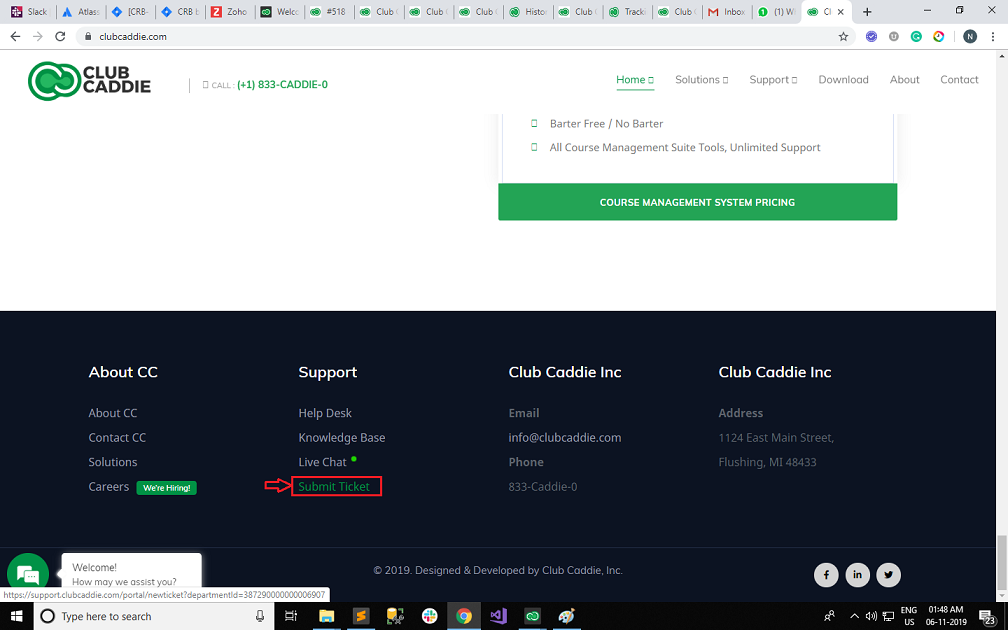
A:-On the home page of Club-Caddie, at the bottom of the Home Page you can see a "Submit Ticket", Click on it. Fill all the info and then click on the "Submit" button.
B:- On the home page of club caddie click on "Support" from the header of the window. It will open the Drop-Down menu. Select "SubmitTicket" from the drop-down list. Fill all the info then click on the "Submit" button.
Step 5:- How to contact us:-
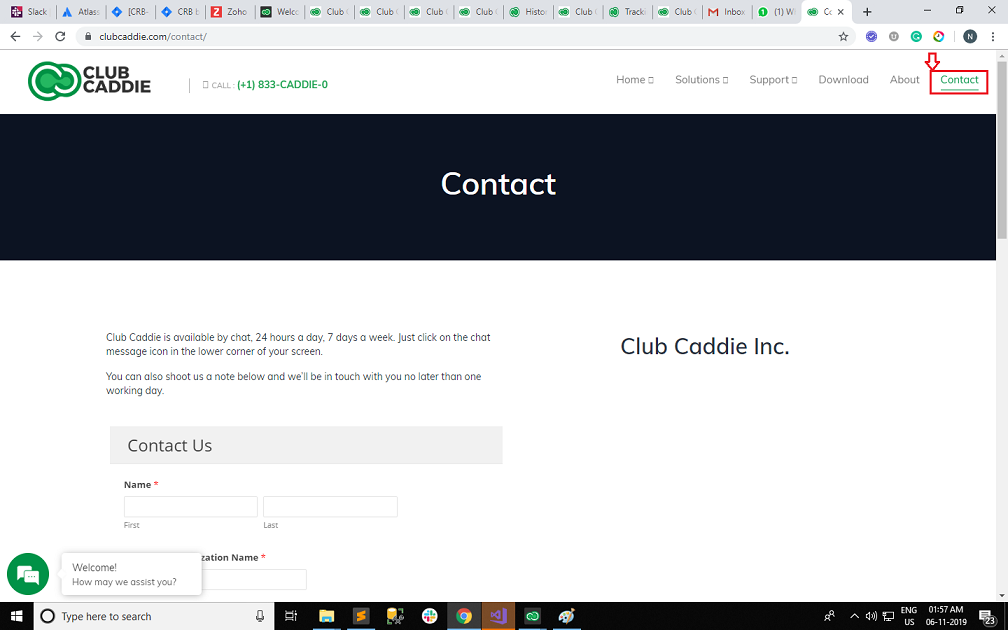
You can contact us by clicking on the "Contact Us" button from the Home Page of the Club Caddie, or you can click on the "Contact" from the upper right corner of the screen.
Fill all the necessary info then click on the "Submit" button.

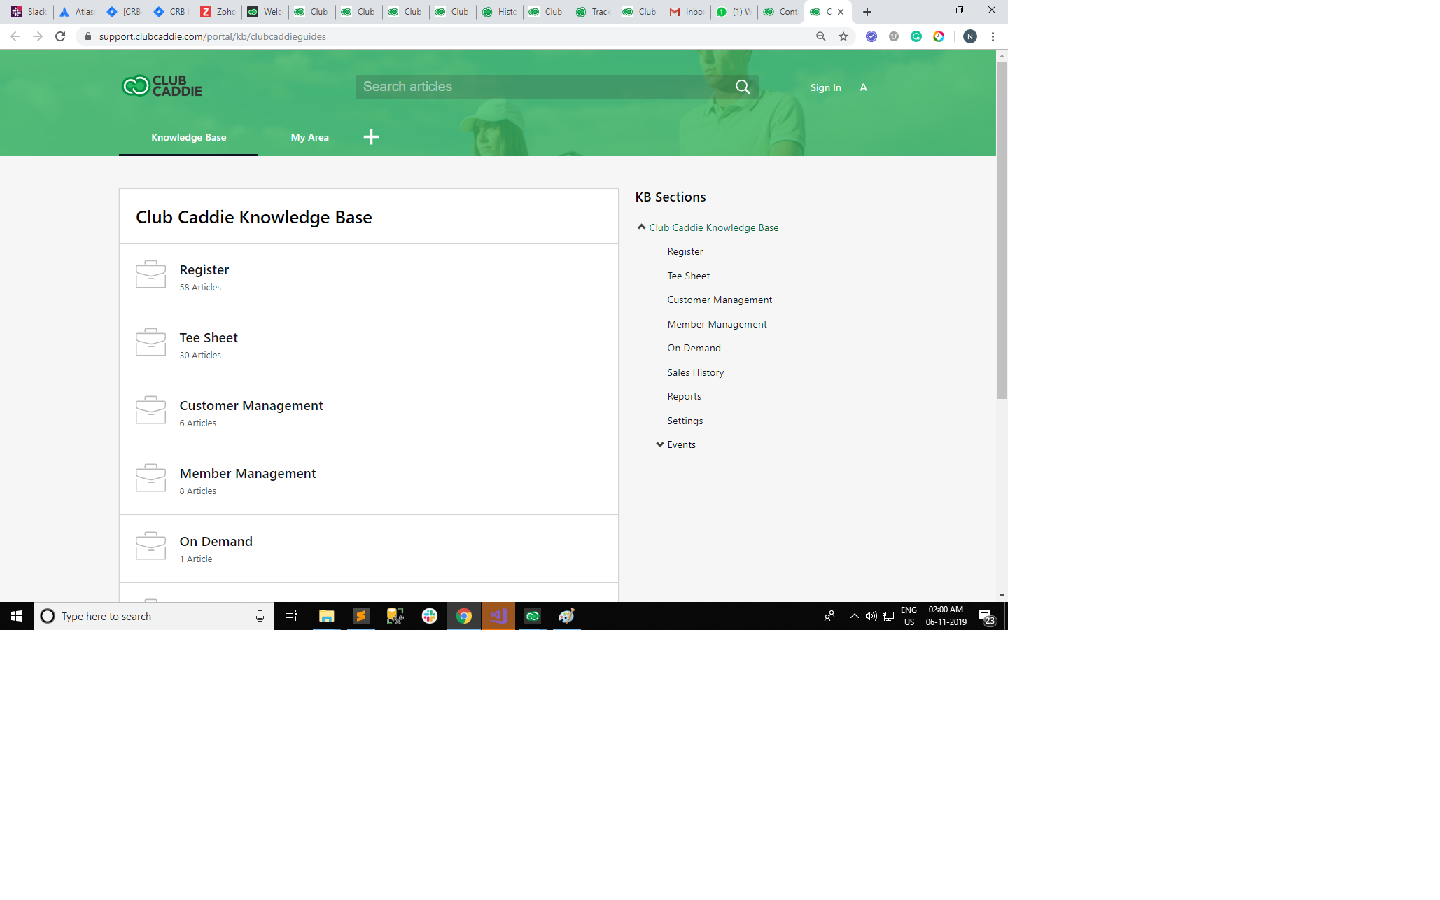
Step 6:- Refer to the "Knowledge Base" under the "Support" section, for step by step guide of POS functionality.
This article contents how to use "Customer Support" for new Customers and Existing Customers.
Step- By- Step:-
Step 1:- You'll first need to navigate to our homepage found here.
Step 2:- We have support for both Existing and New Customer.
If you are looking for any assistance you can reach us through Emails, Submit a ticket, On-call and can chat with us.
Step 3:- How to chat with Us:-
There are three ways to chat with us:-
B:-On the Home page of Club-Caddie, Click on "Live Chat" from the bottom of the window under the Support section.
C:-On Home page of Club-Caddie, Click on the "Support" from the header of the window. It will open the Drop-Down menu. Click on the 'Chat" from the Drop-Down list.
Note:- There are two departments "Club Caddie Sales" and "Club Caddie Support". If you are a new customer you can choose "Club Caddie Sales.
If you are an existing customer, you can choose "Club Caddie Support" for any assistance.
Step 4:-How to Submit Ticket:-
There are two ways to Submit Ticket:-
A:-On the home page of Club-Caddie, at the bottom of the Home Page you can see a "Submit Ticket", Click on it. Fill all the info and then click on the "Submit" button.
B:- On the home page of club caddie click on "Support" from the header of the window. It will open the Drop-Down menu. Select "SubmitTicket" from the drop-down list. Fill all the info then click on the "Submit" button.
Step 5:- How to contact us:-
You can contact us by clicking on the "Contact Us" button from the Home Page of the Club Caddie, or you can click on the "Contact" from the upper right corner of the screen.
Fill all the necessary info then click on the "Submit" button.
Step 6:- Refer to the "Knowledge Base" under the "Support" section, for step by step guide of POS functionality.
Related Articles
Support - Chat AI
Article Content: This article demonstrates how to utilize Chat Support AI. This feature is available to help assist in answering your questions regarding Club Caddie. Step by Step Guide: Step 1: Log into your facility on Club Caddie. Step 2: Select ...Moving an Email Address from an Archived Customer Profile to a New Profile
Article Contents: This article contains a step-by-step guide on how to move an email address from an archived customer profile to a newly created profile. This process is crucial in situations where a customer requires a new profile or needs to ...Joining A Remote Screenshare
Article Contents: This article serves as a guide for joining a remote screenshare session. It provides a step-by-step that users can follow to successfully join a session. The instructions cover accessing the provided screenshare link to installing ...General Tips - Membership Class Changes
Article Contents: This article gives step-by step instructions for transitioning golf club memberships from yearly to monthly billing cycles, or vice versa. Step-by-Step: Step 1: Determine the expiration of the current membership class. Following ...How To Login To Club Caddie (Video)
Article Contents: This video tutorial provides a step-by-step guide on logging in and clocking in using the Club Caddy software for food and beverage operations. Step-By-Step: Step 1: Navigating to the Club Caddie login screen and selecting the ...