Downloading and installing the Epson driver for Windows
Article Contents:
Downloading and installing the Epson driver for Windows.
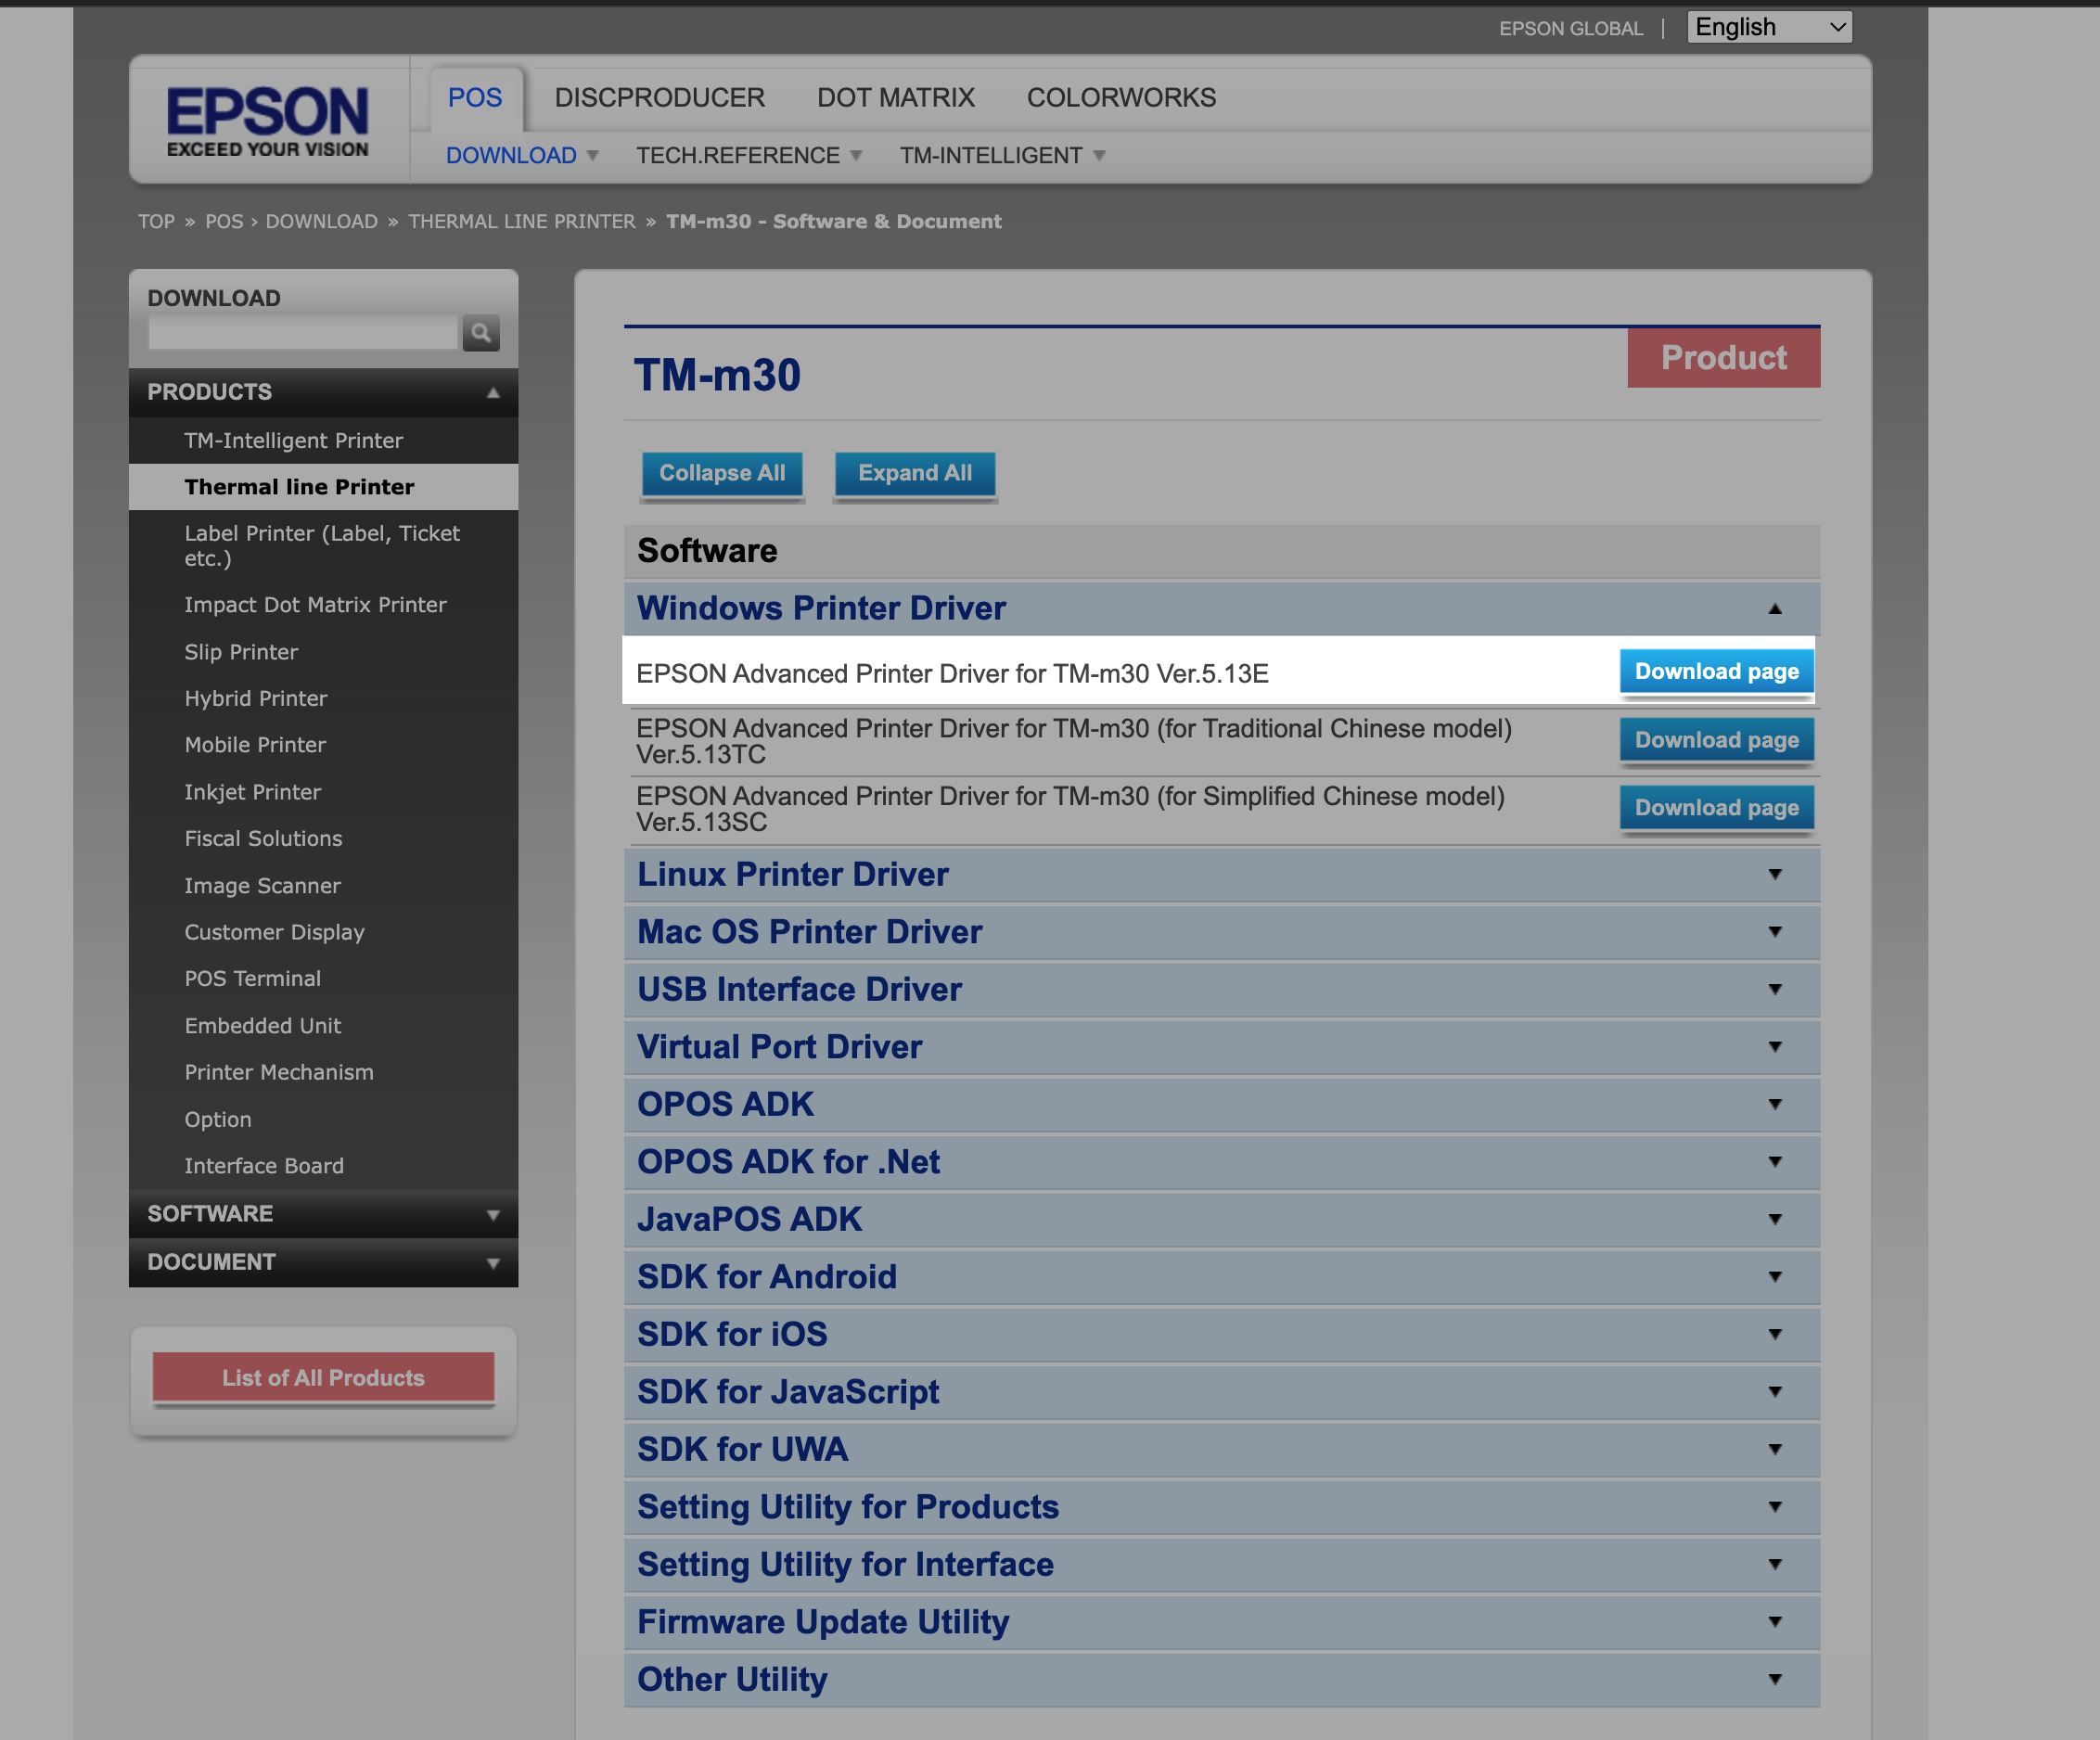
Step 1: Download the latest printer drivers. This is specialized software that helps the printer run correctly on your computer.
To download this, go to Epson's website and select Windows Printer Driver.
Step 2: Click Download page on the latest file and scroll down to confirm the download. You should see the download start in the left-hand corner of the window.
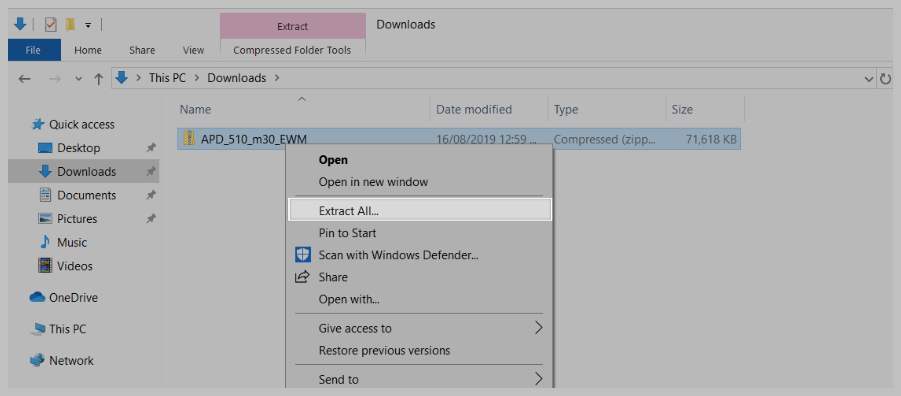
Step 3: When this download is completed, go to your Downloads folder, right-click on the file, and select Extract All.


Not sure where to find the download? Go to explorer and select Downloads from the left-hand list. The download will also appear at the bottom of Google Chrome, click the arrow here and select show in folder.
Step 4: After extracting the file, a new folder will open. Double-click on the install and follow the installation guide instructions. Once installed you will see a confirmation box. Close this and continue to the next step.
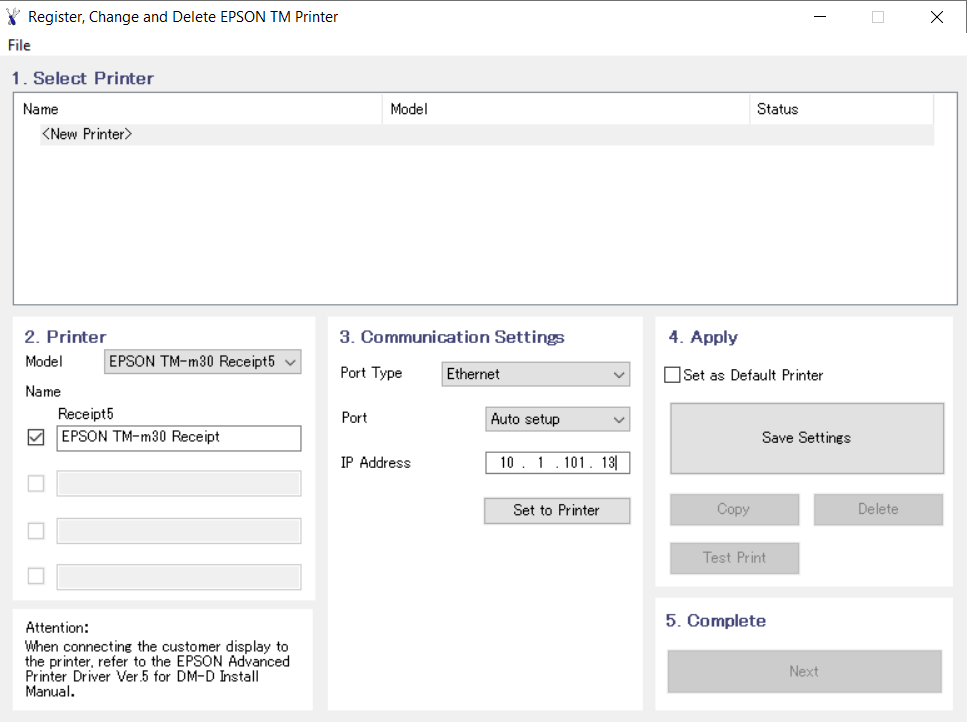
Step 5: Installing your Epson Printer. - You will be brought to the printer setup screen where you'll need to input the following information:
Step 6: Model: Select Epson TM-m30II or TM-m30II-NT under model.
Step 7: Name: Type in a name of your choice or leave as default.
Step 8: Port Type: Set this to Ethernet.
Step 9: Port: Leave this as Auto setup.

IP Address: This is where you need to enter your printer's IP address. To find this you will need to switch the printer off and turn it back on, please wait for a few seconds until the network configuration slip is printed.
Related Articles
Setup - Epson TM-m30II (LAN) receipt printer
Article Contents: This article provides instructions on setting up and installing the Epson TM-m30II (LAN) receipt printer for use with the Club Caddie system. It covers the requirements, where to purchase the printer, how to connect it, insert ...Setup - Epson TM-m30II (Bluetooth) receipt printer
Article Contents: Model number: TM-m30II USB/ETH/BT (C31CJ27212) Requirements: To use this hardware with your Club Caddie system, you need to meet the following requirements: Where to buy the Epson TM-m30II receipt printer: The Epson TM-m30II receipt ...Setting up an Epson U220
Article Contents: This guide provides detailed instructions on setting up a new Epson U220 Printer, including downloading necessary software, configuring network settings, installing advanced printer drivers, and testing the printer. Follow these ...Hardware - Setup Guide to Cloud Printing
Article Contents: This article contains a step-by-step guide on how to setup your cloud printer. Follow the step-by-step guide below to set up your Ethernet printer and configure the Auto-print functionality. Please note that you will need a ...Epson TM-20 Receipt Printer Troubleshooting and FAQs
Article Contents: This article provides troubleshooting tips for the Epson TM-T20ii thermal receipt printer, addressing issues such as the printer not printing receipts, being offline, or not connecting to the cash drawer. If you're having issues ...

