How to Schedule a Nightly Reboot
Article Contents:
This
article guides you on how to schedule your computer to reboot automatically at
a specific time using the Task Scheduler. This can be helpful for ensuring your
computer runs smoothly, especially if it tends to slow down due to low memory
and numerous background applications running over time. The tutorial covers
setting up both one-time and recurring reboots.
Step By Step:
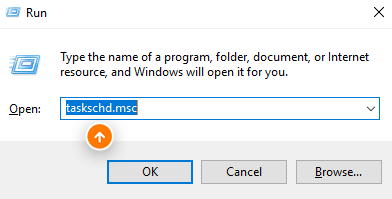
Step 1: Press "Win + R" to open the Run dialog box. Type `taskschd.msc` and press Enter. This action launches the Task Scheduler.
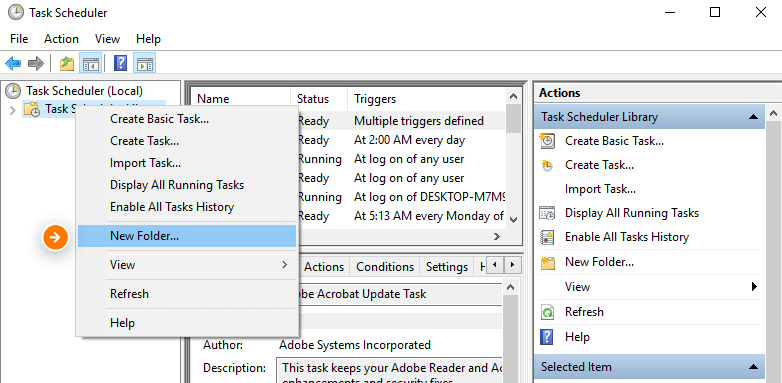
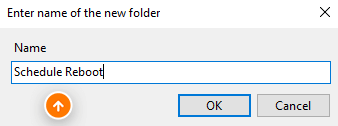
Step 2: In
the Task Scheduler, right-click on "Task Scheduler Library" and
select "New Folder." Name this new folder "Schedule Reboot"
or a name of your preference, then click "OK.
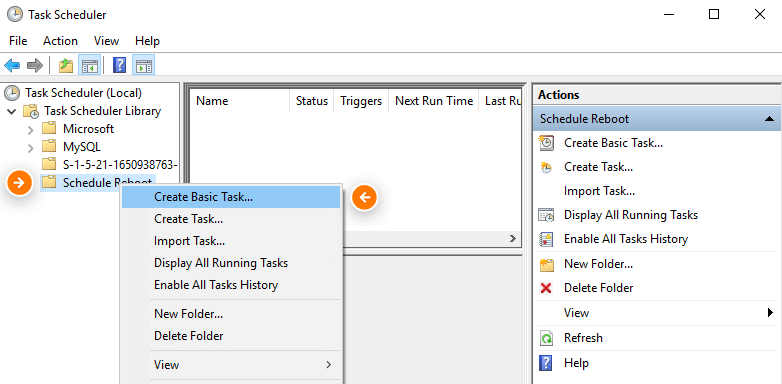
Step 3: Expand
the "Task Scheduler Library" and select the "Schedule
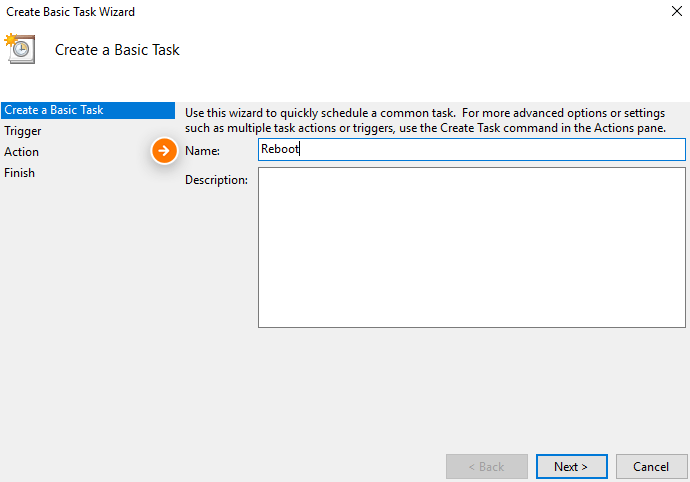
Reboot" folder. Right-click on this folder and choose "Create Basic
Task." This opens a wizard. Name the task "Reboot" and click
"Next."
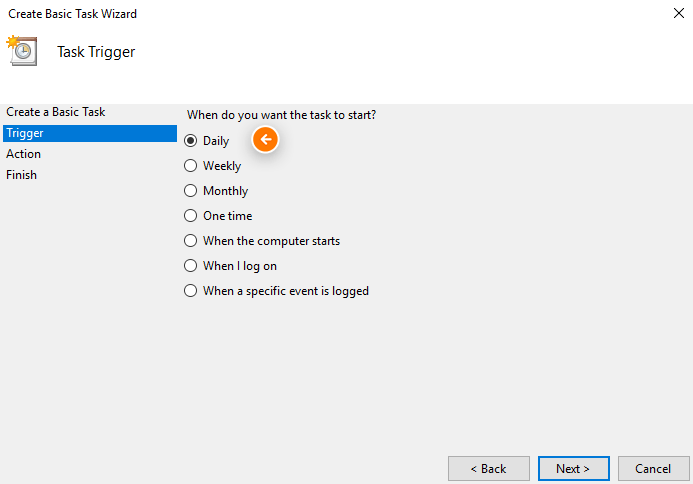
In the "Trigger" section, choose when
you want the task to run (e.g., daily, one-time, weekly), then click
"Next." Specify the exact time for the reboot to occur and
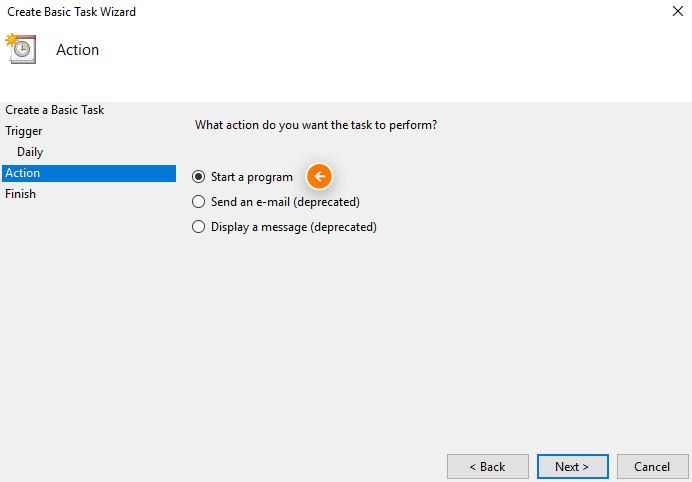
proceed by clicking "Next." In the "Action" section, select
"Start a program" and continue to the next step. Enter `shutdown /r` in the program/script field and click
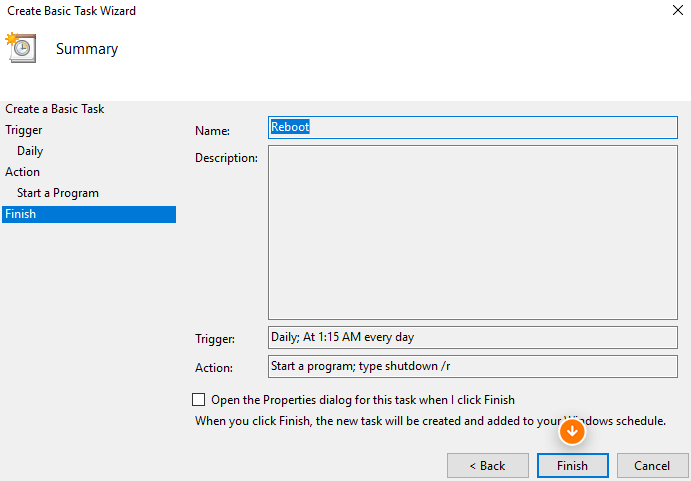
"Next." If prompted by Windows for permission, click
"Yes." Click "Finish" to complete the setup of
your task.
Step 4: In the "Trigger" section, choose when you want the task to run (e.g., daily, one-time, weekly), then click "Next." Specify the exact time for the reboot to occur and proceed by clicking "Next."

Step 5: In the "Action" section, select "Start a program" and continue to the next step. Enter `shutdown /r` in the program/script field and click "Next." If prompted by Windows for permission, click "Yes." Click "Finish" to complete the setup of your task.


Related Articles
Club Caddie - Using the Auto-Updater
Article Contents: This article contains step-by-step instructions on how to update your Club Caddie golf management system through the built-in updater. Step-By-Step: Step 1: The auto-update prompt will appear when the golf management system is first ...Club Caddie - How to Download and Install Latest Version of Club Caddie
Article Contents: This article contains step-by-step instructions on how to update your Club Caddie golf management system. *Before starting Step 1 delete Club Caddie app/software from your computer or station. Windows: Go to your Control Panel in ...Download Club Caddie's Demo Environment
Article Contents: We'll help you download and log in to Club Caddie's demo environment so you can get a feel for a live golf management system. Step-By-Step: Step 1: Navigate to https://clubcaddie.com/demo-download Step 2: Select "Download Now" Step ...Downloading Club Caddie
Article Contents: We'll walk through step-by-step how to download and log in to your facility's golf management platform. Step-By-Step: Step 1: Depending on your user type you'll want to select the appropriate link from the following: A) If you are ...