Long Receipts Cutting Off in Windows
Article contents:
Step 1: Open the Devices and Printers panel on the computer. The steps to access the Devices and Printers panel will vary depending on the Operating System being used. Below are two common options:
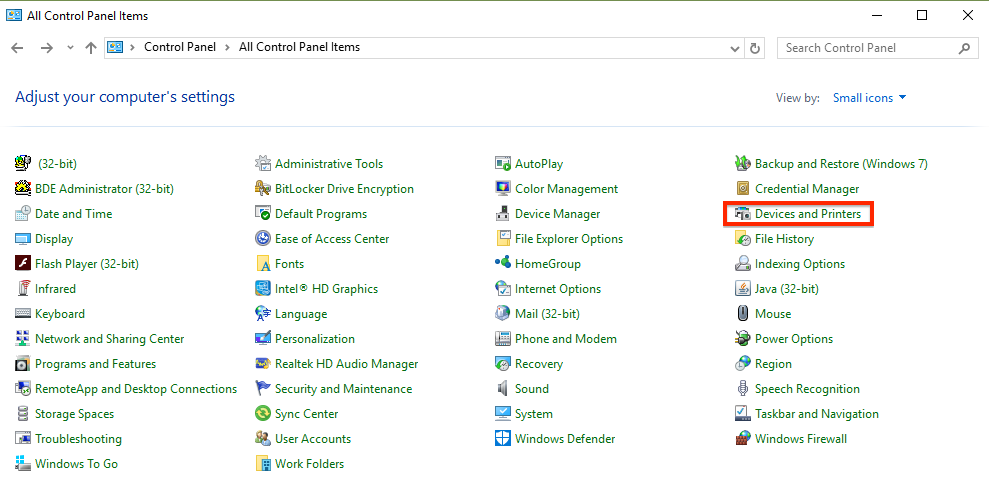

Step 4: When “Devices and Printers” appears in the menu, single click on the icon to open. Inside of the Devices and Printers menu, right click on the printer icon that is experiencing issues and select Printing Preferences.

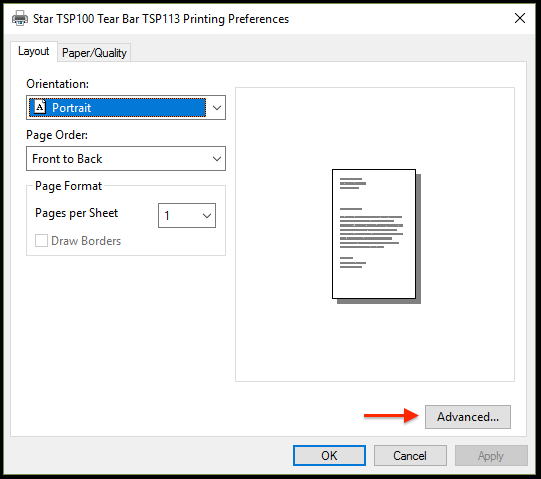
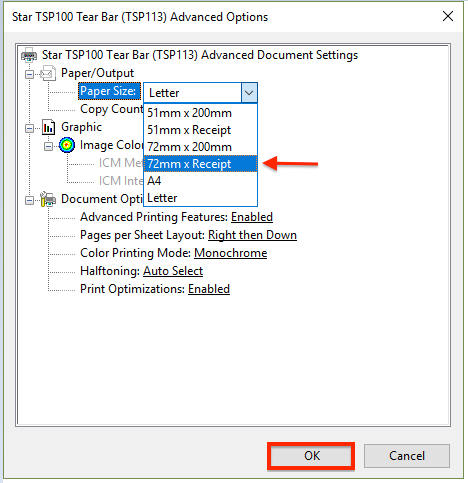
Step 5: The Printing Preferences window will appear. From the bottom right corner, click on the Advanced button. Under the Paper/Output options, click on the drop down menu and choose “72mm x Receipt” as the paper size and then press OK.
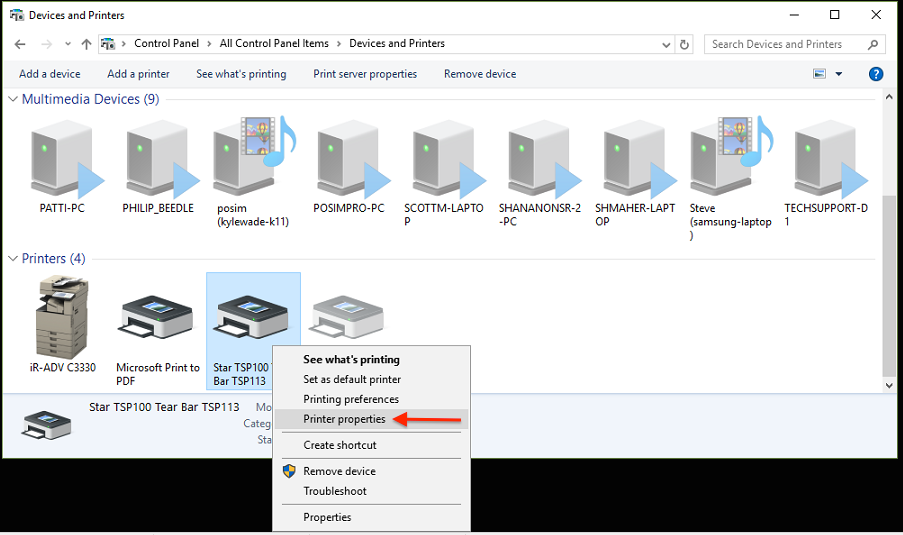
Step 6: The Printing Preferences window will remain open, press Apply and then select OK to save the changes. Go back into the Controls panel window, right click on the printer icon for the Star Tsp100 Printer again, but this time click Printer Properties.

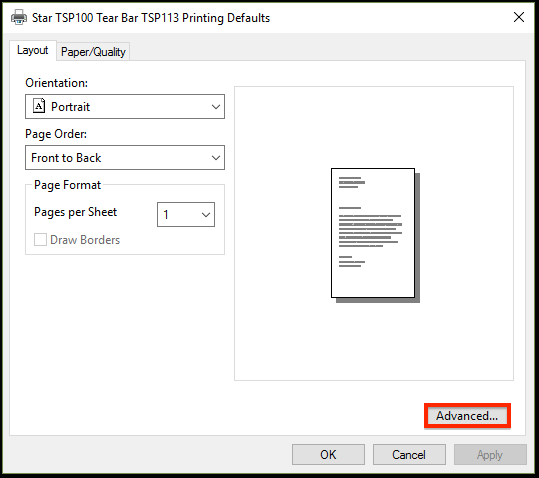
Step 7: When the Printer Properties windows appears, click on the “Advanced” tab at the top and then click on the “Printing Defaults” button in the lower left-hand corner. Inside of the Printing Defaults window, press the Advanced button located at the lower right corner.

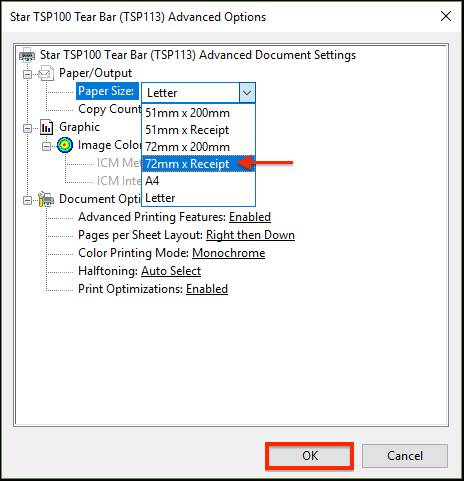
Step 8: Under the Paper/Output options, click on the drop down menu and choose “72mm x Receipt.” as the paper size. Press OK to save the changes and close the window.
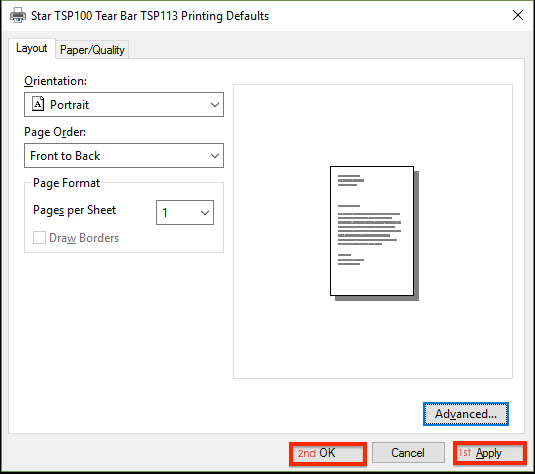
Step 9: The Printing Defaults menu will remain open, press Apply and then press OK to close the window. The Properties window remain open, press Apply and then press OK to close the window.

Related Articles
Star Micronics - Long Receipts Cutting Off in Windows
Article Contents: For Windows users, printer settings can be configured to print a specific length of paper and then automatically stop printing or cut the receipt. For users, this means that receipts could be cut off early and not include all the ...Epson Long Receipts Cutting Off in Windows
Article Contents: For Windows users, printer settings can be configured to print a specific length of paper and then automatically stop printing or cut the receipt. For users, this means that receipts could be cut off early and not include all the ...Add Custom Paper Size
Article Contents: Creating a new custom paper size within the printer server properties in Windows Devices and Printers. Step-by-Step Guide: Step 1: Search for and open Control Panel, and then click View devices and printers. Select the printer that ...Computer System Requirements
Article Contents: This article describes the necessary computer requirements for Club Caddie. Step 1: Desktop Terminal Minimum Hardware: Intel i5 2.4/3ghz+ Processor 8GB DDR3 RAM HD Graphics Card 128GB Solid State Drive 20”+ Touchscreen or ...Printer Paper Setting
Article Contents: This guide outlines the steps required to adjust the paper settings to use 72mm x Receipt paper. By following these detailed instructions, users can ensure their printer is correctly configured for optimal receipt printing. This ...