Membership portal - Events
Article Contents
This article contains a step-by-step guide on Membership portal - Events.
Step-by-Step:
Step 1: Click on the "Customer" button at the top of the screen.
This article contains a step-by-step guide on Membership portal - Events.
Step-by-Step:
Step 1: Click on the "Customer" button at the top of the screen.
Step 2: Click on "Member" from the right corner of the screen You can see the list of members then click on "View / Edit".
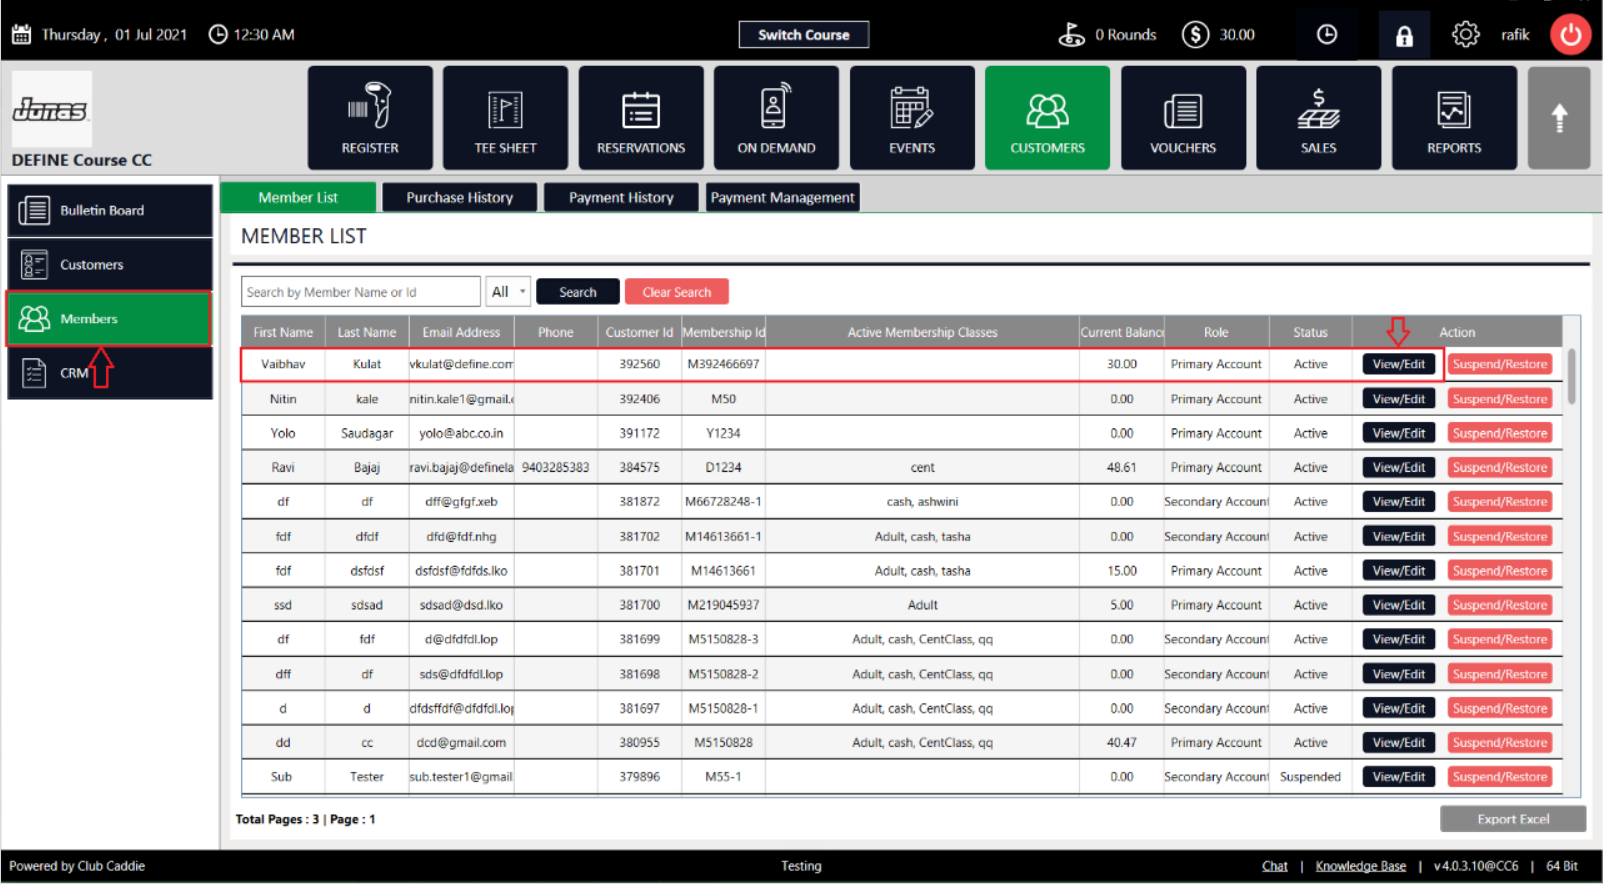
Step 2: Click on "Member" from the right corner of the screen You can see the list of members then click on "View / Edit".
Step 3: From the top navigation menu, click the "Membership" tab, and then click "Settings". After that, you can set the password for the online profile and click "Save".
Step 4: Click on the Gear wheel Icon on the top right corner of the screen.
Step 4: Click on the Gear wheel Icon on the top right corner of the screen.
Step 5: Click on "I-Frames" in the right corner of the screen, then you can see the Membership portal link and click on it.
Step 6: At this stage the member needs to log in here to go to the member portal.
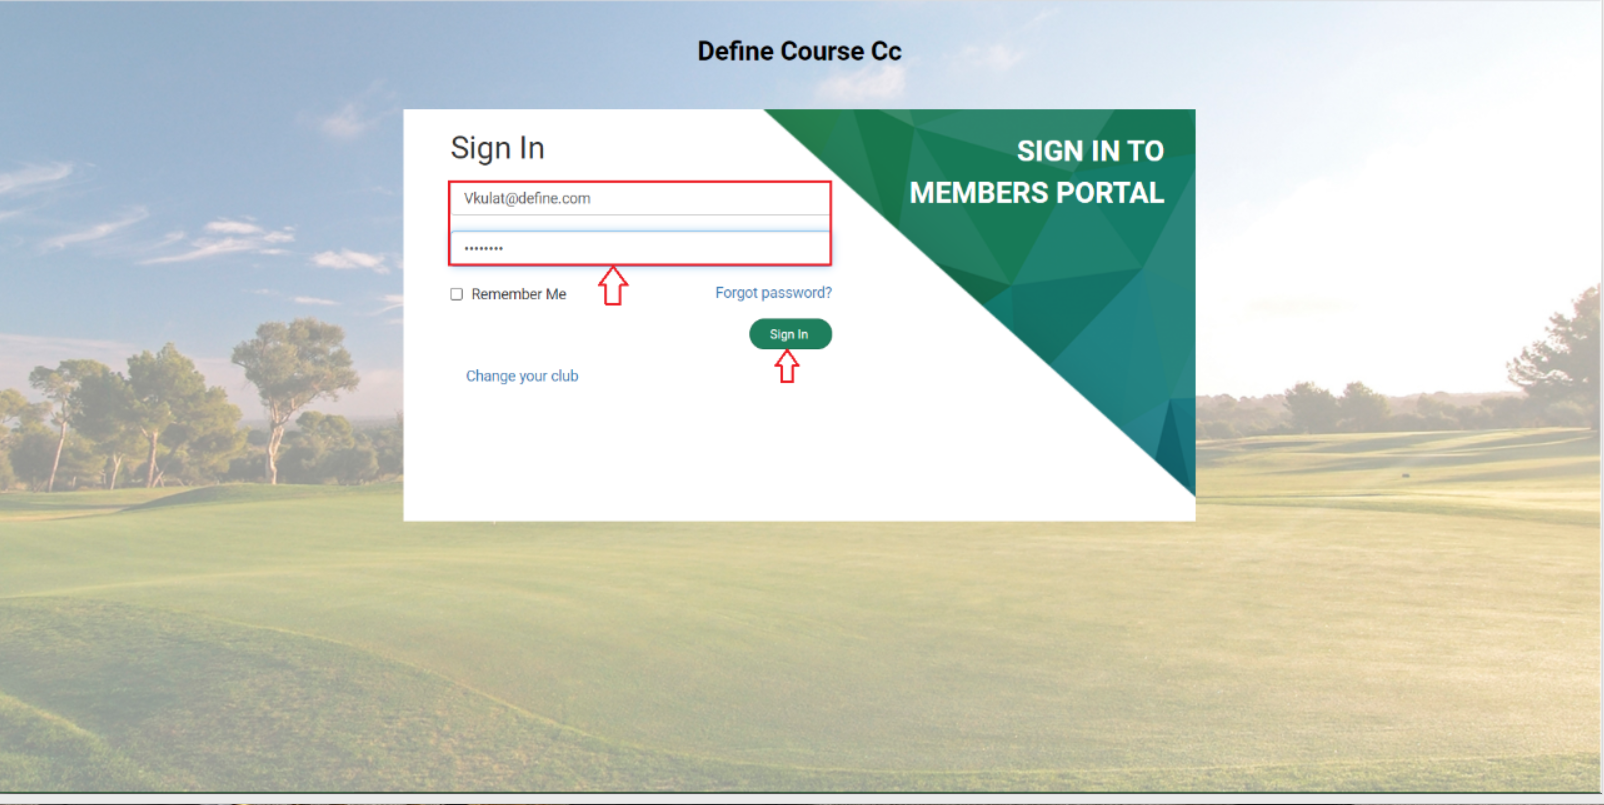
Step 6: At this stage the member needs to log in here to go to the member portal.
Step 7: Once a member has signed in, they can see the "Events" option at the bottom of the screen and click on it, so that they can see the available Event on the screen and then click on "Register". The member will get “Card Payment” and “Membership Payment” option son the screen, then complete the process and click on “Submit Payment” on the screen below.
Step 8: Once you have completed all the steps you will be able to see your booking summary on the screen.
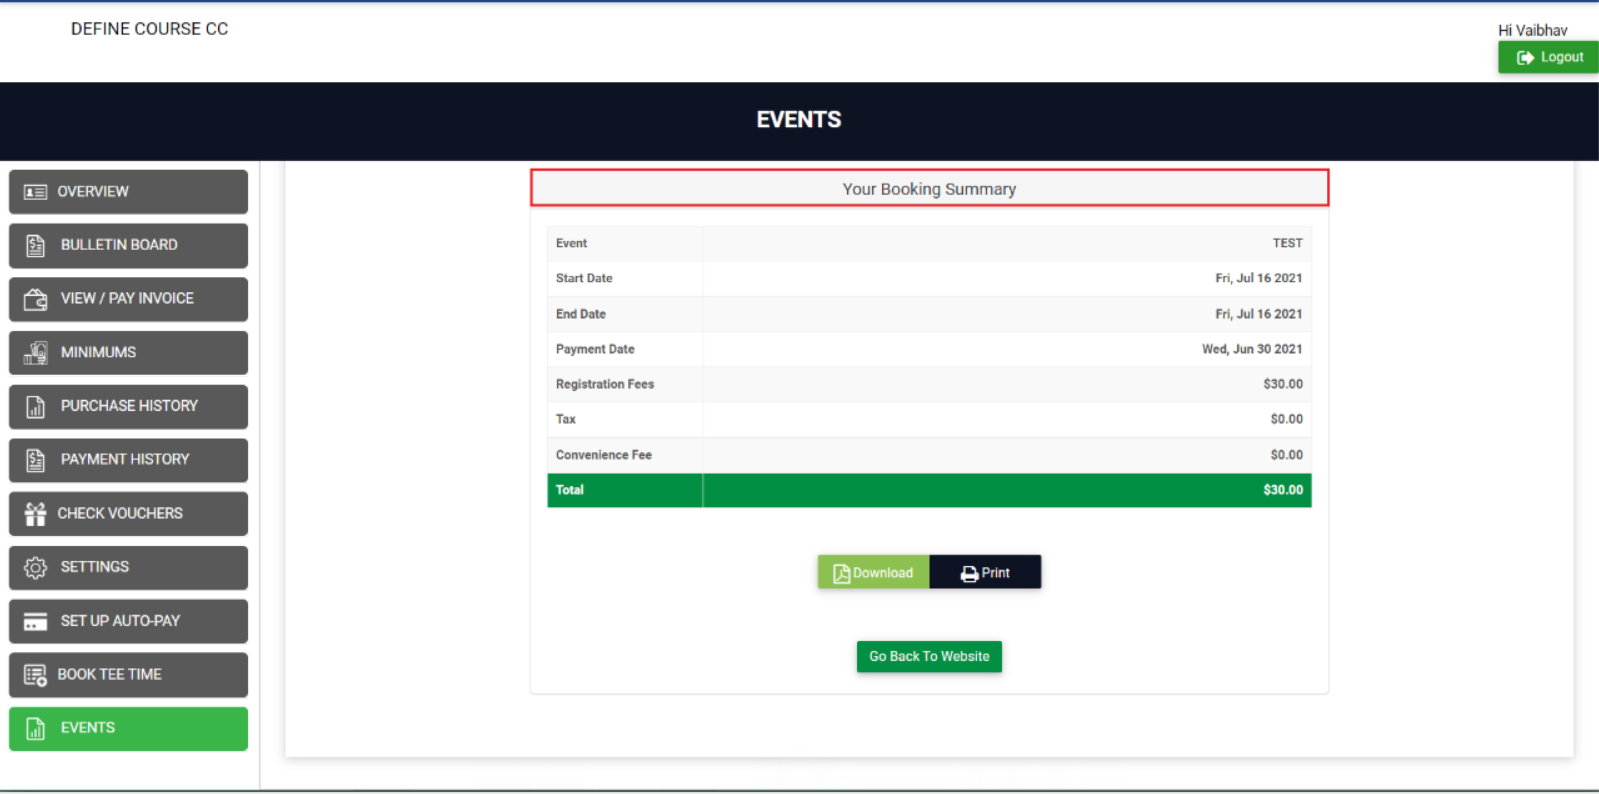
Step 8: Once you have completed all the steps you will be able to see your booking summary on the screen.
Related Articles
Tee Sheet - Add New Customer - Assign Class
Article Contents: This article summarizes how to assign a class to a new customer through the tee sheetS. Step-By-Step: Step 1: Select the TEE SHEET module from the module navigation menu. Step 2: On the TEE SHEET there are time slots under the FRONT ...Tee Sheet - Add New Customer - Set Flags
Article Contents: This article summarizes how to Add New Customer - Set Flags into tee sheet. Step-By-Step Step 1: From the tee time reservation pop up, you will see a plus (+) icon to the left of the Last Name field and under the “Add” column. If ...Resolving Google Calendar Auto-Generated Booking Time Zone Mismatches
Article Contents: This article provides a detailed guide on how to differentiate between a Google Calendar event notification/request and a tee time reminder, specifically addressing issues related to time zone discrepancies in auto-generated ...