Migrating to Quickbooks Online - Transition Guide
Article Contents:
This article contains a guide for transitioning from Quickbooks Desktop to Quickbooks Online, including steps to take before and during the migration, such as syncing data, removing existing records, establishing a connection to Quickbooks Online, and mapping journal entry components like transaction types, sub-departments, payment methods, and vouchers.
For awareness you will need to select a respective cutover date as a migration from Desktop to Online requires for the chart of accounts and mapping to be first removed and then reimported directly from Quickbooks Online.
As an example, choosing a date of March 1st would require you to use the sync to Quickbooks to catch up to the most recently available date prior to cutting over and after migration the GL Code reporting would need to be used to create manual journal entries prior to the the March 1st date.
Prior to Migration:
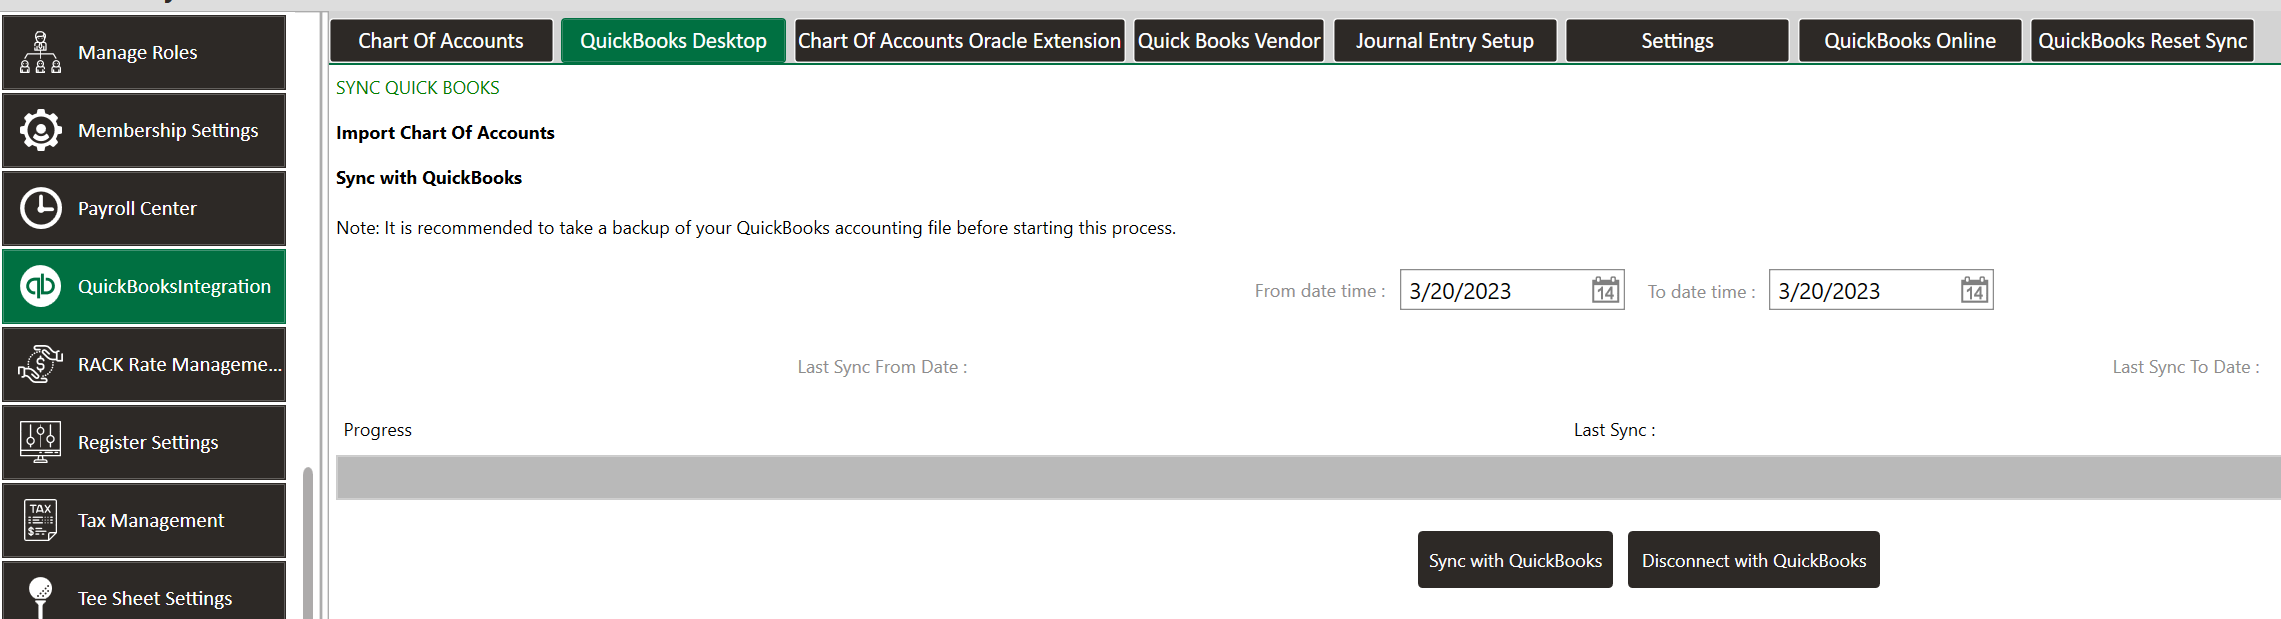
1) Use the Quickbooks Desktop sync to sync up to the most recent dates by completing a Quickbooks sync for the respective date range.
Day of the Migration:
1) Navigate to Settings -> Quickbooks Integration -> Quickbooks Desktop -> Disconnect From Quickbooks Desktop.
As an example, choosing a date of March 1st would require you to use the sync to Quickbooks to catch up to the most recently available date prior to cutting over and after migration the GL Code reporting would need to be used to create manual journal entries prior to the the March 1st date.
Prior to Migration:
1) Use the Quickbooks Desktop sync to sync up to the most recent dates by completing a Quickbooks sync for the respective date range.
Day of the Migration:
1) Navigate to Settings -> Quickbooks Integration -> Quickbooks Desktop -> Disconnect From Quickbooks Desktop.
2) We will need to remove the existing records from Quickbooks Desktop.
A) Navigate to the Chart of Accounts page and remove each of the established chart of accounts records that are in-place so that the list of account codes is cleared.
B) Navigate to the Quickbooks Vendors tab and remove the respective vendors.
C) Remove the mapping for the transaction types and sub-departments in the journal entry setup.
3) Navigate to the Quickbooks Online tab and select the Connect to Quickbooks option.
Follow the respective prompts in Quickbooks Online to be able to establish a connection.
You'll be directed to a browser page which will walk you through logging into Quickbooks and selecting the respective company file to sync.
4) Once you have established a connection you can sync data from Quickbooks online by selecting the "Import from Quickbooks" option that is now.
Mapping the Journal Entry - Transaction Types, Sub-Departments, Payment Methods, And Vouchers.
5) After importing your chart of accounts codes you will need to refer to the following locations to complete the mapping:
A) Transaction Types - Navigate to Settings -> Quickbooks Integration -> Journal Entry Setup -> Transaction Types. Select Add and then proceed to map each transaction type available in the drop-down list.

If you do not map certain transaction types it may not allow for a sync if that unmapped transaction type results in the GL Code reporting to be unbalanced for a given day.
You can additionally refer to the attached Transaction Type Mapping spreadsheet at the bottom of this article.
B) Next, to map the Sub-Departments, Payment Methods, and Custom Vouchers navigate to Settings -> Register Setting:
Departments - Choose the Departments tab and then select edit to choose the respective GL code mapping for each sub-department. All must be mapped.
Customer Payment Methods - Staying in register settings choose the Custom Payment Methods tab and then select edit to choose the respective GL code mapping.
Vouchers - Staying here, next choose the Club Vouchers Tab and then select edit to choose the respective GL code mapping for each custom voucher type created.
C) Class Types - Optionally, If you club has separate GL codes for individual member type sales this can be mapped in Settings -> Class Management -> Set Chart of Accounts within the action dropdown for each of the class type.
Related Articles
QuickBooks - Journal Entry imported with zero values
Question The journal entry that was imported into QuickBooks was blank and contained no values. Solution This is likely due to the system already considering the date as having been previously sync'd to QuickBooks. Step 1: Delete journal entries ...Change the time format from decimal to minutes or vice versa in QuickBooks Desktop Payroll
Article Contents: This article explains how QuickBooks Desktop Payroll displays time entries and how to change the format between decimal and minutes. It provides a step-by-step guide on setting your preferred time format in the application's ...Players First Integration
Article Contents: How to integrate Club Caddie with Players First (a customer experience management solution). Step by Step: Step 1: Navigate to Settings, then click on 3p Integrations from the left hand side menu. Step 2: Scroll to the right and ...Could not read association information from QuickBooks. Cannot create QBXMLRP2 COM component.
Article Contents: This article provides solutions for resolving the "Could not read association information from QuickBooks. Cannot create QBXMLRP2 COM component" error, including steps for registering a DLL and renaming the QBW file to avoid issues ..."Transaction Split lines to accounts payable must include a supplier on that split line" when entering a general journal
Article Contents: If you receive the message "Transaction Split lines to accounts payable must include a supplier on that split line" OR "Transactions to accounts payable must include a supplier", you have assigned a chart of accounts line to an ...