Pairing a new Clover Device with Club Caddie
Article Contents:
1. First you will want to ensure that the customer has activated the device and it is powered on and connected to Wi-Fi.
2. Next you will need to make sure the customer has access to the ADMIN Login | Clover Web Dashboard credentials. If you don’t have Admin credentials, you cannot complete the integration.
3. Next, when logging in for the first time, there will be a two factor authorization that goes to the operator’s email or phone number.
4. After you have gained access to the operator’s Clover login page, you will want to open up a new browser tab and then copy and paste the following link below:
https://www.clover.com/oauth/authorize?client_id=46TM68X8ER640&redirect_uri=https://clubcaddie.com/
 The merchant ID will be different for every course. As well as the code at the end of Code=.
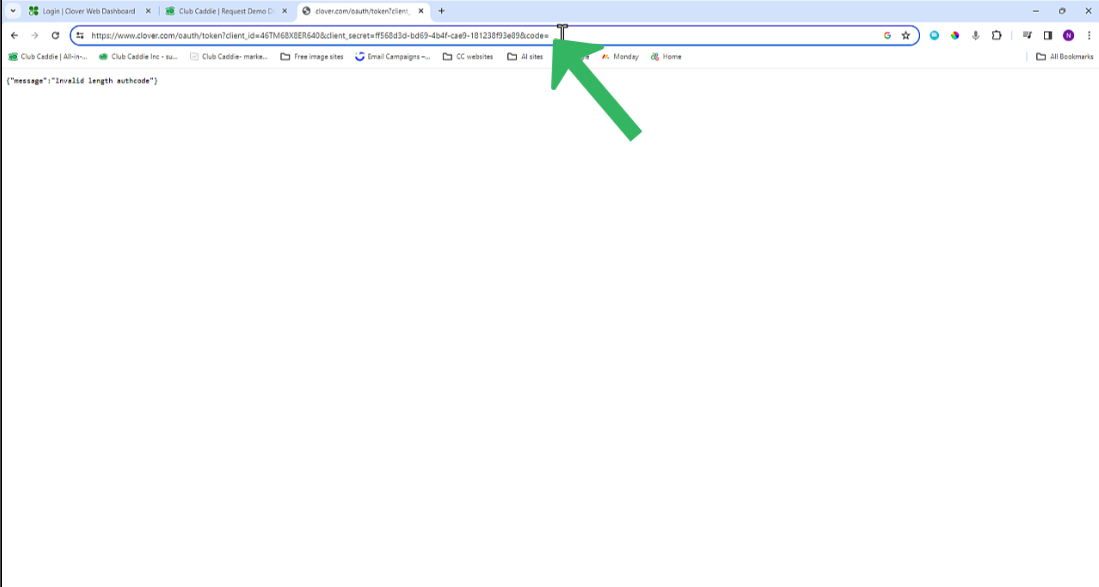
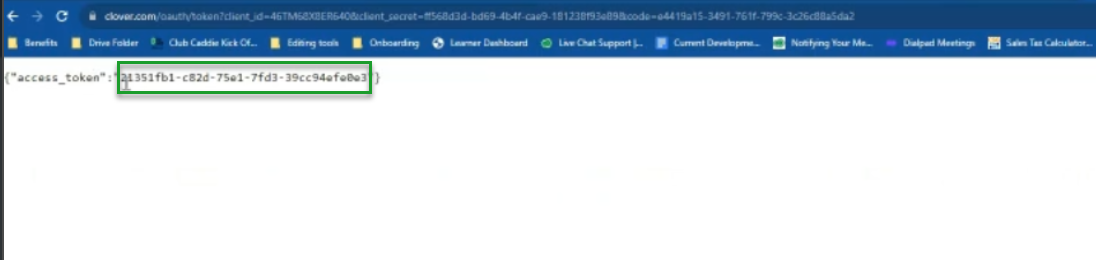
 You will now be taken to a white page with an authorization code. It will look something like this ea150693-fc26-be40-f17f-b5ac57769100
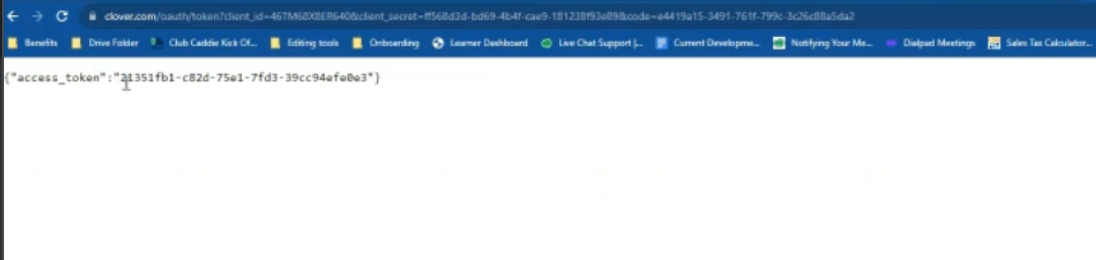
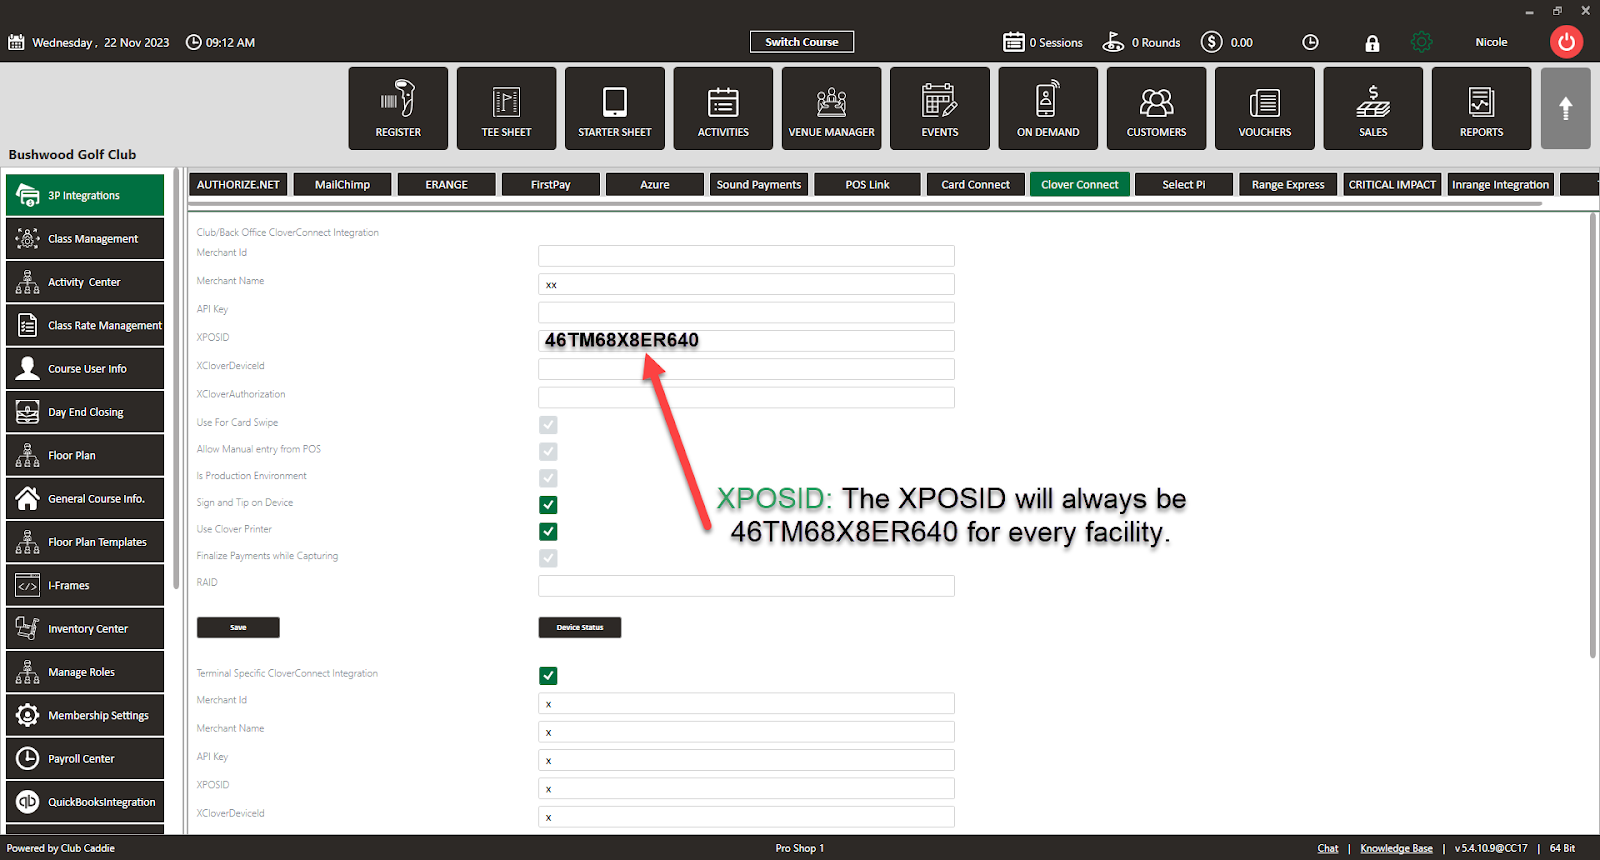
5. Now you have created all the credentials and you can begin entering them into the 3P settings in Club Caddie. Go back to Settings > 3P Integration > Clover Connect

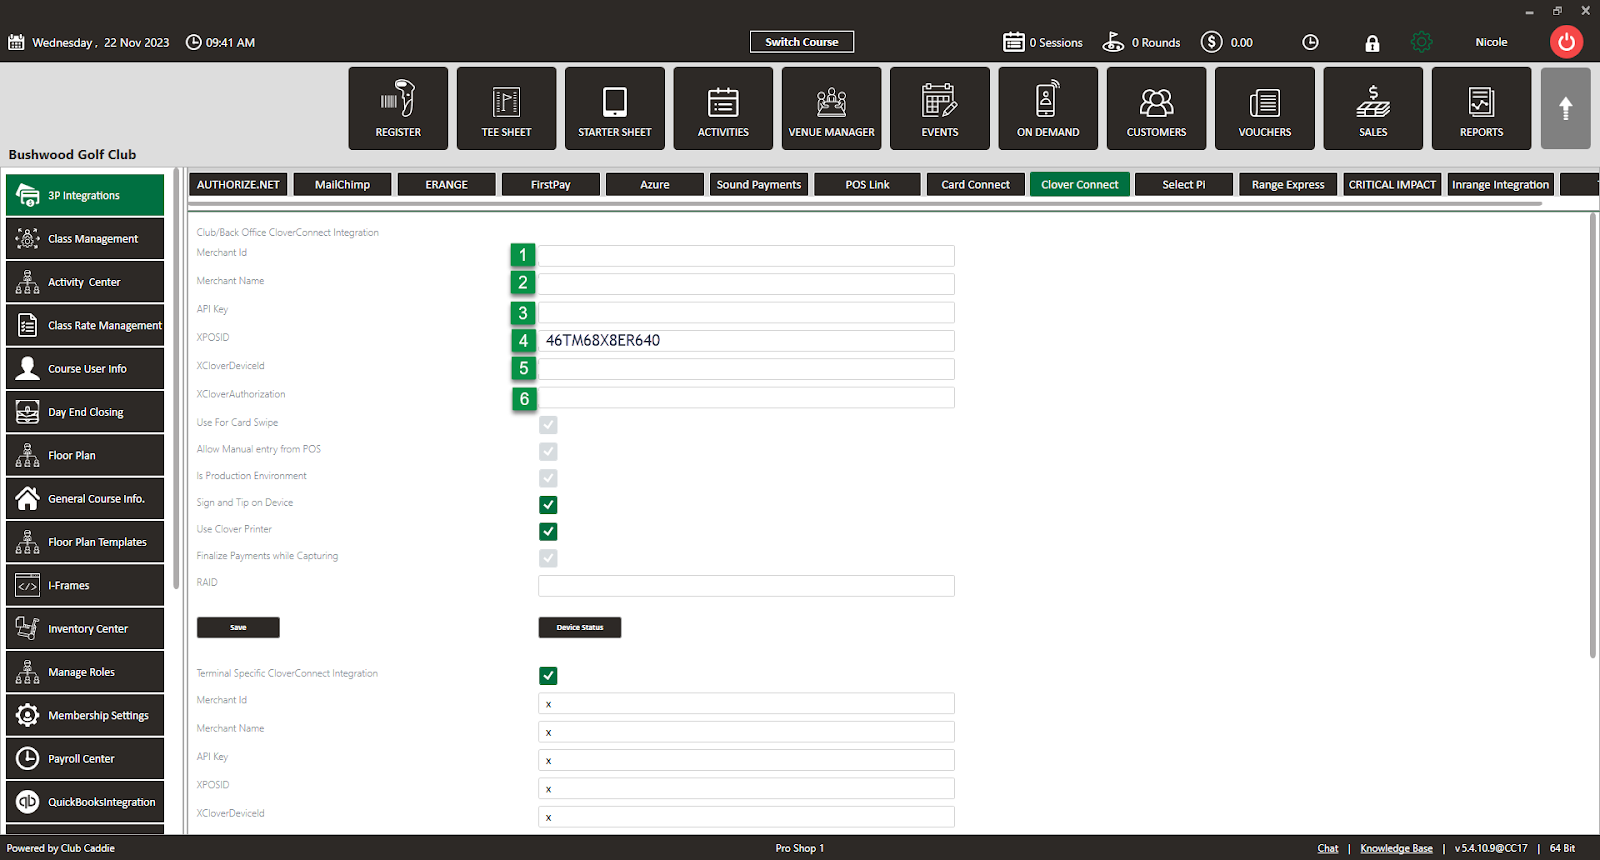
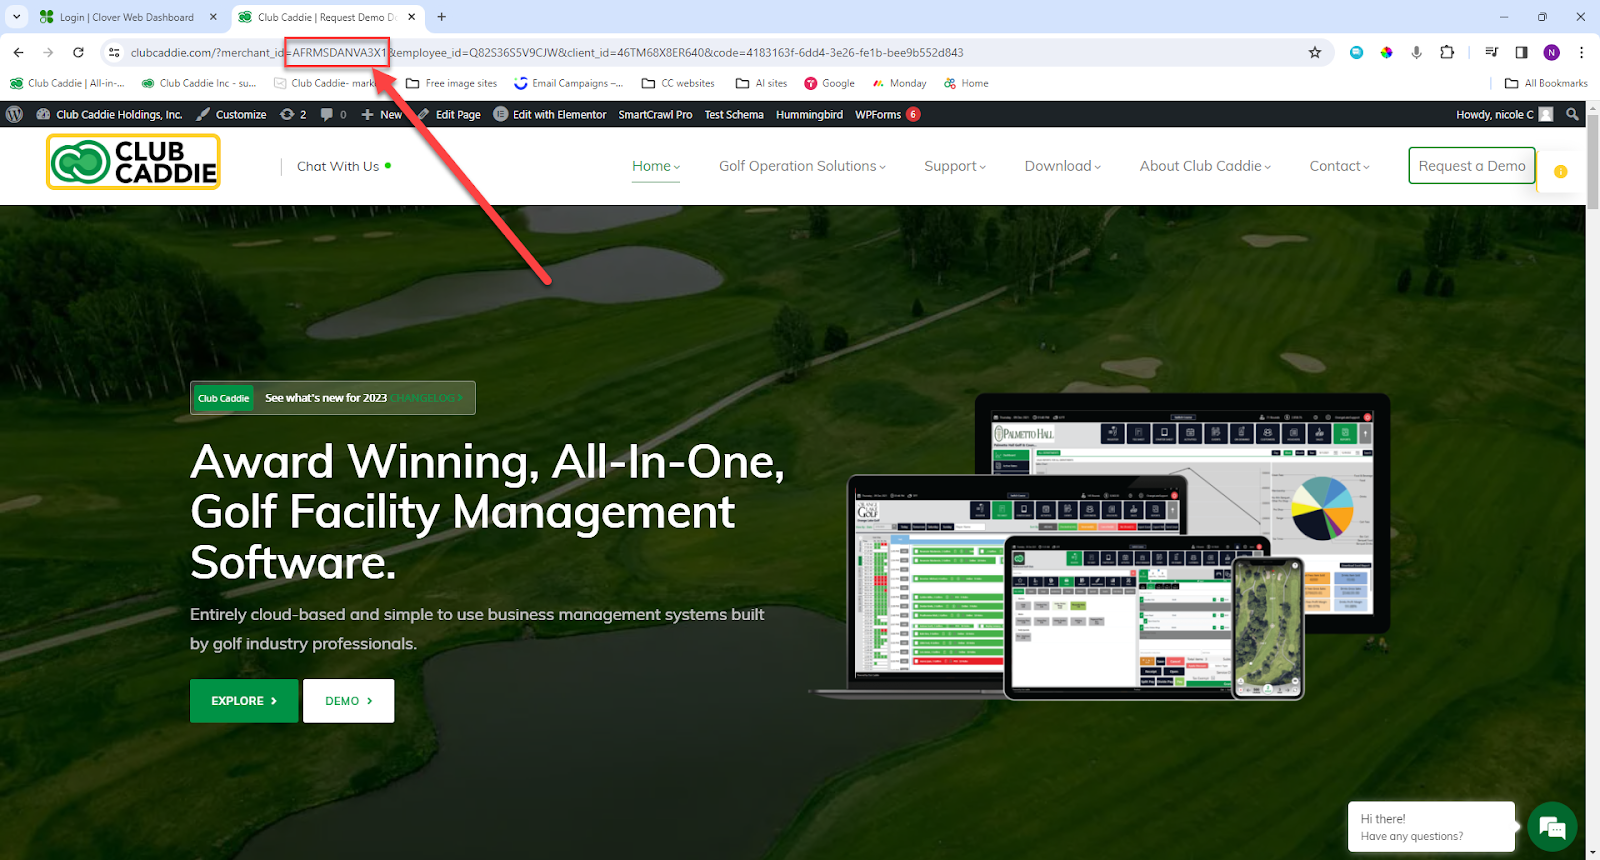
1. Merchant ID: This will be located when you copy and paste the link from step five into the browser. It will start with “Merchant ID” and then you can copy and paste the ID into Club Caddie.
2. Merchant Name: If you go back to the Clover dashboard, you will see the name of the facility in the upper left-hand corner of the screen.
3. API Key: This should be left blank.
4. XPOSID: The XPOSID will always be 46TM68X8ER640 for every facility.
5. XClover Device ID: This is the ID number of the device of the clover device you are pairing with the terminal in Club Caddie. It can be located on the device or by opening up the printer cover and having them read it back to you.

6. XClover Authorization: This will be the code generated where you merged the code= numbers with the other link and it took you to a white page with a string of numbers.
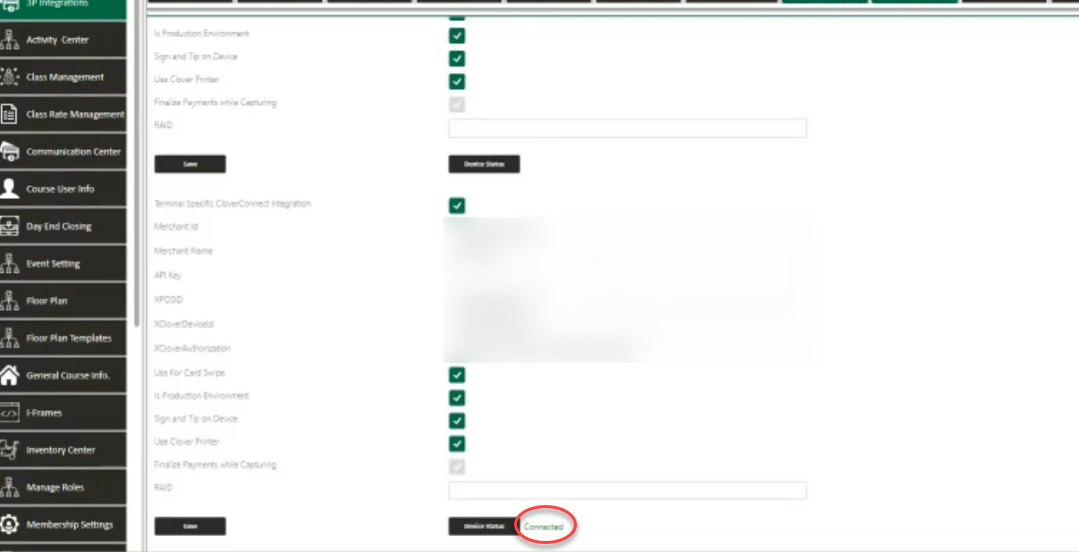
7. You will want to enter the credentials in both the top and bottom fields and the following settings are mandatory and need to be checked on. Only for the bottom credential screen. Leave every setting off in the top half of the credential screen.
Use Clover Printer: Should be turned on if you would like receipts printed from the clover device. If you have a dedicated printer, then you can leave it checked off.
8. Hit Save on both the top portion and bottom fields.
9.1. Log out of Club Caddie and log back in.
9.2 Now you will perform a test transaction. If the transaction freezes (only see a spinning circle on the Clover device) simply force close Club Caddie, and wait about a minute for the reader to time out. Then log back into Club Caddie and redo the test transaction. It should work going forward.
10. Miscellaneous Settings that need to be turned on in order for Clover card processing to be as simple and seamless as possible for the operator.
In register settings: Make sure that the “Associate Employee with All Tabs is checked on. If you don’t have this checked, then the employee will have to manually assign the person receiving the tip and can be very confusing for the customer. Checking the box makes it so the employee is always preselected.
Terminal Management: Click on edit for the terminal that the terminal is tied to. You will want to ensure that the “Enable Signature-Tip after payment” tab is turned on.

This concludes the step-by-step guide on integrating Club Caddie with Clover Connect.
Related Articles
Clover Refunds
Article Contents: This article contains step-by-step instructions for processing refunds on the Clover platform. It outlines how to navigate to the Transactions section in the Clover Dashboard, apply filters to locate the specific transaction that ...CardConnect - Updating an Existing Merchant Services Support Ticket
Article Contents: This article contains information on updating an existing Merchant Services support ticket in the CardConnect system. It provides instructions on how to add comments to a ticket in order to provide additional information or respond ...CardConnect - Subscribing to Ticket Updates
Article Contents: This article provides instructions on subscribing to email notifications for updates on CardConnect Support tickets. It guides users through the process of navigating to the appropriate user settings, enabling the "Support Ticket ...Could not read association information from QuickBooks. Cannot create QBXMLRP2 COM component.
Article Contents: This article provides solutions for resolving the "Could not read association information from QuickBooks. Cannot create QBXMLRP2 COM component" error, including steps for registering a DLL and renaming the QBW file to avoid issues ...Players First Integration
Article Contents: How to integrate Club Caddie with Players First (a customer experience management solution). Step by Step: Step 1: Navigate to Settings, then click on 3p Integrations from the left hand side menu. Step 2: Scroll to the right and ...