Prorating Member Classes
Article Contents:
This article covers the option of prorating a member class for when adding a new class to a member. When this option it turned on in Class Management, the monthly or yearly rate for the member will be prorated appropriately.
Step by Step:
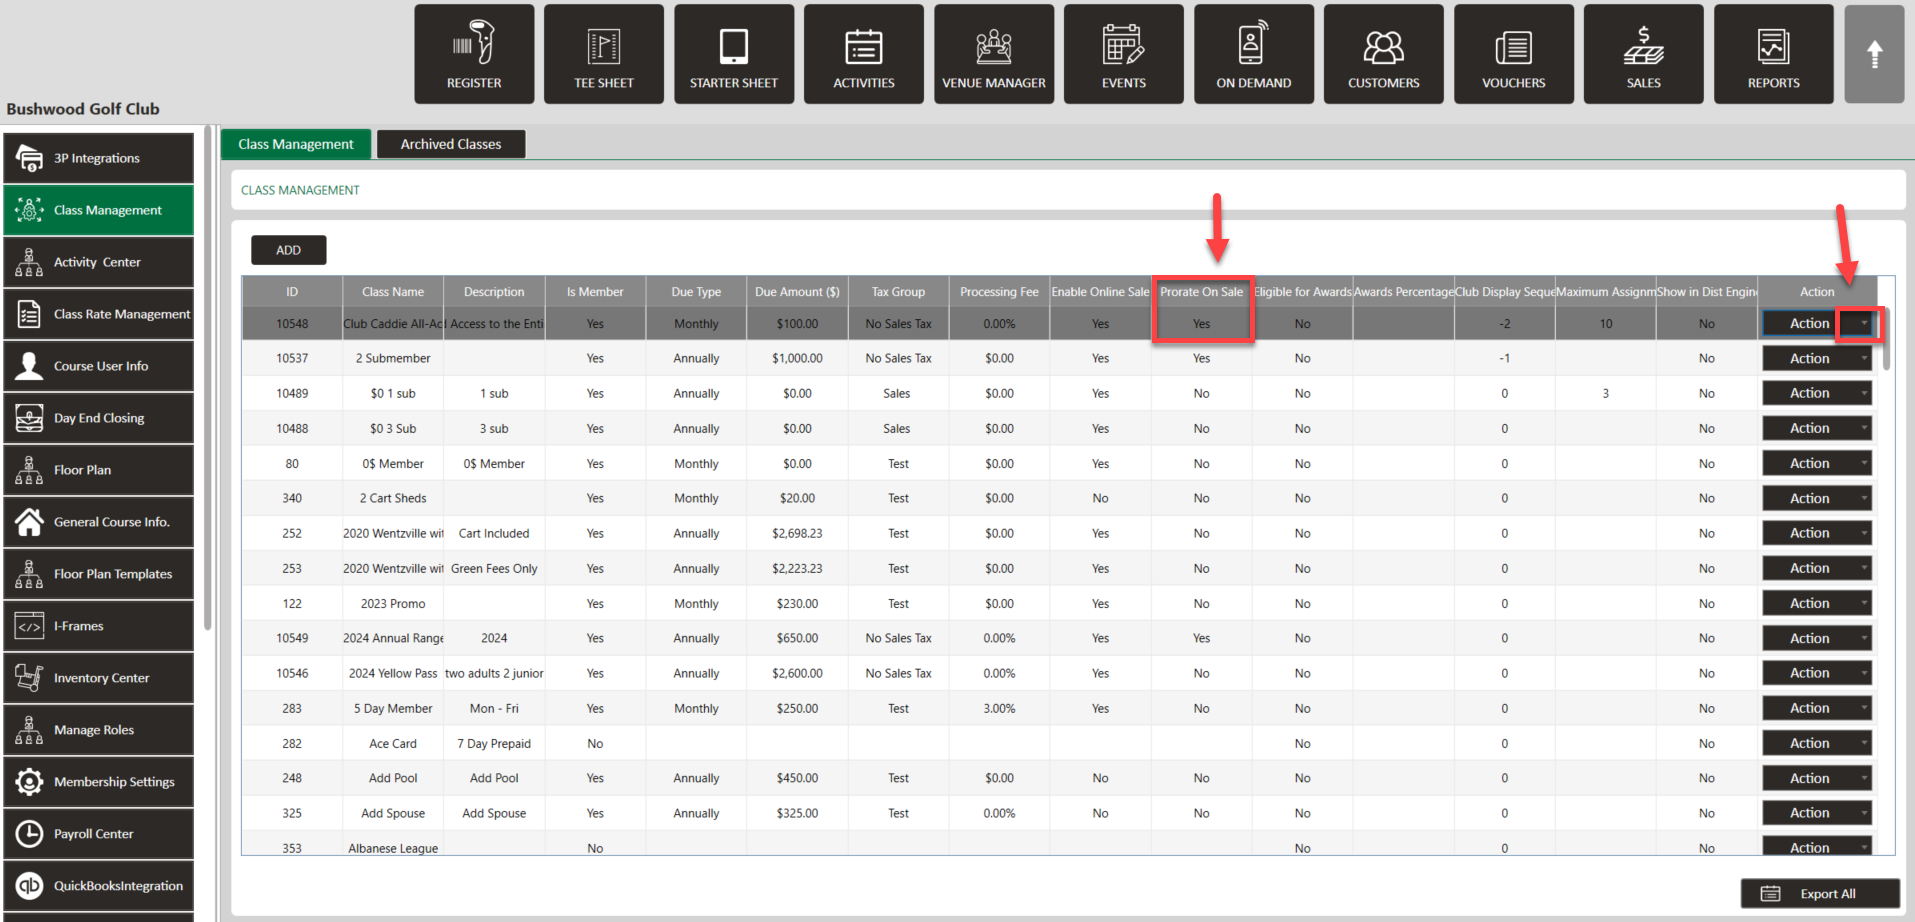
Step 1: Navigate to your Settings, then click on Class Management.
Step 2: From Class Management, click on the Action dropdown for the class that you would like to prorate, select Edit Class, and toggle on Prorate on Sale. Then click Save.

Step 3: You will then be able to add this class to a member at a prorated discount for the month or year, depending on their respective class.
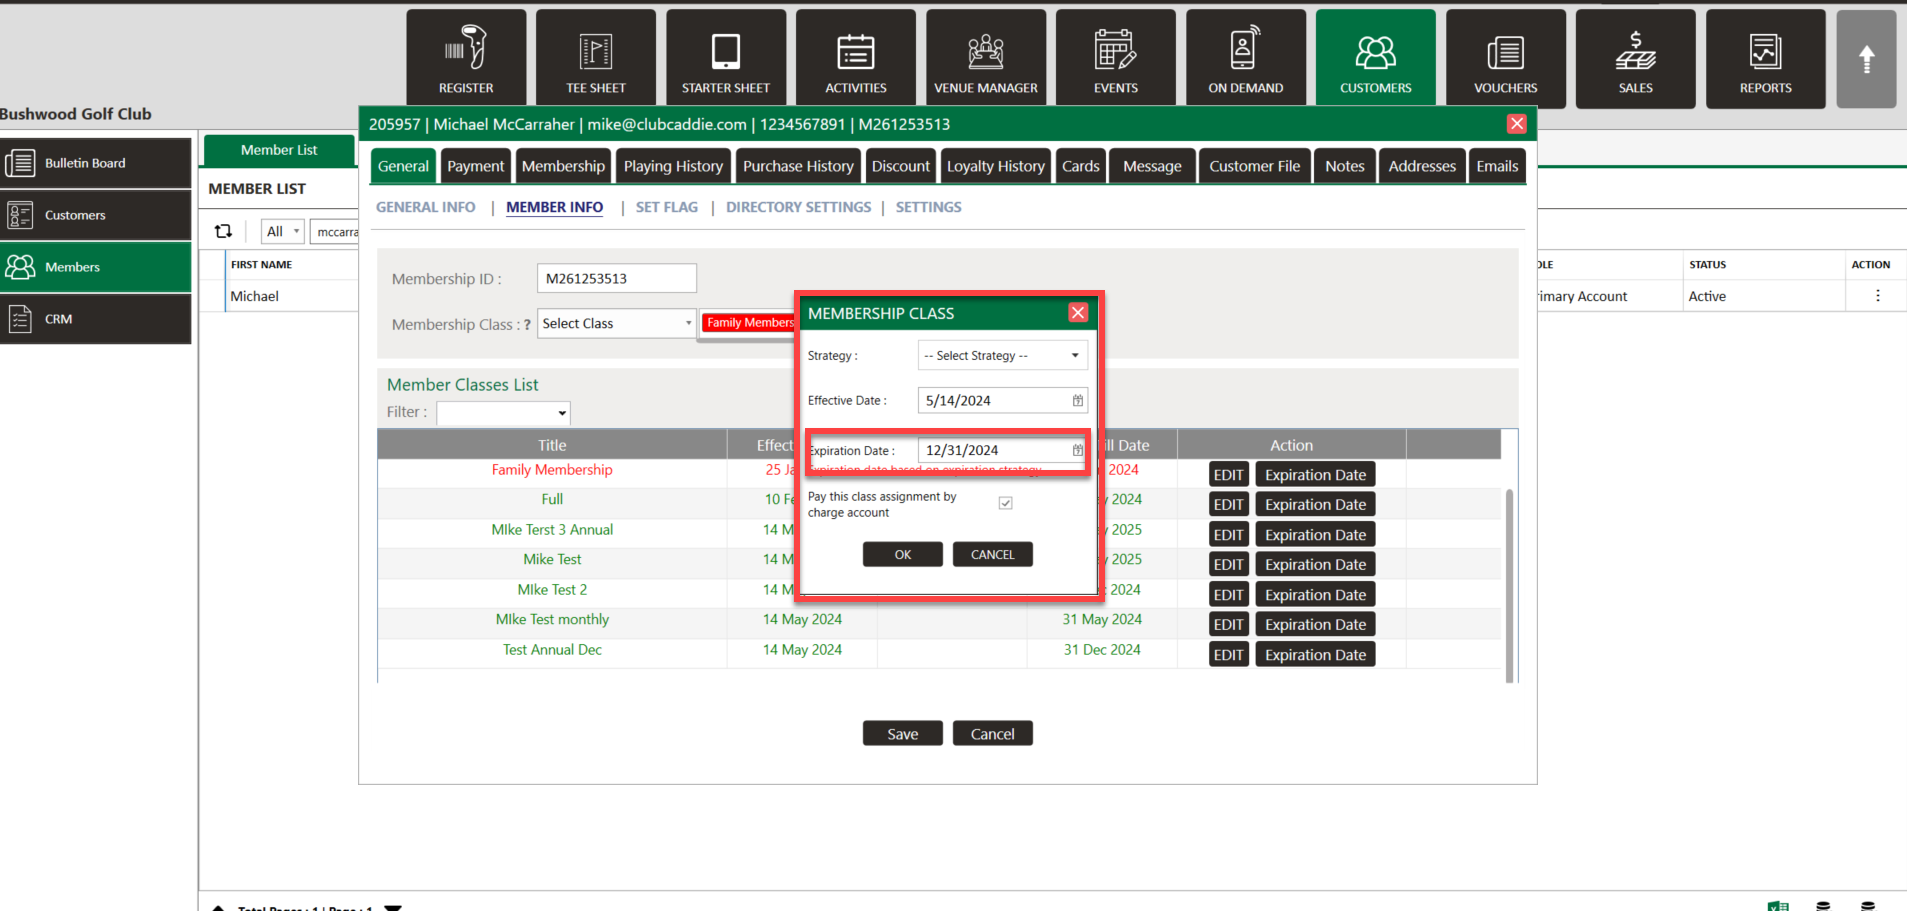
Annual - If you would like the annual class to end on Dec 31st, and to be prorated from the effective date until the end of the year, enter Dec 31st in the expiration date when adding the class to the member.

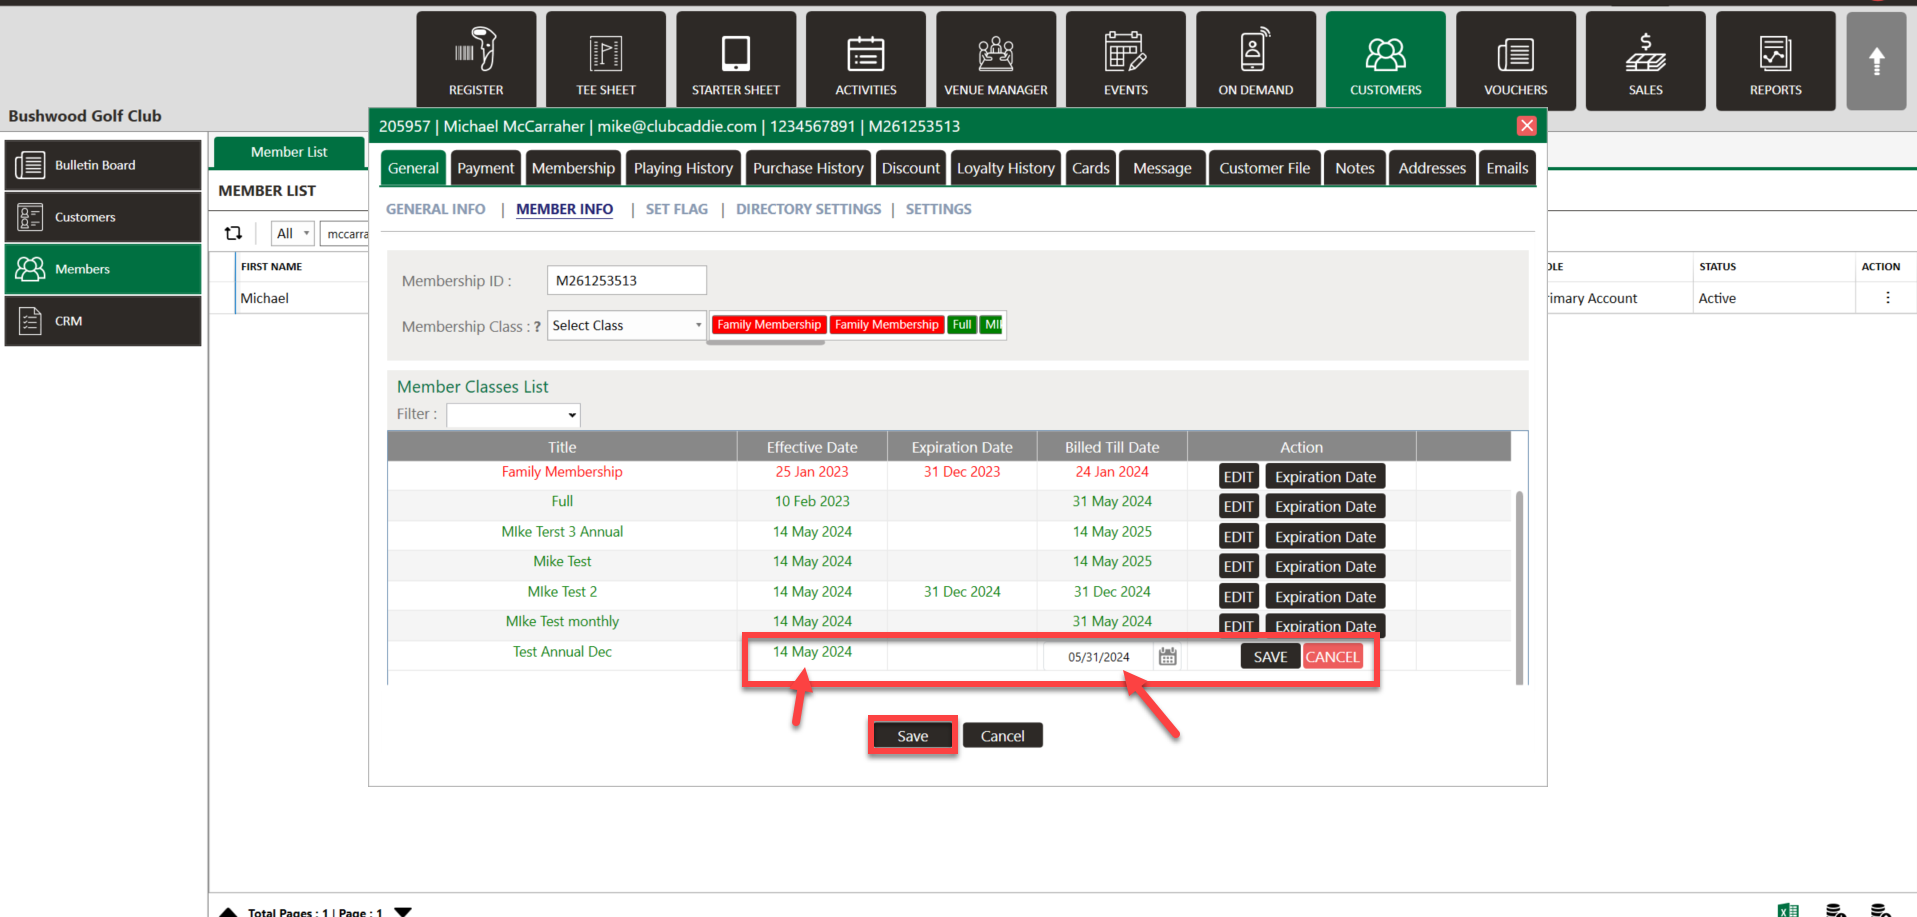
Monthly - Make sure to set the Bill Till Date for the last day of the month in order for the prorate to work effectively for the current month.

Annual - If you would like the annual class to end on Dec 31st, and to be prorated from the effective date until the end of the year, enter Dec 31st in the expiration date when adding the class to the member.
Monthly - Make sure to set the Bill Till Date for the last day of the month in order for the prorate to work effectively for the current month.
Related Articles
Membership - Online Membership Sales & Application Creation
Article Contents: Our latest update revolves around the introduction of new settings under Class Management, aimed at improving the online sale and signup experience for memberships. These settings include the creation of custom sale strategies, the ...Discount Rule for specific Customer/Member
Article Content: This article instructs on how you can set a Discount Rule to a specific Member/Customer through the Customer Profile. Step-by-Step Guide: Step 1: Click on the "Customers" tab from the row of headers. Click on the "Customers" option ...Department/Subdepartment Class Discount
Article Contents: This article provides instruction on how to set a discount for a Class. Step-By-Step: Step 1: Click on the Settings gear wheel icon from the top-right corner of the screen. Select Class Management from the left-side panel. Step 2: ...Membership Billing & Invoices: Customers Minimum Spending Requirements by Department
Article contents:- This article summarizes the minimum spend rules by class or customer for any department's spending. Step By Step:- Note:- You can set a minimum spend rule across an entire class or alternatively set up a customer-specific spend ...Settings – Class Management
Article Contents: This is a step-by-step guide on how to create a new class or edit an existing class. Step-By-Step: Step 1: Click on the Gear Wheel icon on the top-right corner of the screen. Then click on Class Management from the left-side menu. ...