Setting up an Epson U220
Article Contents:
This guide provides detailed instructions on setting up a new Epson U220 Printer, including downloading necessary software, configuring network settings, installing advanced printer drivers, and testing the printer. Follow these steps closely to ensure a smooth setup process for your new Epson U220 Printer, whether it's for a kitchen, bar, or any department requiring reliable printing solutions.
Step By Step:
Downloading and Installing Software
Step 1: Download Epson's Net Config utility and Epson's advanced printer drivers. This can be done through the provided link or by searching Google for each and clicking the first link.
Step 2: Launch the Epson Net Config tool installer. Follow the installation prompts until the installation complete message is displayed by the installation wizard.
Step 3: Open the Epson Net Config application by typing "Epson Net Config" into your Windows search bar. Allow the application to add an exemption to your firewall when prompted. Ensure your printer is connected to your network if it doesn't appear in the displayed list of network-connected printers.
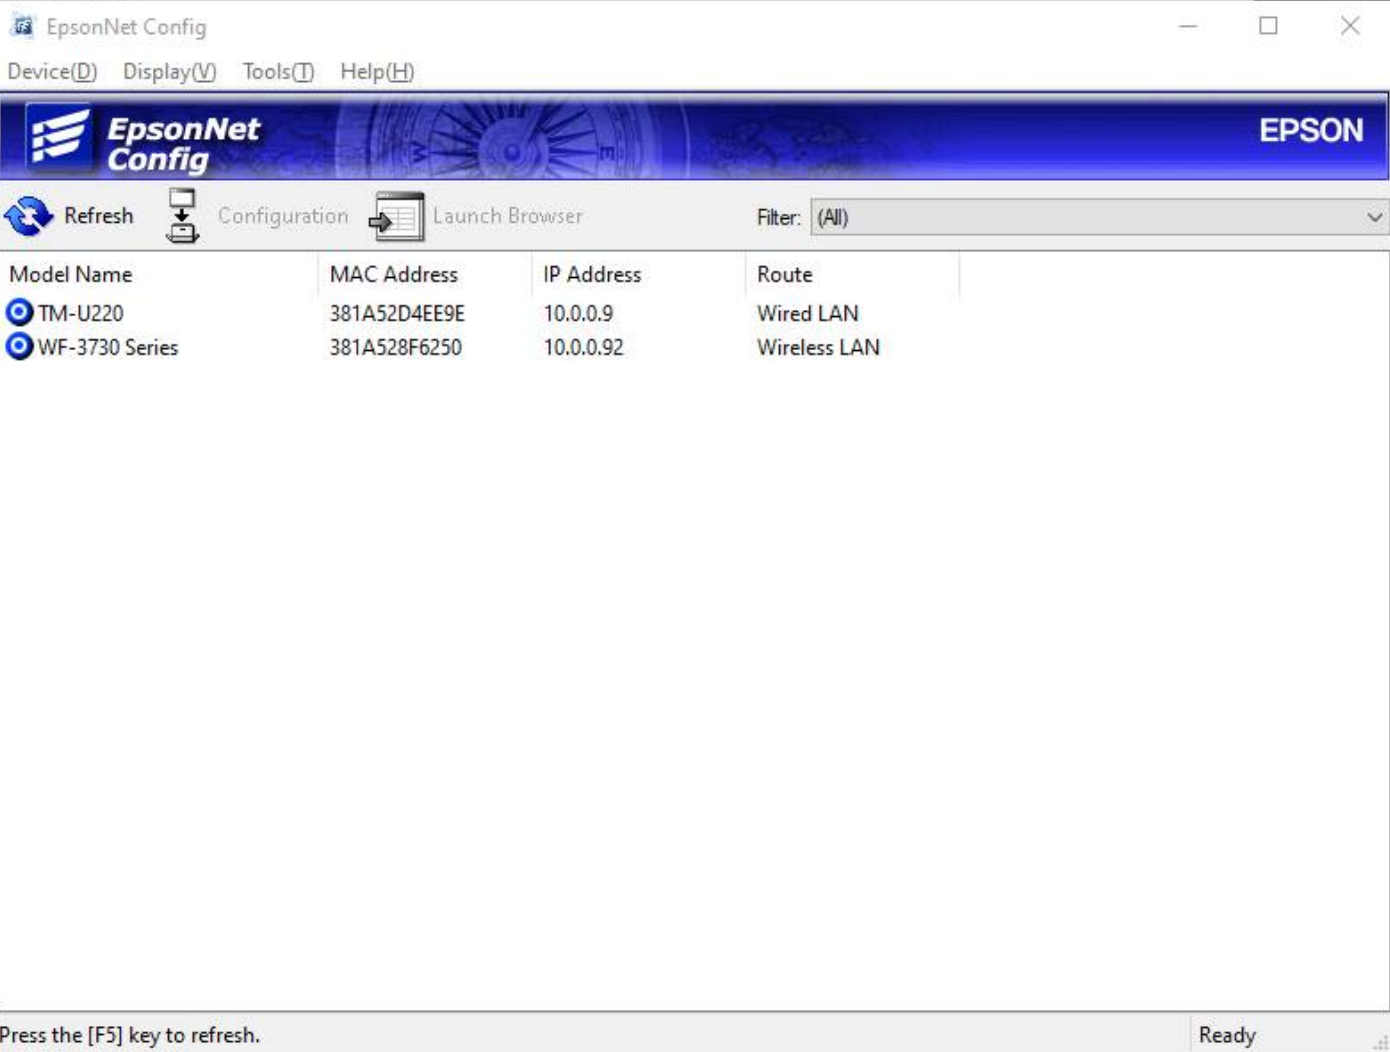
Step 4: Select your network printer and click "Configuration". Then, under TCP/IP configuration options, select "Basic". If an IP address is already populated, ensure "Manual" is selected before hitting "Transmit". If no IP address is displayed, set the IP address assignment to "Automatic" and transmit, then revert to "Manual".
Installing Advanced Printer Drivers
Step 5: Extract and open the Advanced Printer Drivers application.
Step 6: Follow the installation prompts until you reach a screen with an "Add" button. Click this button to proceed.
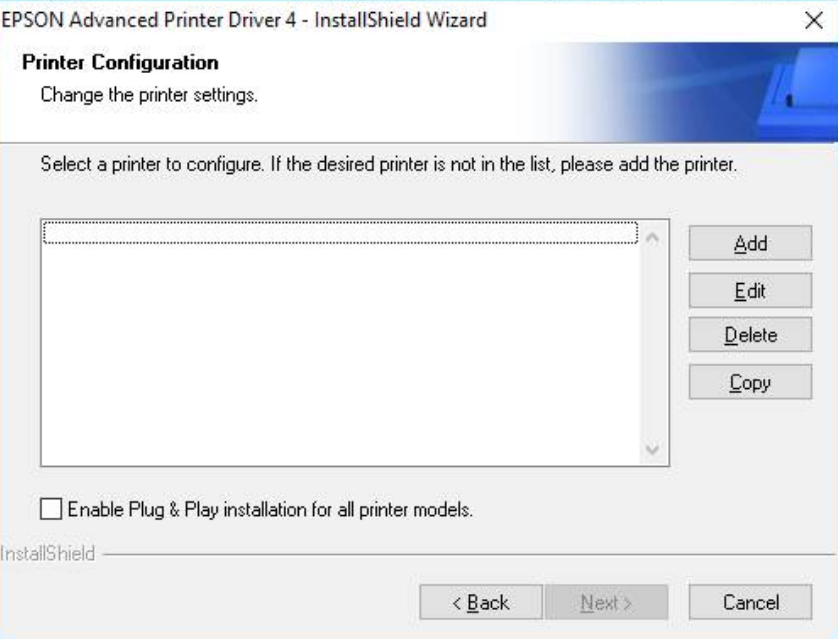
Step 7: Specify the printer model as U220. Leave the printer name as default or add a custom name if it is to be used as a kitchen/bar printer, following your settings in Club Caddie under departments -> printer options. For network printers, select "Ethernet Port" as the port type.
Step 8: Continue through the next screens until the installation complete message is displayed.
Testing the Printer
Step 9: In Windows "Printers and Scanners" settings, your new Epson Kitchen printer should now be listed. Test the printer by selecting a test print from the Windows print queue. Further testing within Club Caddie can be done by adding a food item from a department mapped to the kitchen printer and pressing "Send" in the register.
Related Articles
Setup - Epson TM-m30II (LAN) receipt printer
Article Contents: This article provides instructions on setting up and installing the Epson TM-m30II (LAN) receipt printer for use with the Club Caddie system. It covers the requirements, where to purchase the printer, how to connect it, insert ...Downloading and installing the Epson driver for Windows
Article Contents: Downloading and installing the Epson driver for Windows. Step 1: Download the latest printer drivers. This is specialized software that helps the printer run correctly on your computer. To download this, go to Epson's website and ...Epson TM-20 Receipt Printer Troubleshooting and FAQs
Article Contents: This article provides troubleshooting tips for the Epson TM-T20ii thermal receipt printer, addressing issues such as the printer not printing receipts, being offline, or not connecting to the cash drawer. If you're having issues ...Setup - Epson TM-m30II (Bluetooth) receipt printer
Article Contents: Model number: TM-m30II USB/ETH/BT (C31CJ27212) Requirements: To use this hardware with your Club Caddie system, you need to meet the following requirements: Where to buy the Epson TM-m30II receipt printer: The Epson TM-m30II receipt ...How do I set a default printer?
Article Contents: Club Caddie utilizes the default printer for standard receipt print jobs such as transaction receipts and not Kitchen and Bar print jobs. Step-By-Step: Step 1: To choose a default printer, select the Start button and then Settings. ...