Settings - Rack Rate Management
Article Contents :
This article provides step-by-step instructions on how to set up Rack Rates.
 These are rates that are typically used for customers (public rate). - For members, utilize Class Rate Management.
Step-By-Step
These are rates that are typically used for customers (public rate). - For members, utilize Class Rate Management.
Step 1: Click on the Gear Wheel Icon on the top right corner of the screen for Settings. Then, click on Rack Rate Management on the left-hand-side menu.
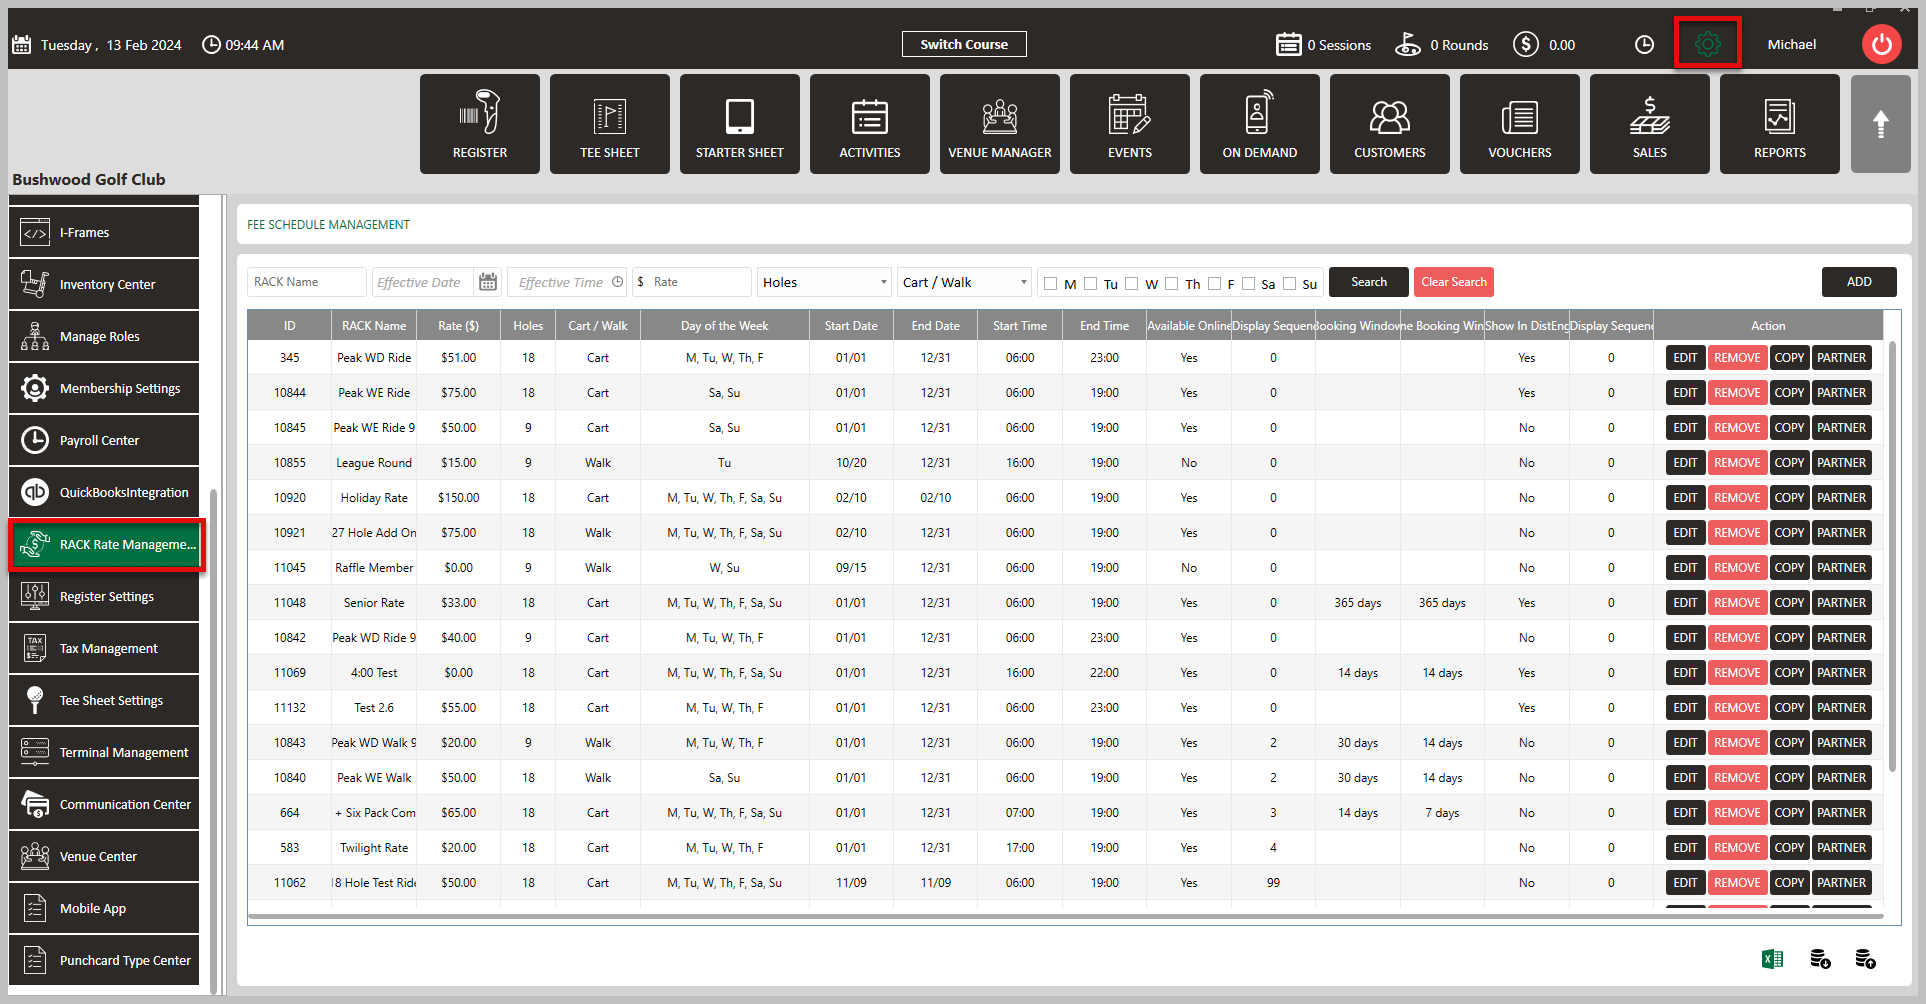
Step 2 : To add a new rack rate, click the "ADD" button on the right hand side of the screen. This will generate a Add Rack Rate View pop-up window.
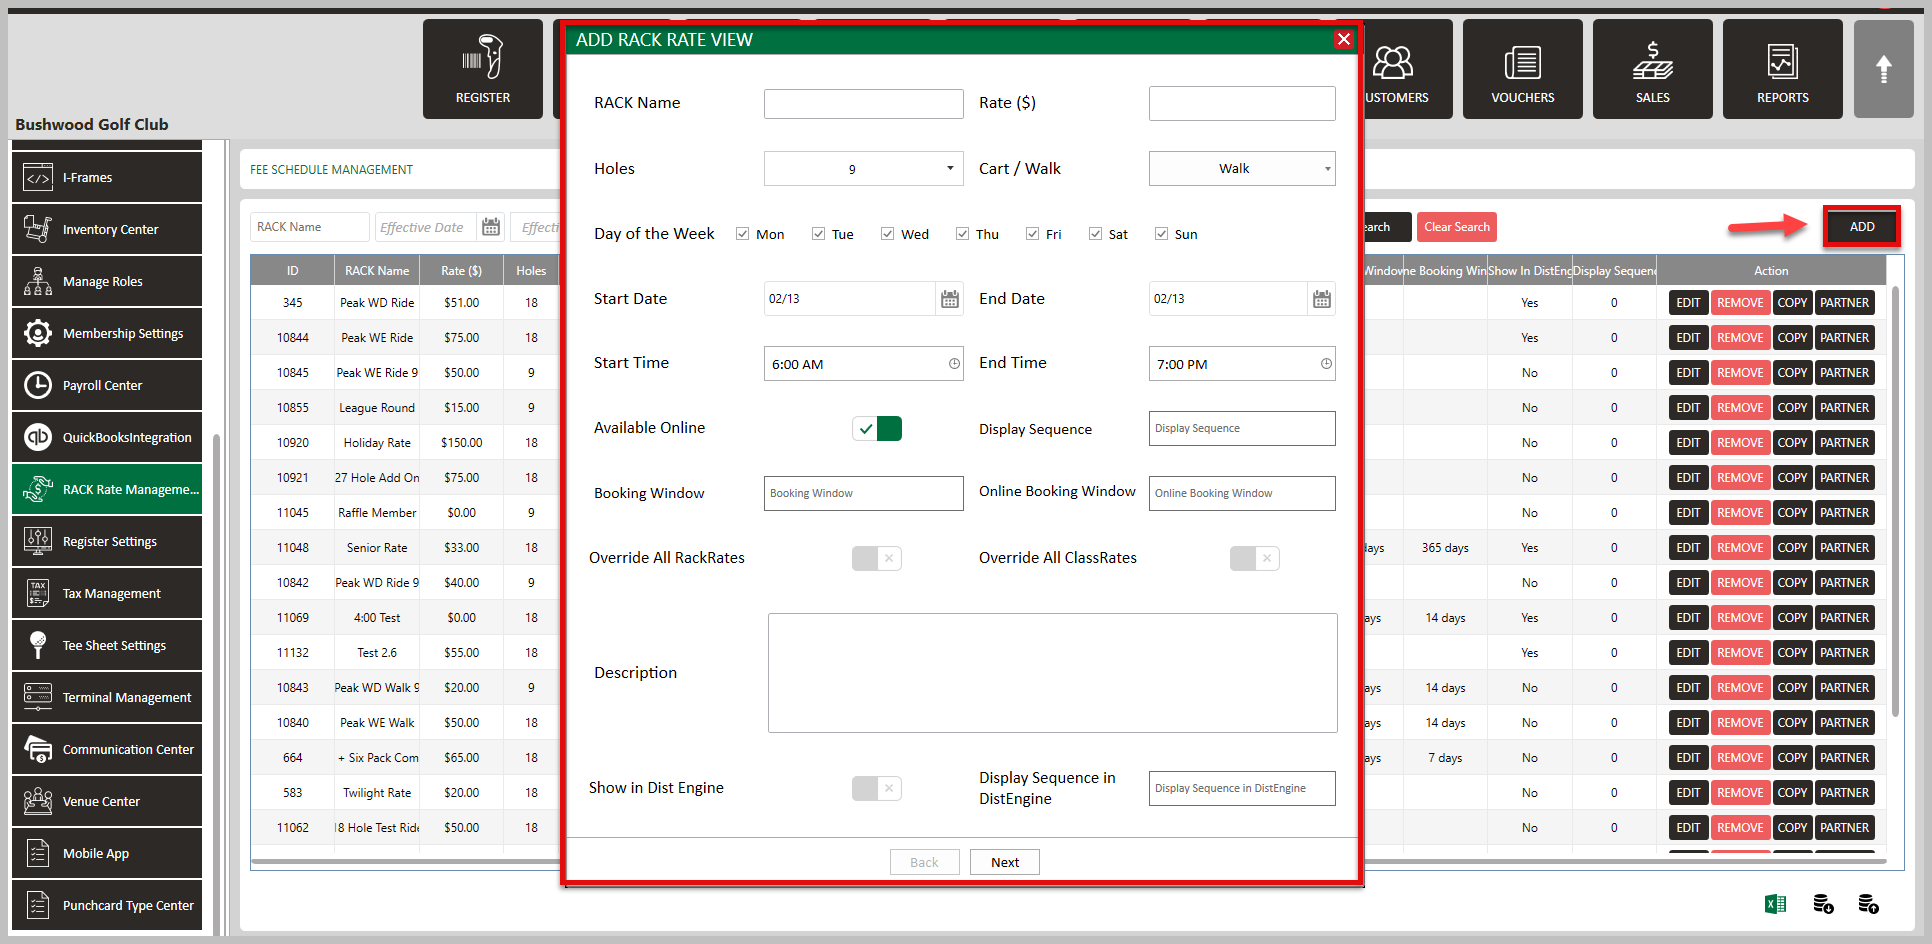
Step 3: In this window, enter all information you would like for this particular rate.
Rack Name: The name of the rate that will be displayed.
Rate $: The total cost (cart included if associated) of the rate. - Does not include tax.
Holes: Select 9 or 18 holes.
Day of the Week: Which days the rate is available. Ex. if its a weekday rate, you would only check boxes Monday-Friday and leave Saturday and Sunday blank.
Start and End Date: Date range of when you want the rate available.
Start and End Time: The time of day that you would like the rate available.
Available Online: Making this rate available for customers to select online.
Display Sequence: Where this rate displays in the dropdown when selecting a rate. Ex. if you enter "2", it will be the second option to select.
Booking Window: How far out this rate can be booked. Ex. If you enter "14", operators can book this rate 14 days in advance.
Online Booking Window: How far out this rate can be booked online. Ex. If you enter "10", golfers can book this rate 10 days in advance.
Override All RackRates: Check this box the make it the first option during the correct booking window.
Override All ClassRates: Check this box to make it priority over any Class Rates.
Show in Dist Engine: Toggle on if you would like this rate to display on the Distribution Engine option on the tee sheet.
Display Sequence in DistEngine: What place in order would you like this rate to display.
When information is all entered, click Next.
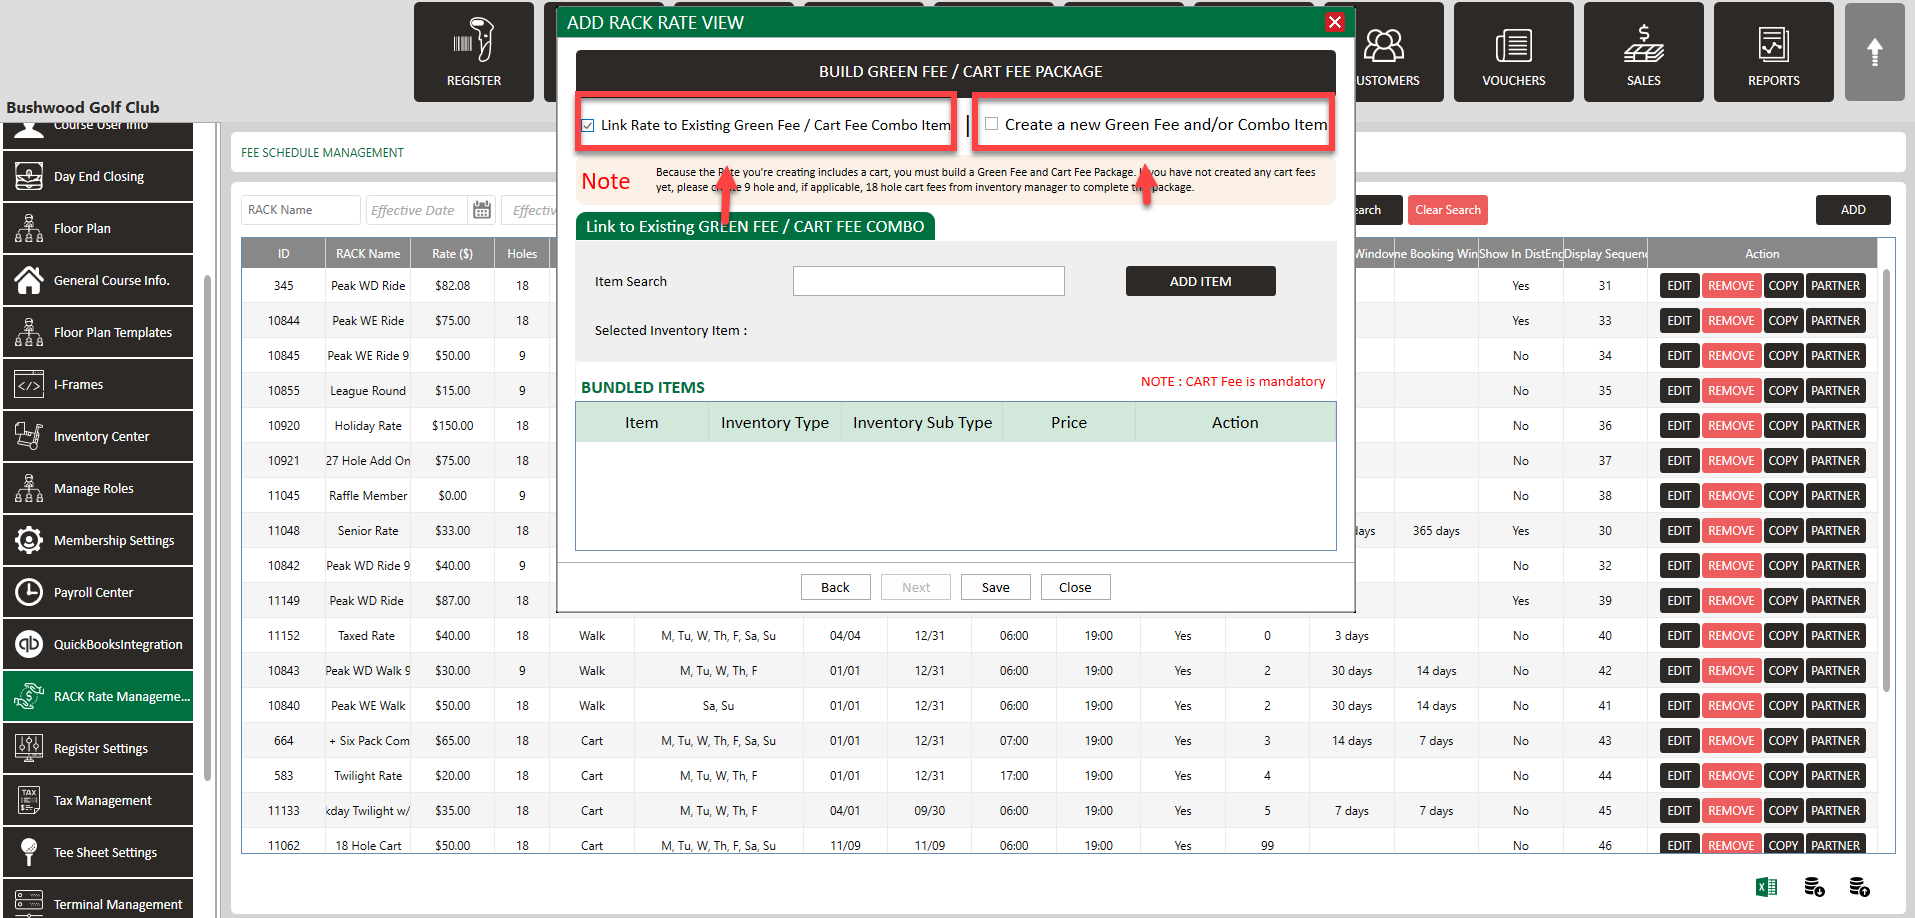
Step 4: On the next page, you will see two options on the top to select:
- Link Rate to Existing Green Fee / Cart Fee Combo Item
- Create a new Green Fee and/or Combo Item.
Please see descriptions below for what option is best for you.
- Link Rate to Existing Green Fee / Cart Fee Combo Item
- Create a new Green Fee and/or Combo Item.
Please see descriptions below for what option is best for you.
- Link Rate to Existing Green Fee / Cart Fee Item:
You are attaching your new rate to an existing inventory combo item ex. "Weekday Twilight w/ Cart Combo". Your new rate will be available to book, however in your records it will count towards the Twilight Rate Combo and whatever greens fee and cart fee are attached to that combo.
- Create a new Green Fee and/or Combo Item:
This option is the more common as you are creating a new combo item (greens fee and cart). You are creating your new rate option, but then after you select this option, you will have the choice to either Create New Green Fee as Inventory Item or Link New Rate to Existing Green Fee Item (most common). With either choice you are creating a new combo in your inventory, but you have the option to either tie the greens fee part of the combo to another greens fee or create an entire new greens fee.
Step 5: To utilize the option Link Rate to Existing Green Fee / Cart Fee Item:
Search for the rate by typing in the Item Search box, click Add Item, then Save. Your new rate will then be available and listed in the Rack Rate Management section. If you wish to use the other option, skip step 5 and proceed to step 6.
Search for the rate by typing in the Item Search box, click Add Item, then Save. Your new rate will then be available and listed in the Rack Rate Management section. If you wish to use the other option, skip step 5 and proceed to step 6.
Step 6: To utilize the option Create a new Green Fee and/or Combo Item:
First, you have the option under Build / Title Green Fee to either Link New Rate to Existing Green Fee Item (most common) or Create New Greens Fee as Inventory Item.
If you are wanting to create a new greens fee item, it is suggested to create the greens fee rate in your Inventory Center first. For more information on how to create an inventory item, please CLICK HERE.
Link New Rate to Existing Green Fee Item: Start typing in the box of the existing greens fee and a list will populate for you to choose from. Select the rate, then click Add Item. This item will drop down below to Bundled Items.
Create New Greens Fee as Inventory Item: Select that box and the rate name will automatically populate and will be greyed out as it will be titled by the name you entered for the rate on the first page. Select Add Item, and proceed to step 7.
Step 7: If the rate is Walking, then click Save. If this rate will include a cart, add a cart fee under Add Cart to Bundle. To do so, click in the box and start typing for ex. "cart". Your cart rates will then populate and you can select which cart fee you wish to include, then click Add Item. The cart fee will then drop down below to be bundled with the greens fee. Then, click Save to add this rate.
Step 8: Find this rate in your list in Rack Rate Management.
Please note that if you have set a Floor Price in your inventory setup for a greens fee or cart fee item, you will not be able to create a Rack Rate below that price.
Related Articles
Settings - Class Rate Management
Article Contents : This article provides step-by-step instructions on how to set up Class Rates. These are rates that are typically used for members. - For public rates, utilize Rack Rate Management. Step-By-Step Step 1: Click on the Gear Wheel Icon ...How to Add Rack Rates
Article Contents: This article shows how to Add rack rates to tee sheet Please see the attached Guides for a step-by-step walkthrough on how to create a Rate (PDF and Video) Step-By-Step: Step 1: Click on "Settings". Step 2: Click on "Rack Rate ...Add Description for a Rack Rate
Article Contents: This is a step by step guide on how to add a description to a Rack Rate. Step by Step Guide: Step 1: Navigate to Settings within Club Caddie. Then, select Rack Rate Management from the left hand side menu. Step 2: Click Edit on a ...Settings : Rack Rate Management : Sequencing Rack Rates for the Tee Times.
Article Contents: This article contains step-by-step instructions on how to alter the sequence of rack rates for tee times in settings. Step-By-Step: Step 1: Click the Gear Wheel icon located in the top right corner of the screen. Step 2: From the ...Settings – Class Management
Article Contents: This is a step-by-step guide on how to create a new class or edit an existing class. Step-By-Step: Step 1: Click on the Gear Wheel icon on the top-right corner of the screen. Then click on Class Management from the left-side menu. ...