Settings - Register Settings - Default Print Setting
Article Contents:
This article gives step-by-step instructions on how to adjust the default print settings.
This article gives step-by-step instructions on how to adjust the default print settings.
Step-by-Step:
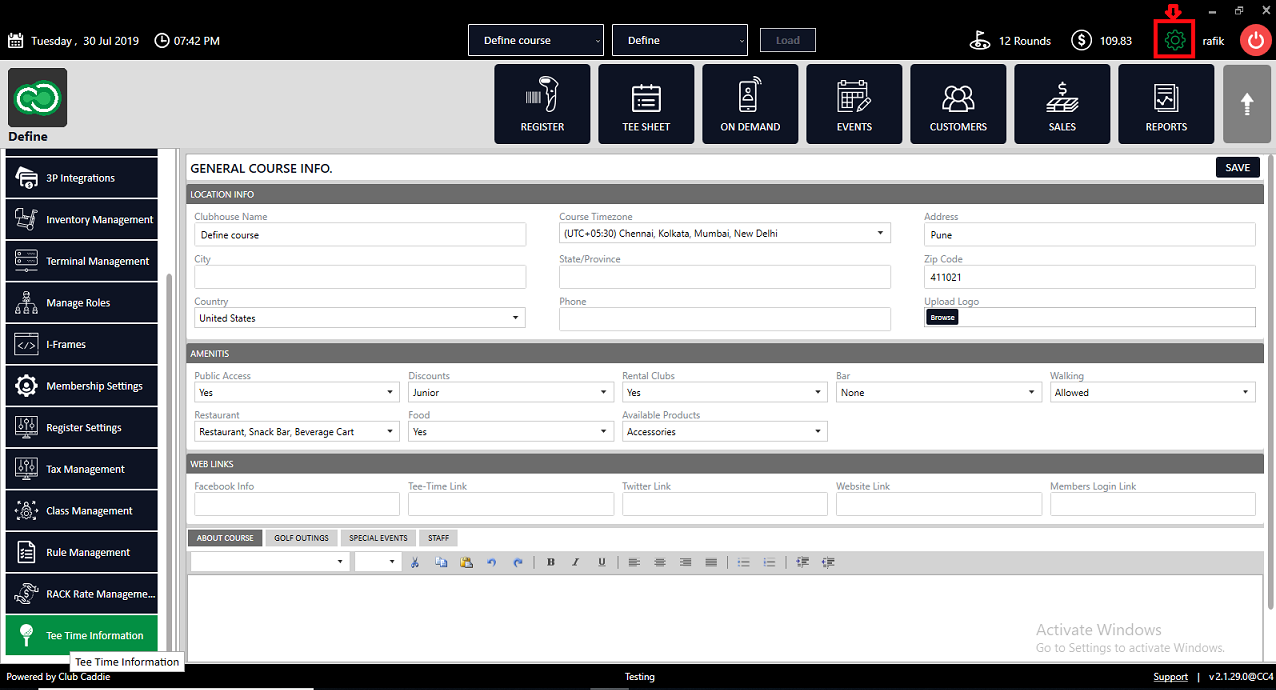
Step 1: Click on the Gear Wheel icon on the top right corner of the screen.
a
Step 2: Click on Register Settings from the left-hand menu.
t
Step 3: Choose the Register tab out of the three tabs Register, Department, and Chart of Accounts. After that selection is made, check the Default Print Setting checkbox to enable the default print setting.
Video Guide
Related Articles
Settings - Register Settings - Default Department for Event Menu
Article Contents: This article gives step-by-step instructions on setting the default department in the event menu. Step-By-Step: Step 1: Click on the Gear Wheel icon on the top right corner of the screen. Step 2: Click on Register Settings in the ...Settings - Register Settings - Print Starter Receipts
Article Contents: This article contains step-by-step on how to print starter receipts. Step-By-Step: Step 1:- Click on the Gear Wheel icon from the top of the window. Step 2: Select the Register Settings from the left row of the window. Step 3: Under ...Settings - Register Settings - Print Tip Receipts
Article Contents: This guide shows how to toggle on tip receipts in your register. Step-By-Step: Step 1: Click on the "Settings" gear wheel icon on the top-right corner of the screen. Step 2: Click on "Register Settings" from the left-hand menu. ...Settings – Register Settings (Video 14:00)
Article Contents: This will show you how to navigate through your register settings, as well as providing a brief description on what each setting can do for you club. Video: The video covers essential features such as printing tip receipts, adding ...Settings - Register Settings - Per User Quick Menu Setting
Article Contents: This article gives step-by-step instructions on enabling or disabling the Per User Quick Menu setting from the REGISTER. Step-By-Step: Step 1: Click on the Gear Wheel icon in the top right corner of the screen. Step 2: Click ...