Settings - Register settings - Void Window setting/User Specific Void Windows
Article Contents:
This article contains a step-by-step instruction on how to set the void window setting and how to set User-specific Void Windows.
Step-by-Step:
Step 1: Click on the Gear wheel (Settings) Icon in the top right corner of Club Caddie.
Step 2: From the left hand menu, click on "Register Settings."
Step 3: Scroll down to the "Void Window" setting. The void window is based on days. Ex. 1 for 1 day.
The void window will need to be set in "days" and will allow you to void a transaction within that void window.
1) If the void window is set to 1 day, you'll be able to void transactions that occurred yesterday.
2) If the void window is set to 2 days, you'll be able to void transactions that occurred up to 2 days ago.
3) If there is nothing set in the void window, you will only be able to void transactions that occurred today or same day transactions.
User-specific Void Windows
Overview of the user-specific void window feature for transaction management
Step by Step: Step 1: Go to 'Settings', then 'Manage Roles', followed by 'Action', and then select 'Settings'. Enter the 'Void Window' section. 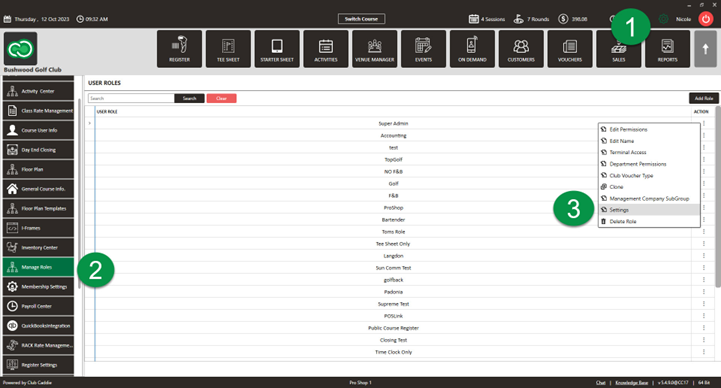
Step 2: Set custom time frames in days that employees are allowed to void transactions, which provides flexibility and minimizes potential misuse.

If no specific value is set, the system will revert to the global default found in the 'Register Settings'.

Note that the setting will remain as configured unless the 'void window' option is specifically activated.
Related Articles
Settings – Register Settings (Video 14:00)
Article Contents: This will show you how to navigate through your register settings, as well as providing a brief description on what each setting can do for you club. Video: The video covers essential features such as printing tip receipts, adding ...Settings - Register Settings - Per User Quick Menu Setting
Article Contents: This article gives step-by-step instructions on enabling or disabling the Per User Quick Menu setting from the REGISTER. Step-By-Step: Step 1: Click on the Gear Wheel icon in the top right corner of the screen. Step 2: Click ...Settings - Register Settings - Default Print Setting
Article Contents: This article gives step-by-step instructions on how to adjust the default print settings. Step-by-Step: Step 1: Click on the Gear Wheel icon on the top right corner of the screen. a Step 2: Click on Register Settings from the ...Settings - Course User Info – How to inactivate a user account
Article Contents: This article contains steps on how to inactivate a specific user account. Step- By- Step:- Step 1: Click on the Gear Wheel (Settings Icon) in the top right corner of Club Caddie. Step 2: Click on “Course User Info” from the left ...Settings – Course User Info
Article Contents: This article contains information on users of the courses information, how to add a new user, how to edit a user, and how to change the log of the user. Step-By-Step: Step 1: Click on the Gear Wheel Icon on the top right corner of ...