
Overview
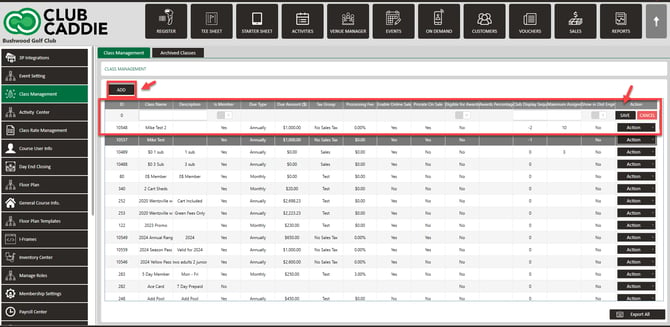
Class Management is where you create a class or edit an existing one. Each class is one row in the list, with its name, whether it is a member class, dues, tax group, processing fee and award settings. You add and edit in the row itself, not in a pop-up window.
Watch how to add a class and edit a class in Class Management in the Club Caddie Desktop app.
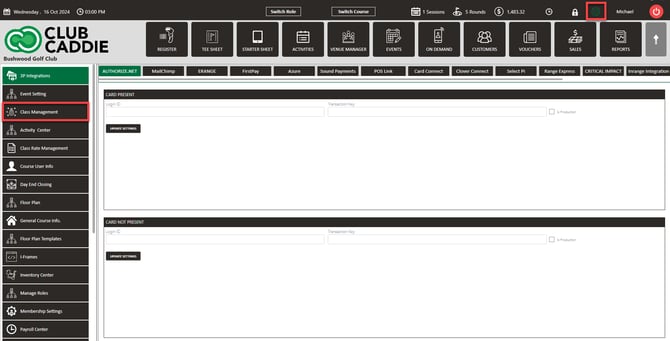
Open Class Management
- Click the gear icon in the top right corner, then click Class Management in the left menu. Two tabs show: Class Management and Archived Classes.
Add a class
- Click ADD. A new row opens at the top of the list with SAVE and CANCEL.
- Fill in the row. Each field is a column in the list:
- Class Name: the title of the class, for example "Weekday Senior".
- Description: how you would explain the class, for example "Can play anytime Mon-Fri and must be over 60 years of age".
- Is Member: turn on if the class is a member class.
- Due Type: how often dues are paid.
- Due Amount ($): the dues price for each Due Type period.
- Tax Group: the tax group that fits your facility.
- Processing Fee: a fee added when the member pays dues.
- Enable Online Sale: turn on if members can buy this class online.
- Prorate On Sale: turn on to prorate dues when a member starts partway through the period.
- Eligible for Awards: turn on so members of this class can earn award credit, which is added to their Award voucher.
- Eligible For Loyalty: turn on if the class earns loyalty points.
- Awards Percentage: the percentage of each dues payment added to the member's Award voucher as credit.
- Club Display Sequence: the order classes are displayed online.
- Maximum Assignments: how many customers can be assigned this class.
- Show in Dist Engine: turn on to show the class in the distribution engine.
- Click SAVE to finish, or CANCEL to close the row without saving.
Edit a class
- Find the class in the list. In its Action column, click the three dots, then click Edit Class. The row becomes editable in place.
- Change what you need, then click SAVE. Click CANCEL to leave the class as it was.
Use the Action menu
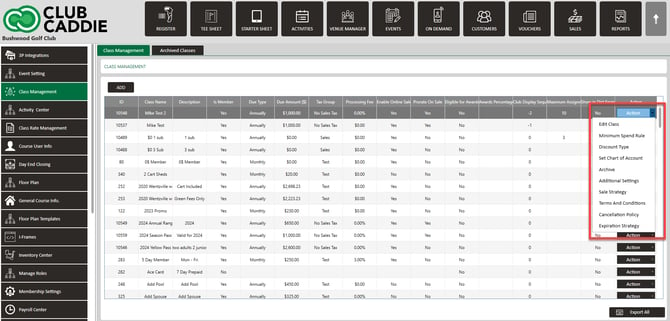
- In the Action column of the class, click the three dots. The menu has these options:
- Edit Class: edit the class.
- Minimum Spend Rule: set a minimum spend rule for the class.
- Discount Type: set a discount rate for a department of your facility.
- Set Chart of Account: add the class to a Chart of Account.
- Archive: archive the class.
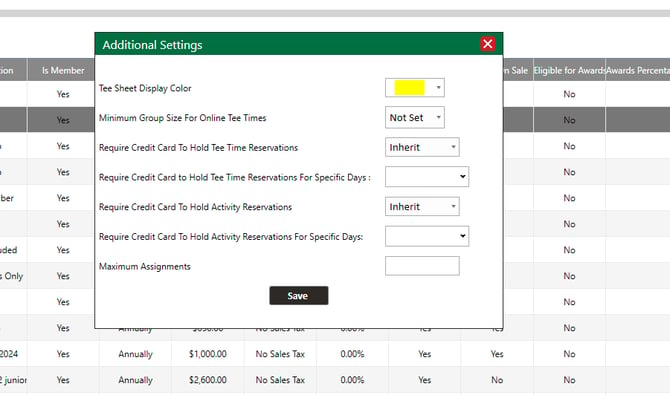
- Additional Settings: tee sheet display color, group size, required credit cards and more for the class.
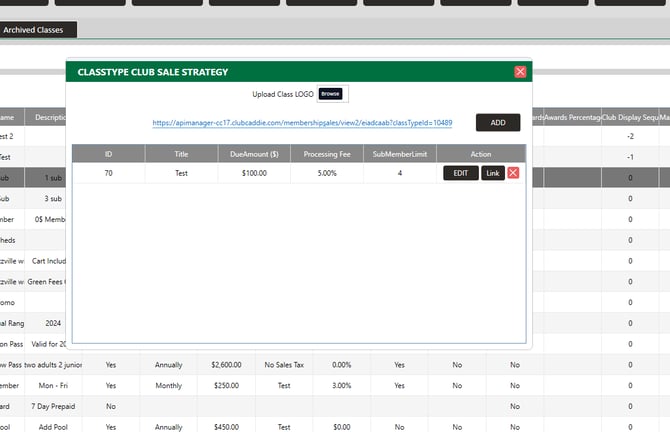
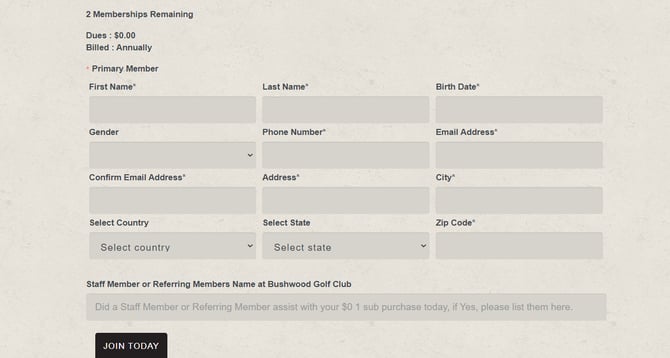
- Sale Strategy: create a link to sign up for the class.
- Terms And Conditions, Cancellation Policy, Expiration Strategy and Custom Billing Schedule are also in the menu.
Set additional settings and a sale strategy
- Open the Action menu and click Additional Settings to set options such as tee sheet display color and group size for the class.
- To create a sign-up link for the class, open the Action menu and click Sale Strategy.
Archive a class
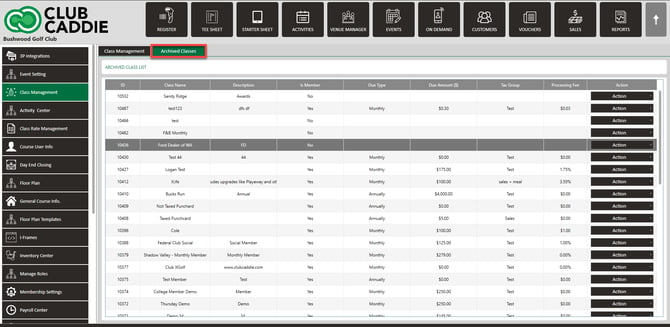
- Open the Action menu, click Archive and confirm. The class moves to the Archived Classes tab. A class that is still assigned to a member cannot be archived.
Common Questions
Where do I enter the details of a new class?
ADD opens a new row at the top of the list. Fill in the row and click SAVE.
Can I archive a class that is still assigned to a member?
No. A class cannot be archived while it is still active on a member profile.
Where do I find a class sign-up link?
Open the Action menu on the class and click Sale Strategy.