.png?width=200&height=89&name=CC%20%20fiserv.%20(3).png)
Step-By-Step:-
Step 1: Click on the Customer module along the top row.

Step 2: Select the Members list in the left-hand menu, then click on the action button and View/Edit for the member you wish to adjust


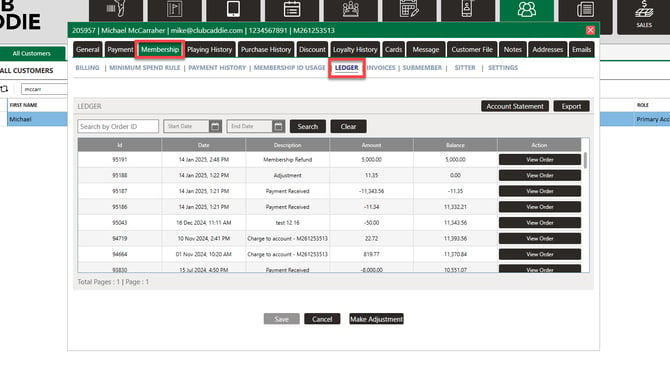
Step 3: Click on the Membership tab from the top navigation menu, then select Ledger.
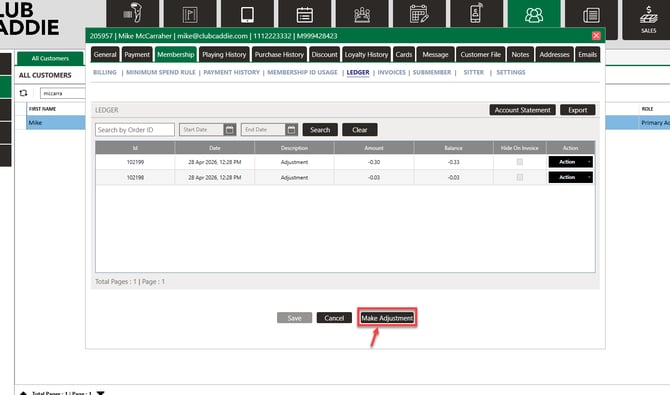
Step 4: Select Make Adjustment on the bottom of the window.
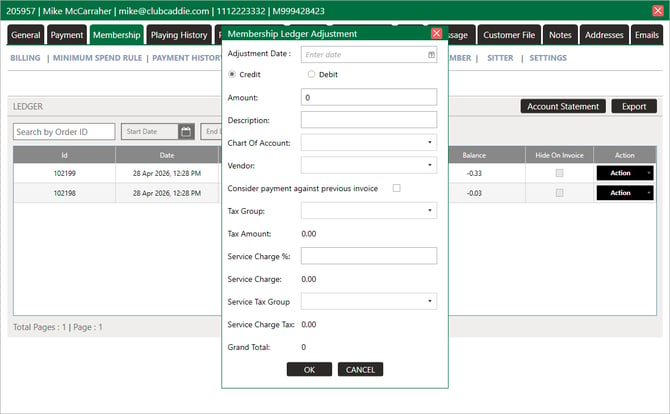
Step 5: Enter the fields and once its correct, click OK.
- Select Credit to reduce the members bill.
- Select Debit to increase the members bill.
- Then enter the three components: Sale Amount, Service Charge, and Tax. You can enter all three in a single adjustment operation instead of creating separate adjustments for each. Once all fields are correct, click OK.
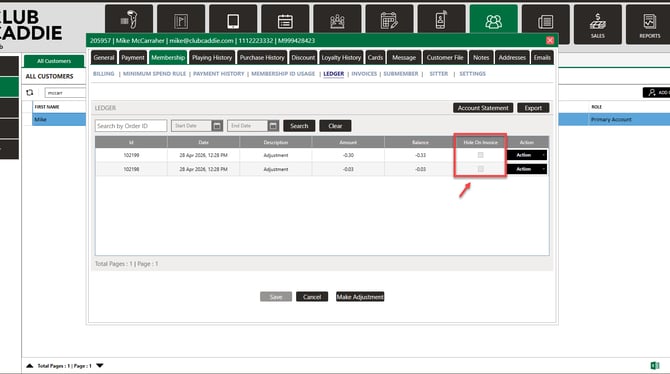
Step 6: If you would like to hide the ledger adjustment from the members invoice, toggle on Hide on Invoice next to the transaction.
TIP: Use this instead of asking accounting to hand-edit statements — the underlying record stays auditable, and the member experience stays clean.
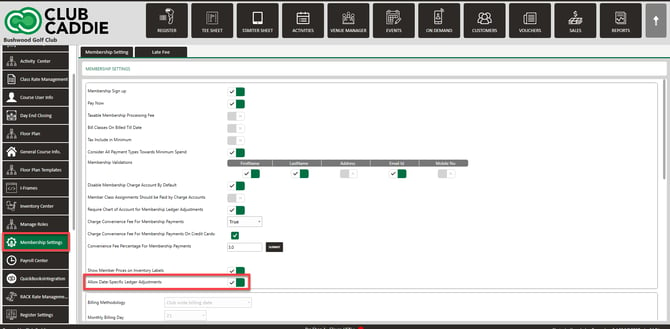
You can enter a past date to backdate the adjustment.
The backdate setting must be toggle on in Settings > Membership Settings.
If you use QuickBooks and there is a dated ledger adjustments prior to last QuickBooks sync, you will not be able to retro prior to the last QuickBook sync.
Please note: sub member membership ID charges will appear on the primary member ledger.