Clover Flex Device Setup
Article Contents:
This article contains a step by step guide on how to set up your Clover Flex device for Club Caddie.
Step by Step:
Step 1: Opening and Activating the Clover.
First, let’s open and activate your Clover device:
- Turn on Clover: Press the power button until the device turns on.
- Club Caddie App: Ensure the Club Caddie app is downloaded on your Clover device from the Clover App Market. If it is not, please contact Club Caddie.
Step 2: Updating the Clover
Interface.
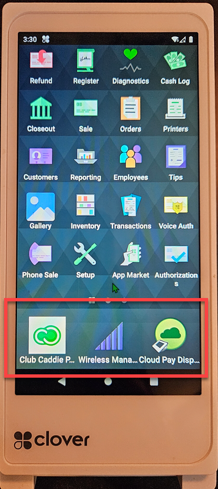
- Open your home screen
- Move Unnecessary Tabs: Hold down any app icon.
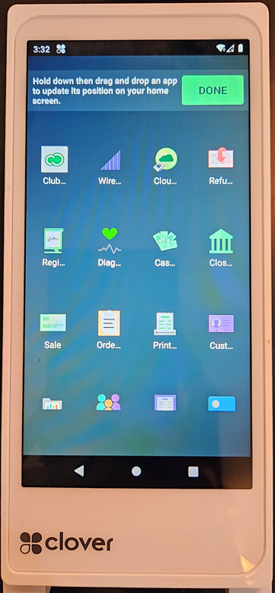
Step 3: Update App Position:
- Hold down the Club Caddie or Cloud Pay Display apps and drag them to the top of the screen. This will save to your favorites at the bottom of the screen for quick access.
Step 4: When Apps are in Place: Tap Done.
Step 5: Adjust Screen Timeout:
Locate and tap the Settings Icon > Tap Display > Tap Screen Timeout > Select your desired screen timeout.

- Open your home screen
- Move Unnecessary Tabs: Hold down any app icon.
Step 3: Update App Position:
- Hold down the Club Caddie or Cloud Pay Display apps and drag them to the top of the screen. This will save to your favorites at the bottom of the screen for quick access.
Step 4: When Apps are in Place: Tap Done.
Step 5: Adjust Screen Timeout:
Locate and tap the Settings Icon > Tap Display > Tap Screen Timeout > Select your desired screen timeout.
 Cloud Pay Display: Use the "Cloud Pay Display" to process card payments pushed from
the POS to run payment.
Cloud Pay Display: Use the "Cloud Pay Display" to process card payments pushed from
the POS to run payment.Note: To exit the Club Caddie Pay screen, you must touch all four corners of the screen.
Cloud Pay Display:
Club Caddie Software:
1. Setting Up Manage Roles Specific to Beverage Cart. - Ensure that the correct roles have
been created (IE, Beverage Cart, or Server Role).
Manage Roles: Navigate to "Manage Roles" in the settings.
Confirm the Role desired has been created: Example- Beverage Cart Role, Server, Bar Tender.
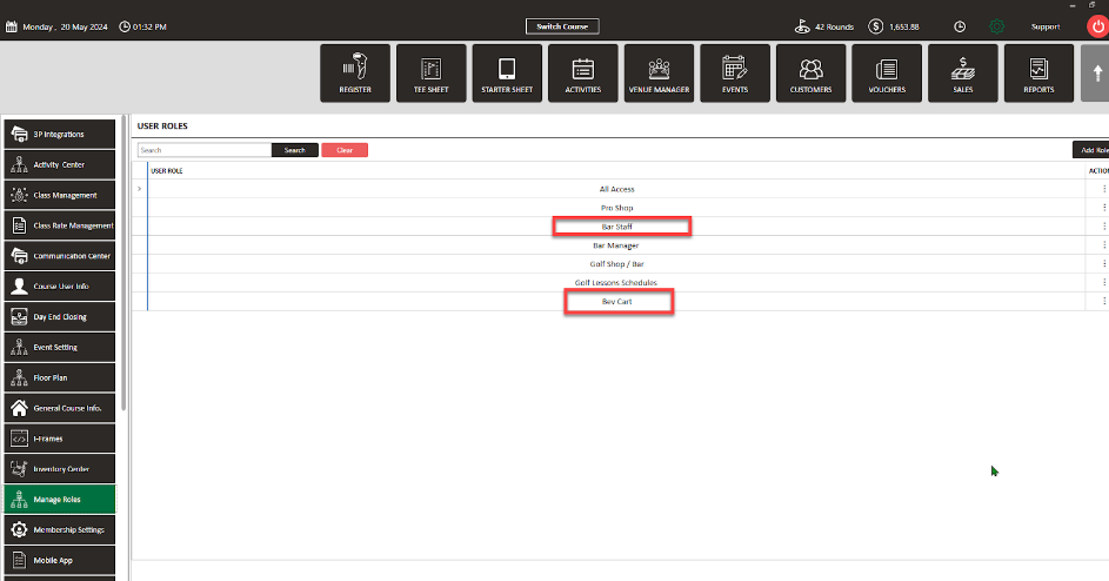
Confirm Permissions: Select the three dots and click Edit Permissions. Only role-related options should be checked. This limits access to what is needed, making navigating easier for your staff.
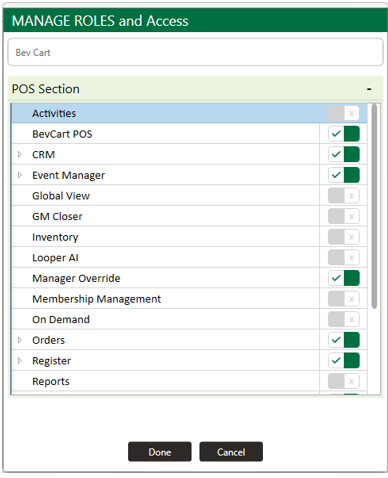
Manage Roles: Navigate to "Manage Roles" in the settings.
Confirm the Role desired has been created: Example- Beverage Cart Role, Server, Bar Tender.
Confirm Permissions: Select the three dots and click Edit Permissions. Only role-related options should be checked. This limits access to what is needed, making navigating easier for your staff.
2:
Terminal Management in Club Caddie:
For efficient terminal management:
Tip Suggestions - Ensure tip suggestions are enabled if applicable.
Enable Signature - Ensure the signature requirement is turned on for added security.
Tip Suggestions - Ensure tip suggestions are enabled if applicable.
Enable Signature - Ensure the signature requirement is turned on for added security.
For additional information about Clover – Tips management, click HERE. Related Articles
Using the Club Caddie App on the Clover Flex
Article Contents: This is a step by step guide on how to use the Club Caddie app on the Clover Flex. Step by Step: Step 1: Logging into the Club Caddie App. - Select Environment: Open the Club Caddie app and select the appropriate environment. - ...Clover Connect OAuth v2 configuration
Article Content: This article step-by-step guidance for configuring oauth 2.0 with clover connect to securely authorize and integrate the club's system with clover's payment platform. It ensures users can properly set up authentication, retrieve and ...3P Integrations - Clover Processing - Tip Amount Before the Card is Inserted
Article Contents: How to enter the tip before the credit card is inserted into the Clover device. The Clover gateway has modified the credit/debit transaction processing workflow. With this update, the Clover hardware prompts for the tip amount ...Settings - Register Settings - Display Sequence for Categories in the Register
Article Contents: This article contains step-by-step instructions on how to edit your display sequence for items in your register. Step-by-Step: Step 1: Click on the Gear Wheel icon on the top right corner of the screen. Then, click on Register ...Inventory Center - Create and Update combo Inventory.
Article Contents: This article gives step-by-step instructions on creating and updating combo inventory in your system. Step-By-Step: Step 1: Click on "Settings" then "Inventory Center". Step 2: To add a new item to your inventory, you need to click ...