How do I create a new terminal?
Article Contents:
In this article, we will walk through adding additional terminals to locations that you have set up.
In this article, we will walk through adding additional terminals to locations that you have set up.
Step-By-Step:
Step 1: Start by navigating to terminal management found within the settings module by clicking the gear icon (1) in the top right-hand corner and finding "Terminal Management" (2) from the left-hand navigation menu.
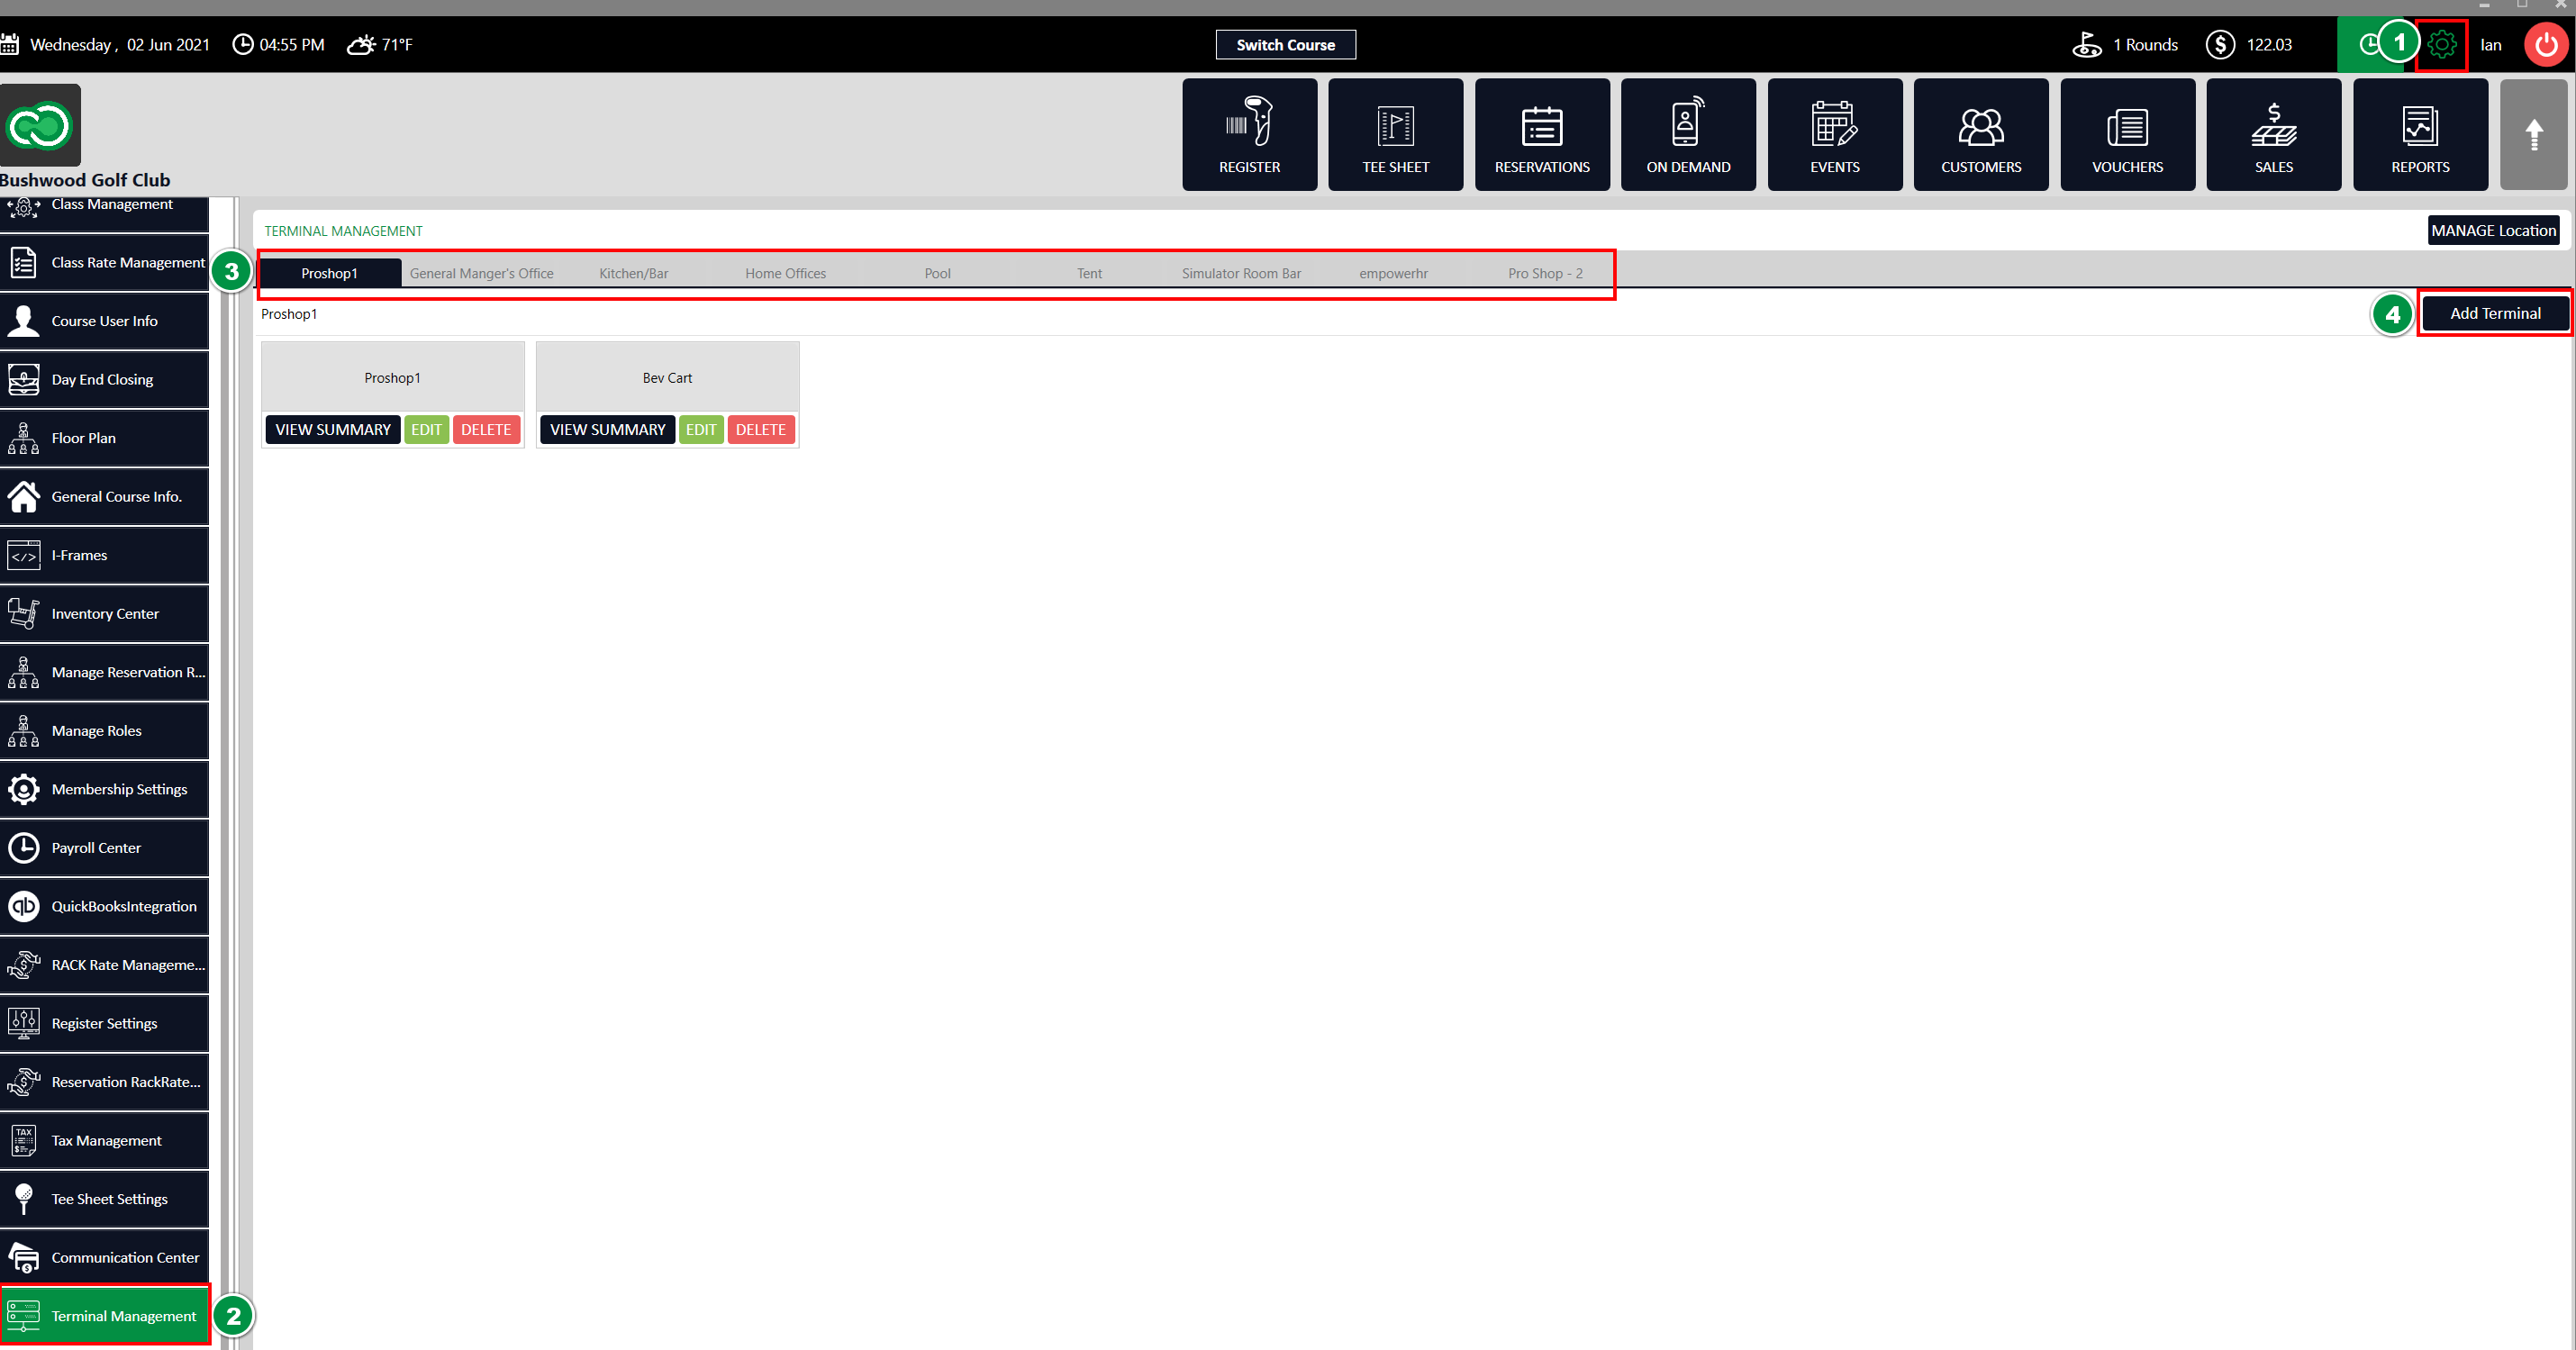
Step 2: Across the top of terminal management, you'll need to select the desired location where you'll be creating a new terminal (3).
Step 3: Using the "Add Terminal" button (4), you'll be presented with the terminal creation wizard.
Step 1: Start by navigating to terminal management found within the settings module by clicking the gear icon (1) in the top right-hand corner and finding "Terminal Management" (2) from the left-hand navigation menu.
Step 2: Across the top of terminal management, you'll need to select the desired location where you'll be creating a new terminal (3).
Step 3: Using the "Add Terminal" button (4), you'll be presented with the terminal creation wizard.
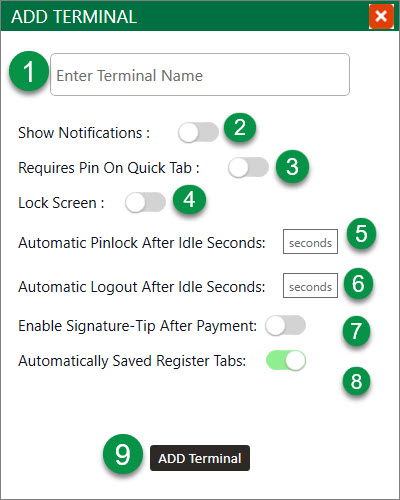
(1) You'll need to add the desired terminal name.(2) If you'll need to receive on-demand notifications to the terminal.(3) If the terminal will require an employee pin upon creation of a quick tab.(4) If the employee lock screen will be in use to display only orders tied to the currently logged-in employee. A lock icon in the top-right hand corner will be displayed to allow for quick switches.(5) The number of seconds the Automatic Pinlock feature turns on after idle. Leave blank if you do not wish to turn on(6) The number of seconds for Automatic Logout to trigger after idle. Leave blank if you do not wish to turn on(7) If you would like to enable a signature tip after payment has been made. Usually turned on for facilities that utilize Microsoft Surface Pro's for tableside service. Ex. the server could take the tablet to the table and ultimately have the customer swipe their card and sign/tip right on the device itself.(8)The Automatically Saved Register Tabs should ALWAYS be triggered on for all terminals to ensure tabs are automatically saved.
Step 4: Once you've filled out the above information, you can finalize the terminal creation by selecting "Add Terminal" (9).
Step 4: Once you've filled out the above information, you can finalize the terminal creation by selecting "Add Terminal" (9).
Relevant Articles:
Related Articles
How do I create a new location?
Article Contents: In this article, we will walk through creating a new location to house underlying terminals. Step-By-Step: Step 1: Start by navigating to terminal management found within the settings module by clicking the gear icon (1) in the top ...Settings - Class Rate Management
Article Contents : This article provides step-by-step instructions on how to set up Class Rates. These are rates that are typically used for members. - For public rates, utilize Rack Rate Management. Step-By-Step Step 1: Click on the Gear Wheel Icon ...Settings - Rack Rate Management
Article Contents : This article provides step-by-step instructions on how to set up Rack Rates. These are rates that are typically used for customers (public rate). - For members, utilize Class Rate Management. Step-By-Step Step 1: Click on the Gear ...Settings - Terminal Management - Configuring Receipt Printing Options
Article Contents: New settings have been added in Terminal Management to allow more control over printing customer and merchant receipt copies separately. This can help save on paper and printing costs. Step 1: Navigate to Settings, then click on ...Settings – Tax Management
Article Contents: This article contains information on the tax management settings. Settings> Tax Management > Edit> Select drop-down of Chart Of Accounts Step-By-Step: Step 1: Click on the Gear Wheel icon on the top right corner of the screen. Step ...