Settings – Class Management
Article Contents:
This is a step-by-step guide on how to create a new class or edit an existing class.
Step-By-Step:
Step 1: Click on the Gear Wheel icon on the top-right corner of the screen. Then click on Class Management from the left-side menu.
Step 3: Click the ADD button to create a new class and fill in all the information such as:
Class Name: The title of of class. Ex. "Weekday Senior"
Class Name: The title of of class. Ex. "Weekday Senior"
Description: How you would like to explain what the class is Ex. "Can play anytime Mon-Fri and must be over 60 years of age".
Is Member: If you would like this class to be a member (typically you would always toggle this on).
Due Type: How often you would like to have the member pay dues for this class; yearly, quarterly, or monthly.
Due Amount ($): The price the member will pay. That amount will then be charged to the member based on what you selected for "Due Type".
Tax Group: You have the option to select the exact tax group that fits your facility.
Processing Fee: Here you can enter a processing fee for when the member pays their dues. - This would be additional to your credit card fee if applicable.
Enable Online Sale: If you would like members to be able to purchase this class online.
Prorate on Sale: Being able to prorate the dues if starting mid month/year.
Eligible for Awards: If you would like the member to receive points for making the purchase of that particular class.
Prorate on Sale: Being able to prorate the dues if starting mid month/year.
Eligible for Awards: If you would like the member to receive points for making the purchase of that particular class.
Awards Percentage: The percentage or amount that you would like the member to receive in credit (awards).
Club Display Sequence: The order you would like the classes displayed when viewing online.
Maximum Assignment: How many customers can be assigned that particular class.
Once completed, click on the SAVE button to finalize.
Step 4: Click on the Action button to find the options below:
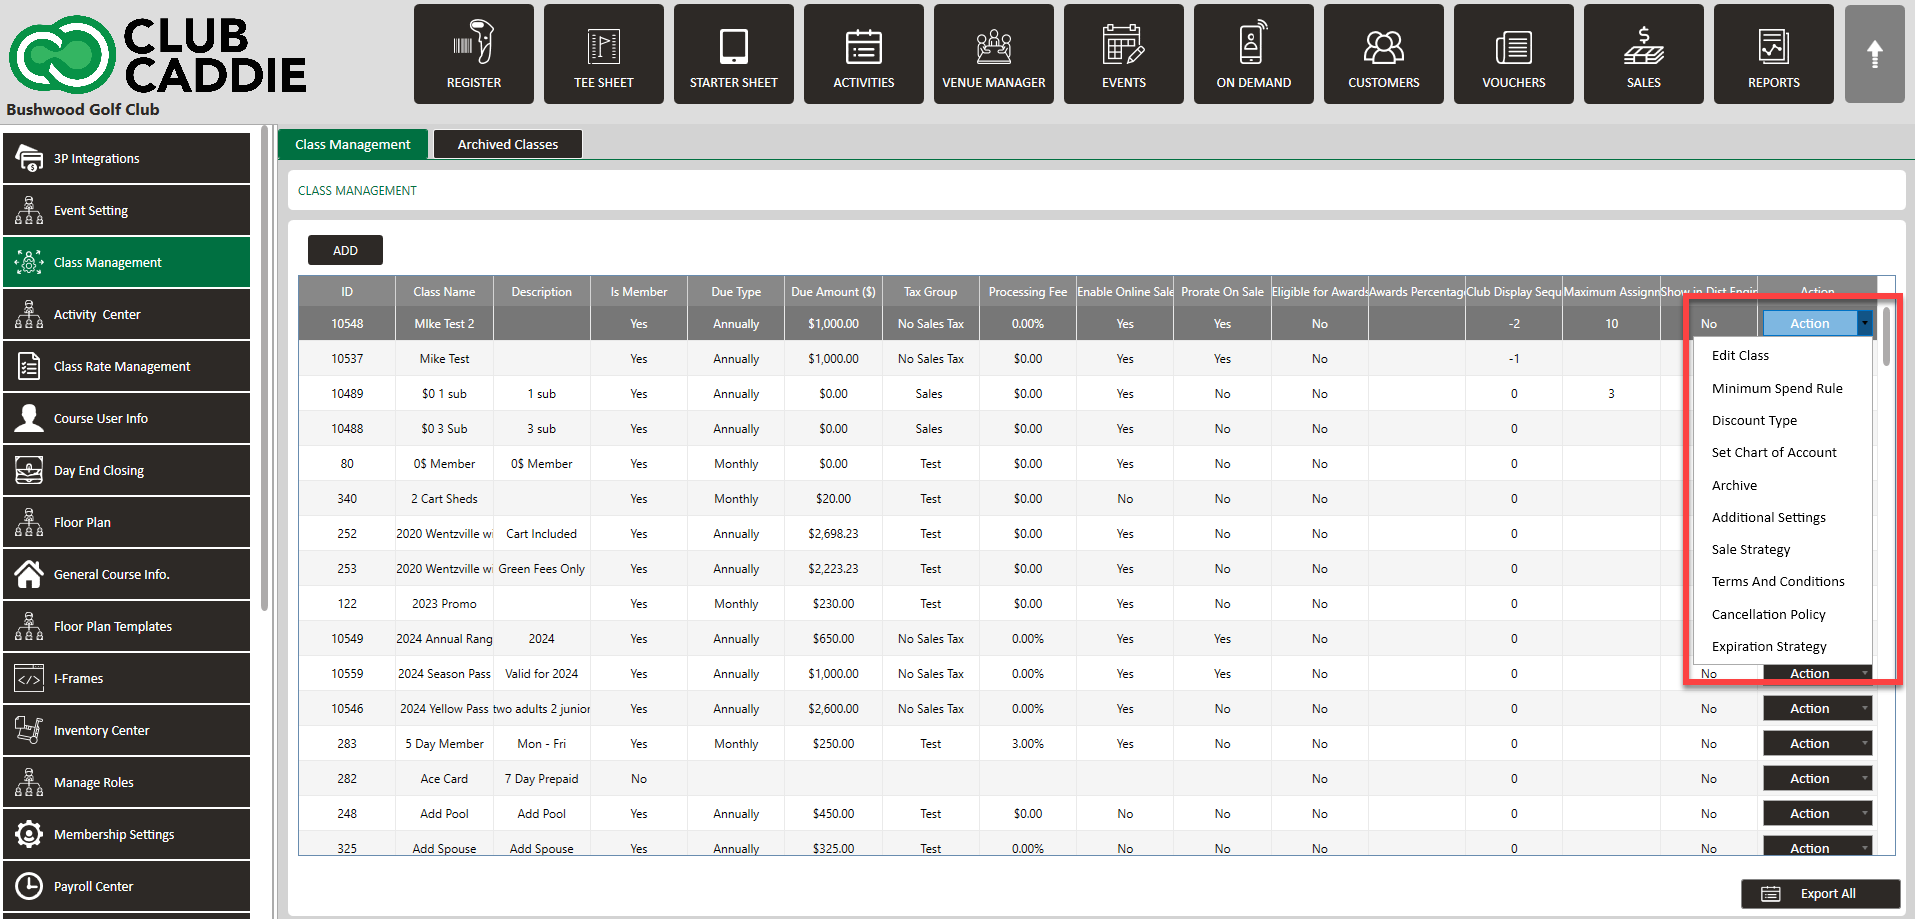
Edit Class - Used to edit a class.
Minimum spend rule - Used to set a minimum spend rule for a particular class.
Discount Type - Used to set a discount rate for a particular department of your facility.
Chart of Account - Used to add a class to a Charts of Account.
Archive - Used to archive a class.
Additional Settings: Here you can select settings for tee sheet display color, group size, required credit cards etc. all for the respected class.

Additional Settings: Here you can select settings for tee sheet display color, group size, required credit cards etc. all for the respected class.
Sale Strategy: Here is where you can create a link to sign up for the respected class.

If you archive a class, that class will appear in the Archived Classes.
Once a class has been assigned to a member that class can no longer be archived.
Related Articles
Settings - Class Rate Management
Article Contents : This article provides step-by-step instructions on how to set up Class Rates. These are rates that are typically used for members. - For public rates, utilize Rack Rate Management. Step-By-Step Step 1: Click on the Gear Wheel Icon ...Class Management - Minimum Group Size for Online Bookings
Article Contents: This is a step-by-step guide on how to set a minimum for group size for online bookings. Example: If you have a class called Platinum and would like to allow them to book as a single, you can enter 1. However, if you have a silver ...Membership - Online Membership Sales & Application Creation
Article Contents: Our latest update revolves around the introduction of new settings under Class Management, aimed at improving the online sale and signup experience for memberships. These settings include the creation of custom sale strategies, the ...Class Management - Online Prepayment Options By Class
Article Contents: There is an option to require prepayment for online Bookings. This enables operators to have more flexibility with their Customers/Members. Step by Step: Step 1: Navigate to the 'Settings' menu, select 'Class Management', and then ...Class Management - Tee Sheet Color-coding
Article Contents: This article provides guidance on color-coding Class Rates on the Tee Sheet for easy visual reference. Step by Step: Navigate to: Settings > Class Management > Action > Additional Settings > Tee Sheet Display Color Step 1: Navigate ...