.png?width=200&height=89&name=CC%20%20fiserv.%20(3).png)
Step-By-Step:
A default modifier can be set for an item at the time of the new item's creation. For an existing item, a modifier can be set directly from the Register.
A: For a new Item:
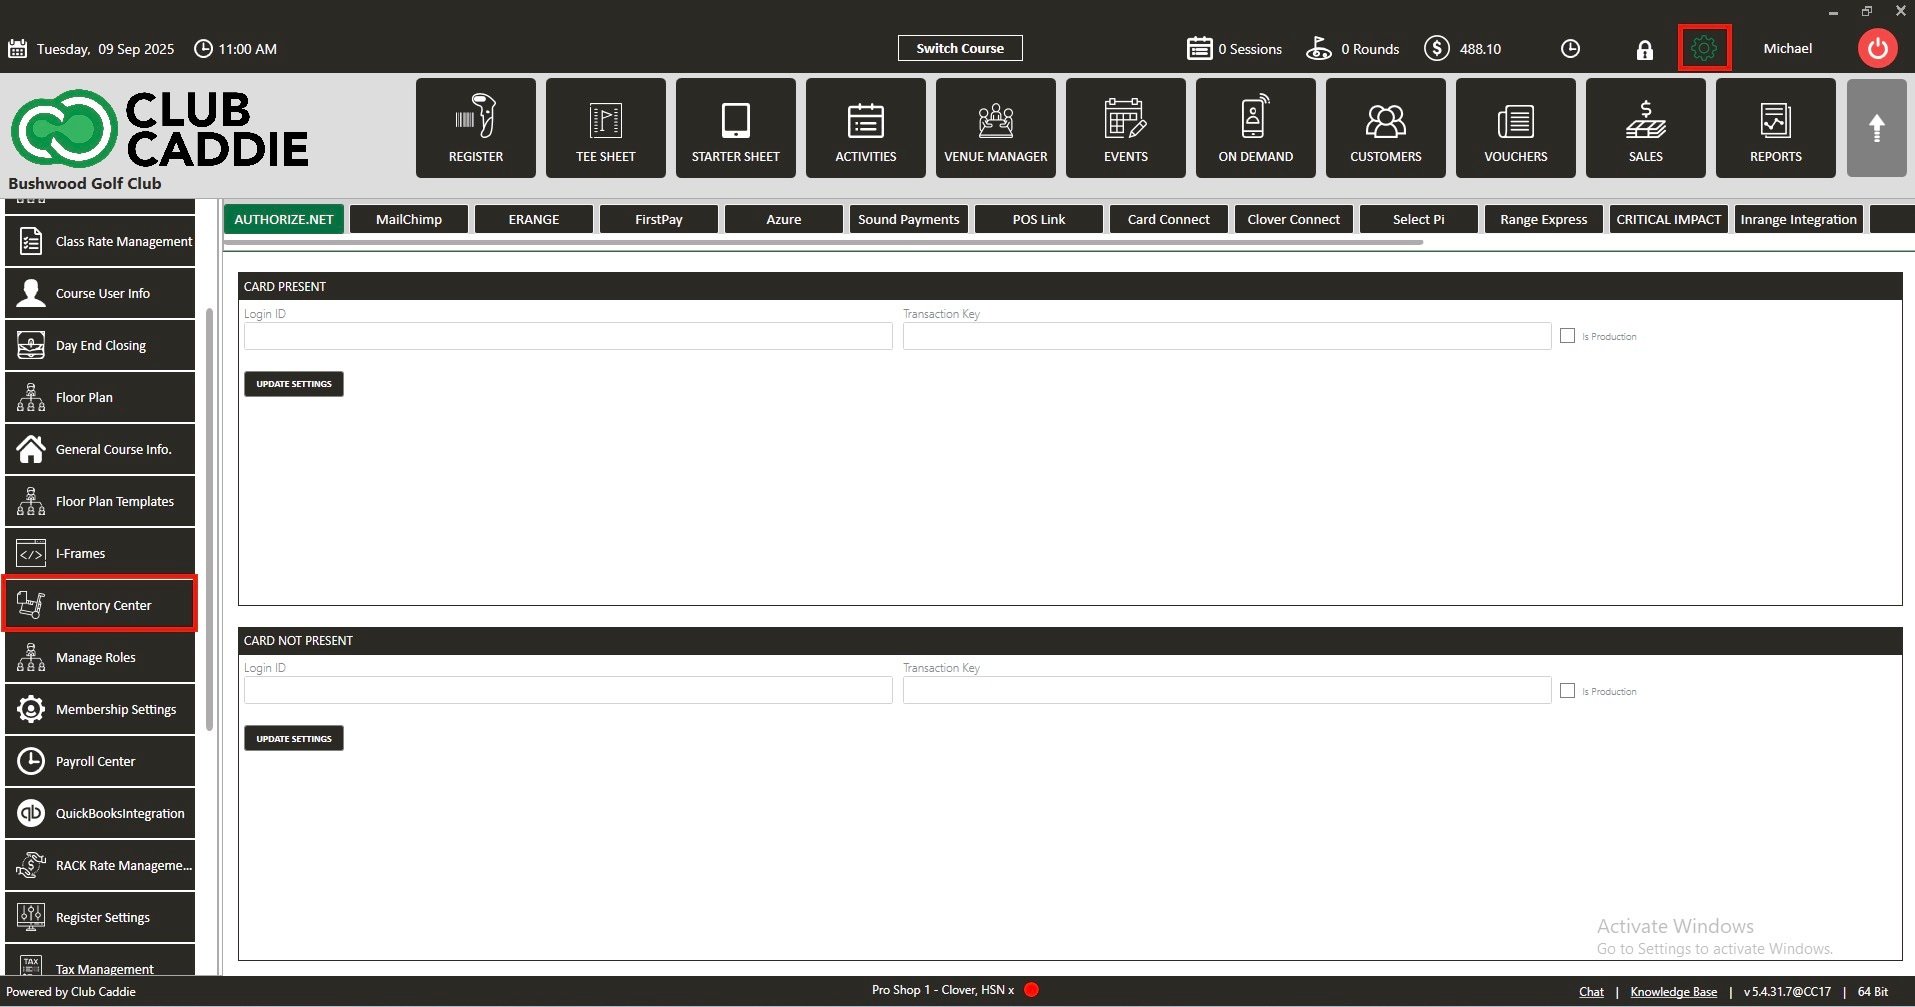
Step 1: Click on the Gear Wheel icon on the top right corner of the screen. Select the Inventory Centre tab from the left-hand menu.
Step 1: Click on the Gear Wheel icon on the top right corner of the screen. Select the Inventory Centre tab from the left-hand menu.
Step 2: Click ADD ITEM from the INVENTORY MANAGEMENT window. The system will open a window to add inventory.

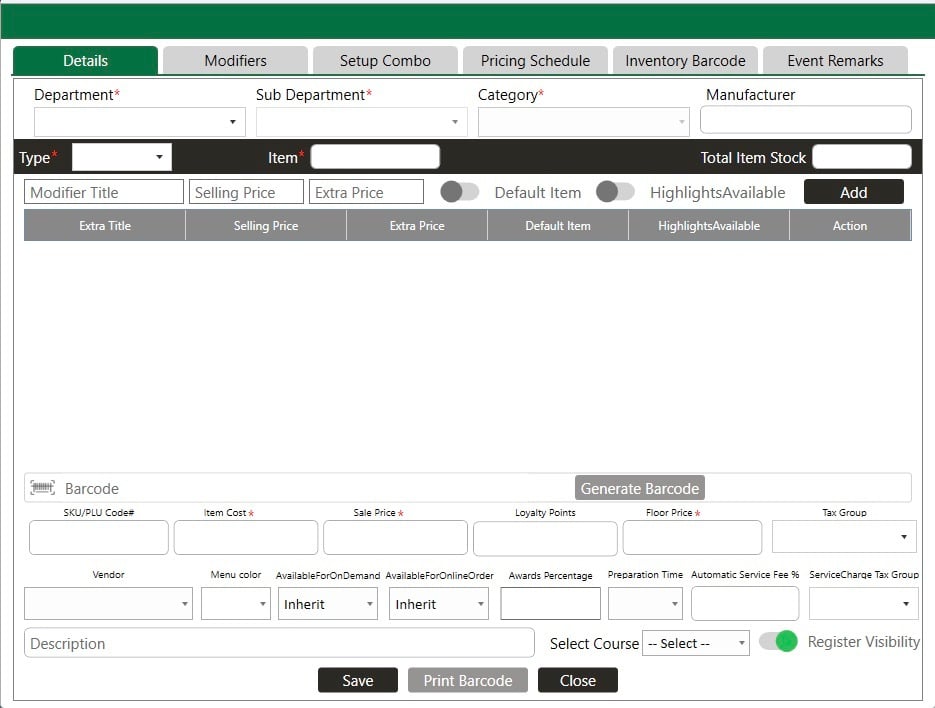
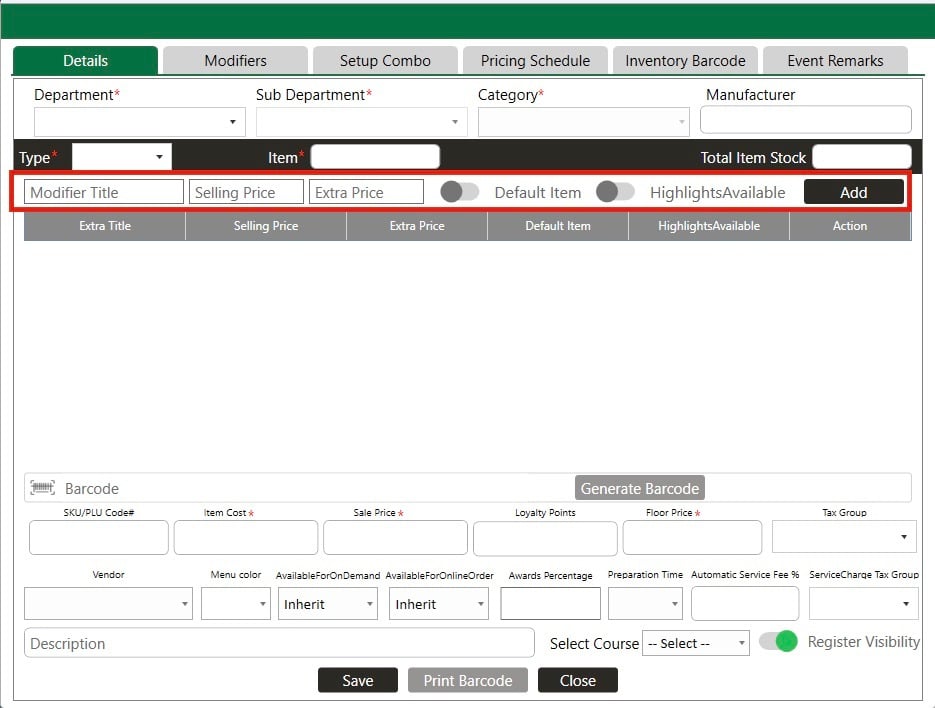
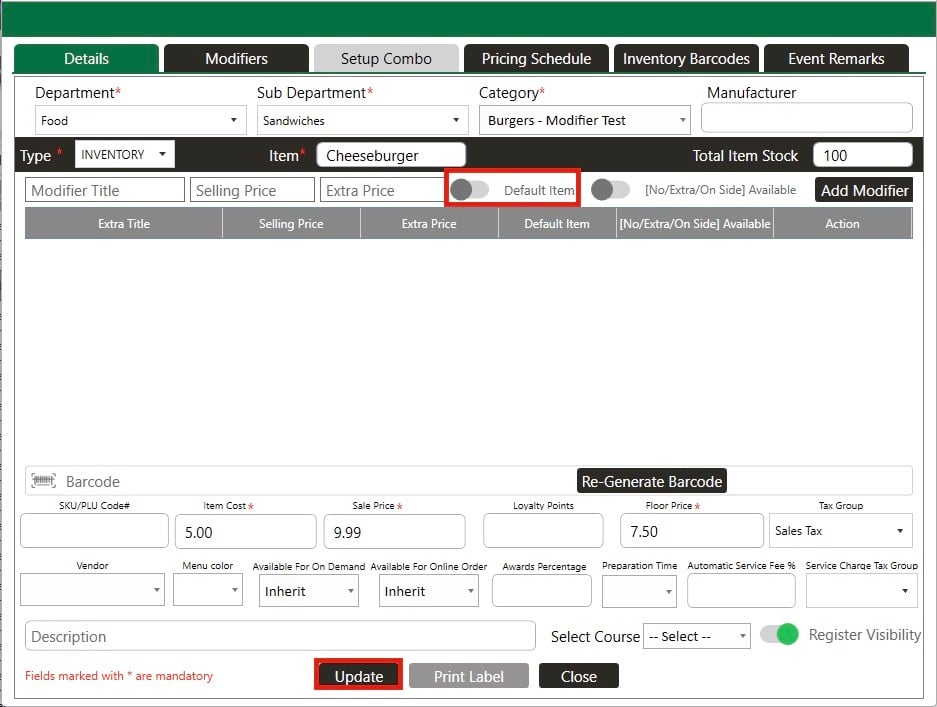
Step 3: Fill in all the item details. Add a modifier by clicking Add Modifier. To make the modifier default, toggle ON and toggle OFF to disable it from the Default Item column.
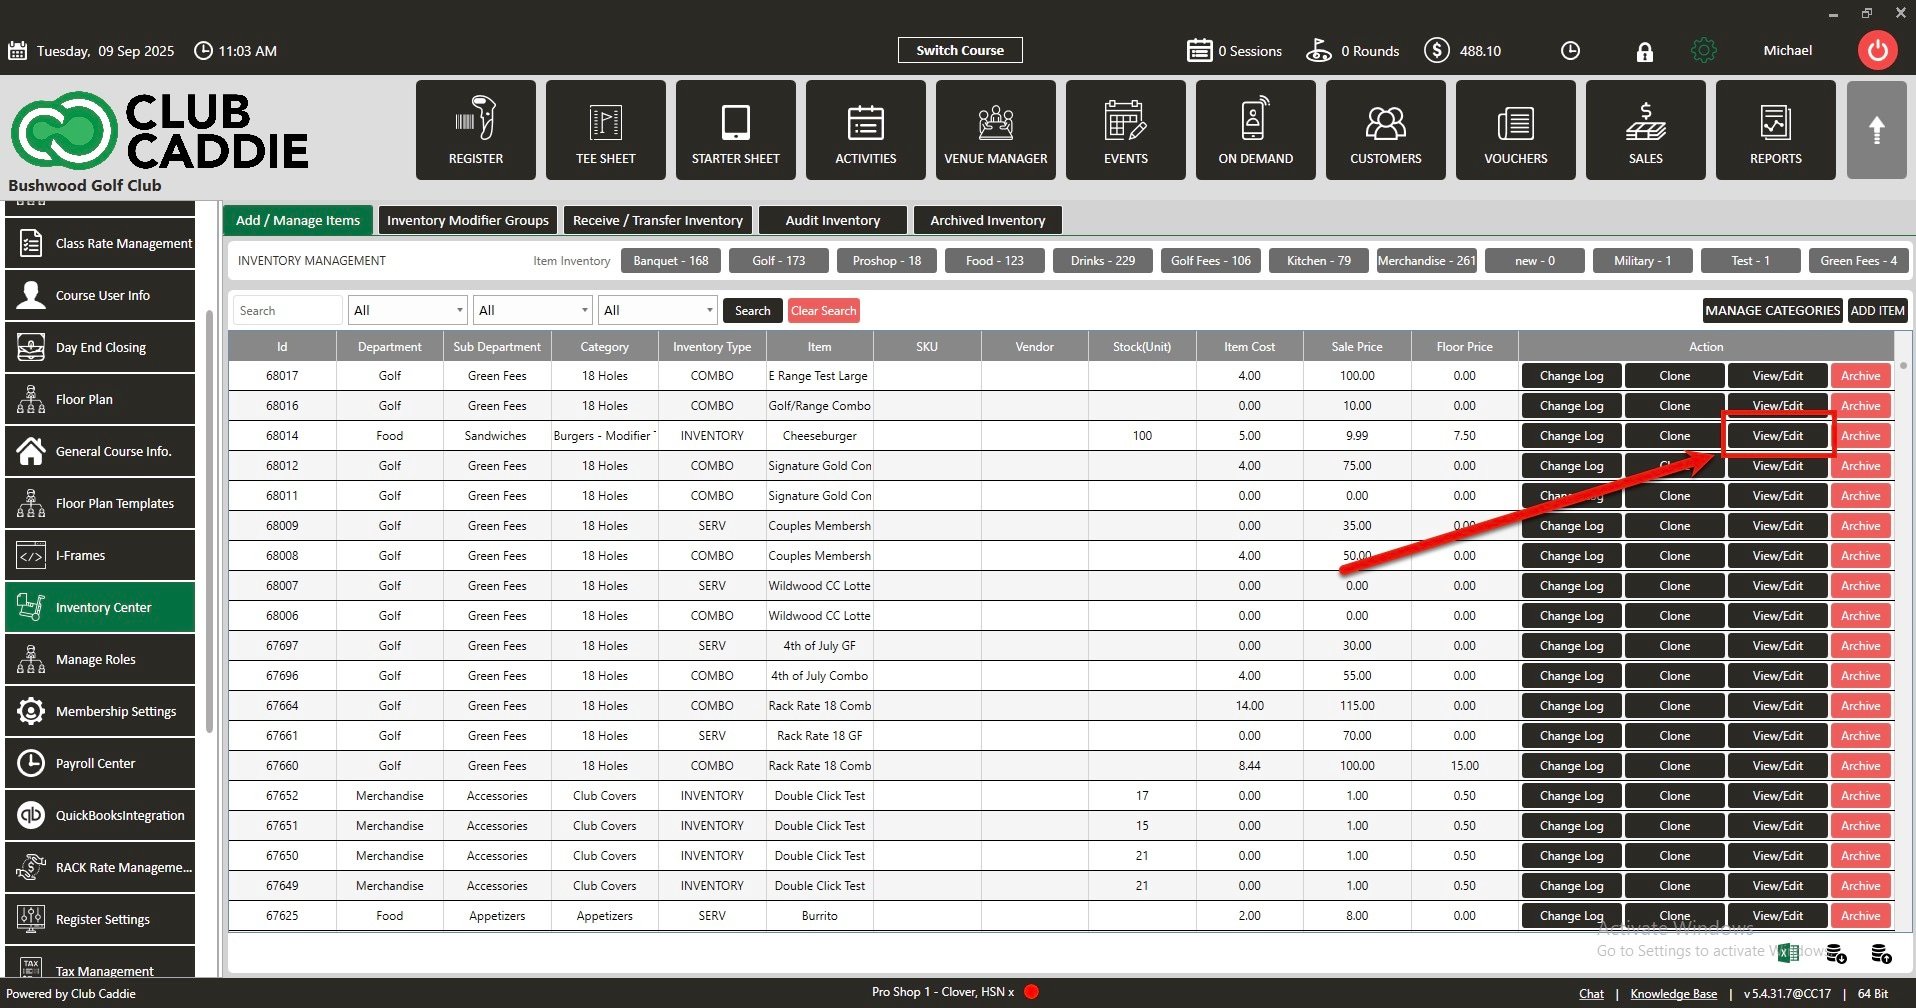
B: For an existing item
Step 1: Follow the above step 1.
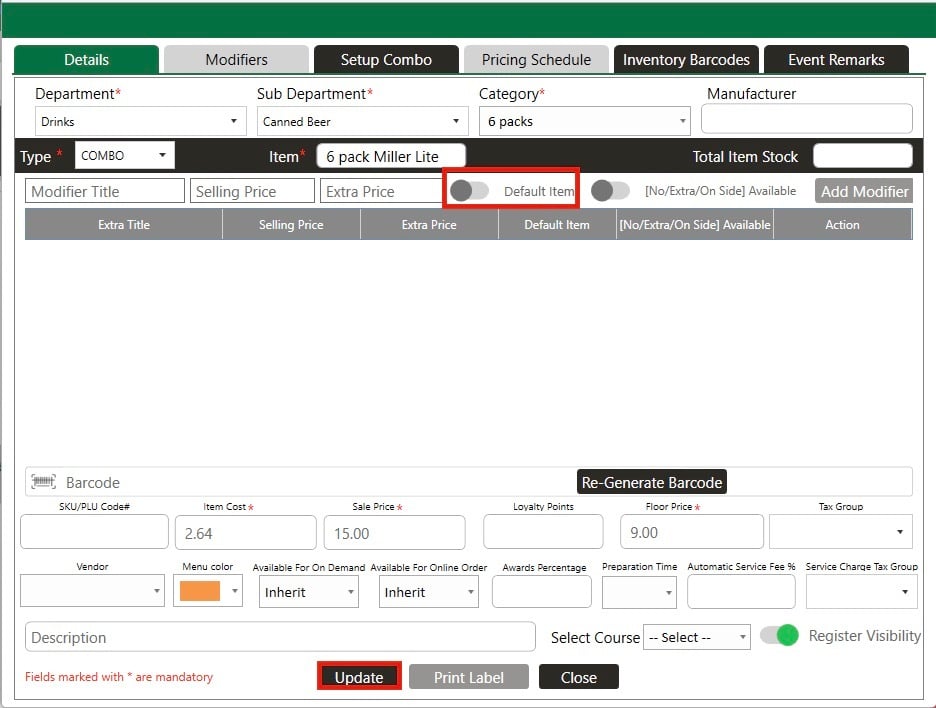
Step 2: Click View/ Edit from the INVENTORY MANAGEMENT window. To make the modifier default, toggle ON and toggle it OFF to disable it from the Default Item column. Then click Update.
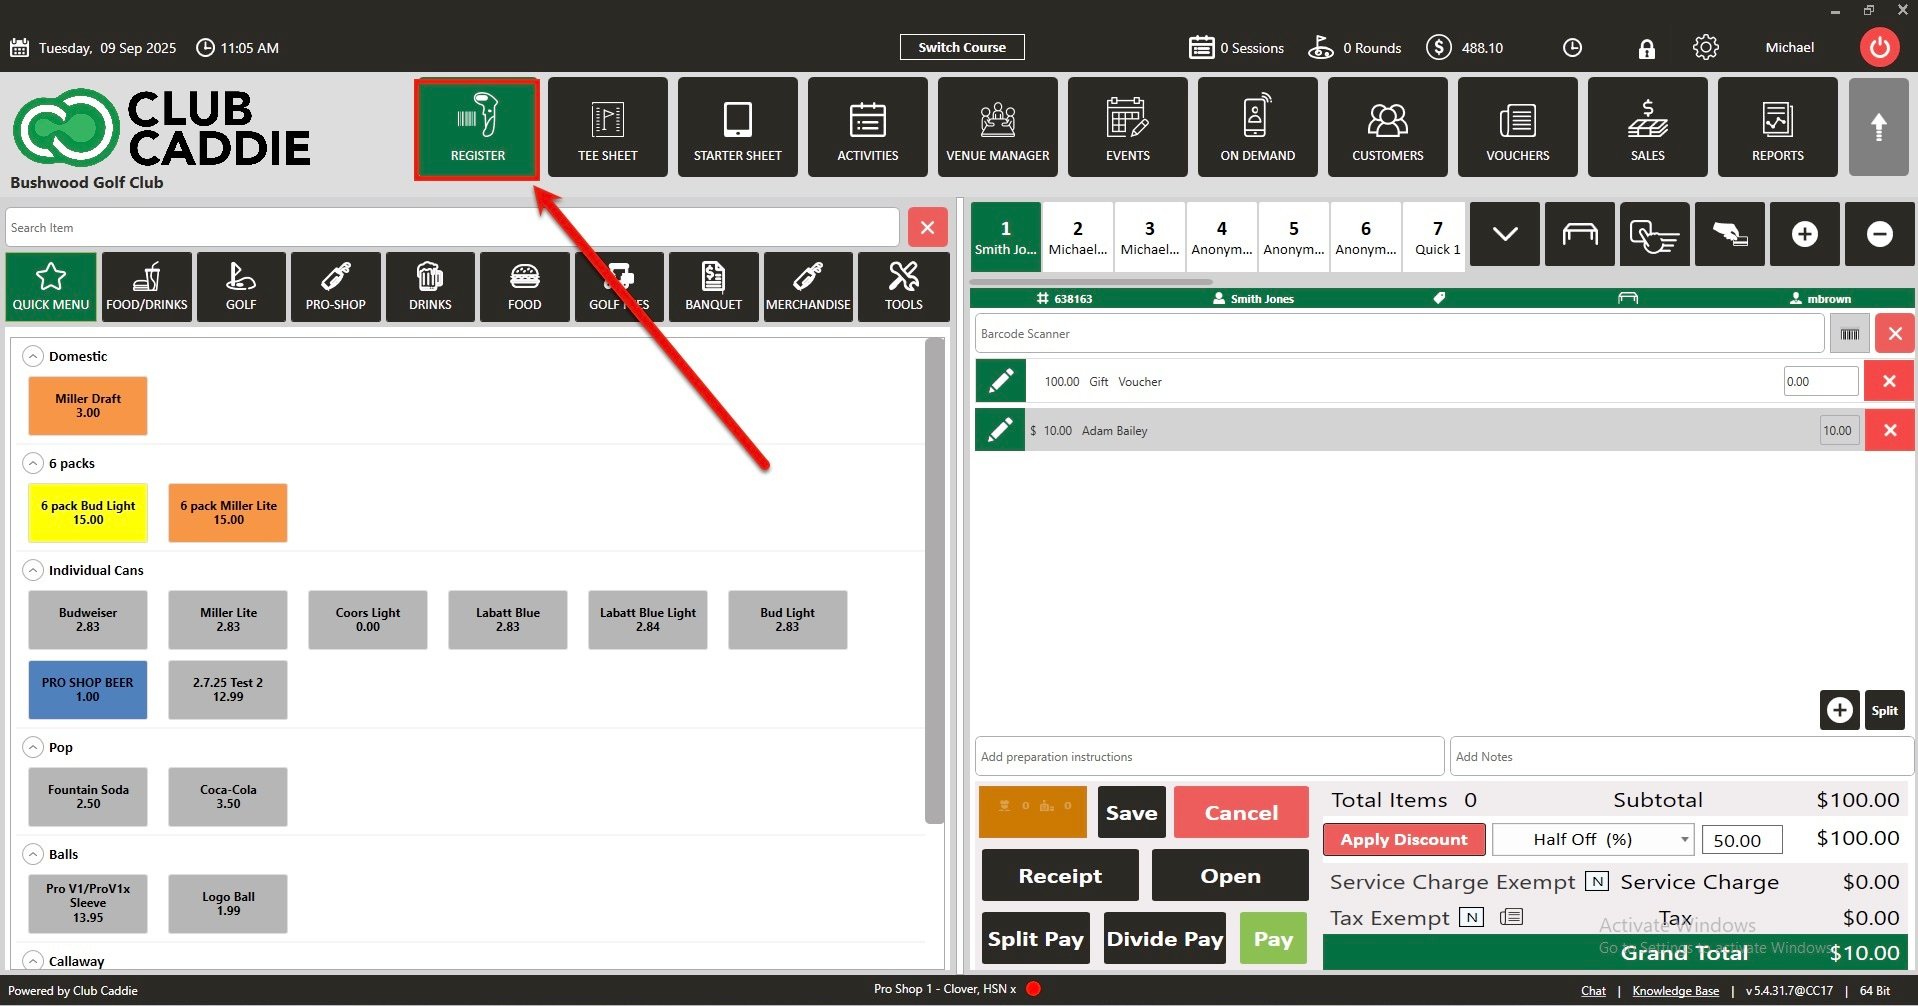
C: For Existing items from the Register:
Step 1: Select the REGISTER module from the module navigation menu.
Step 2: In the REGISTER, on the left side, you can see the Inventory window. Right-click on any item then click on Edit Inventory from the drop-down list.
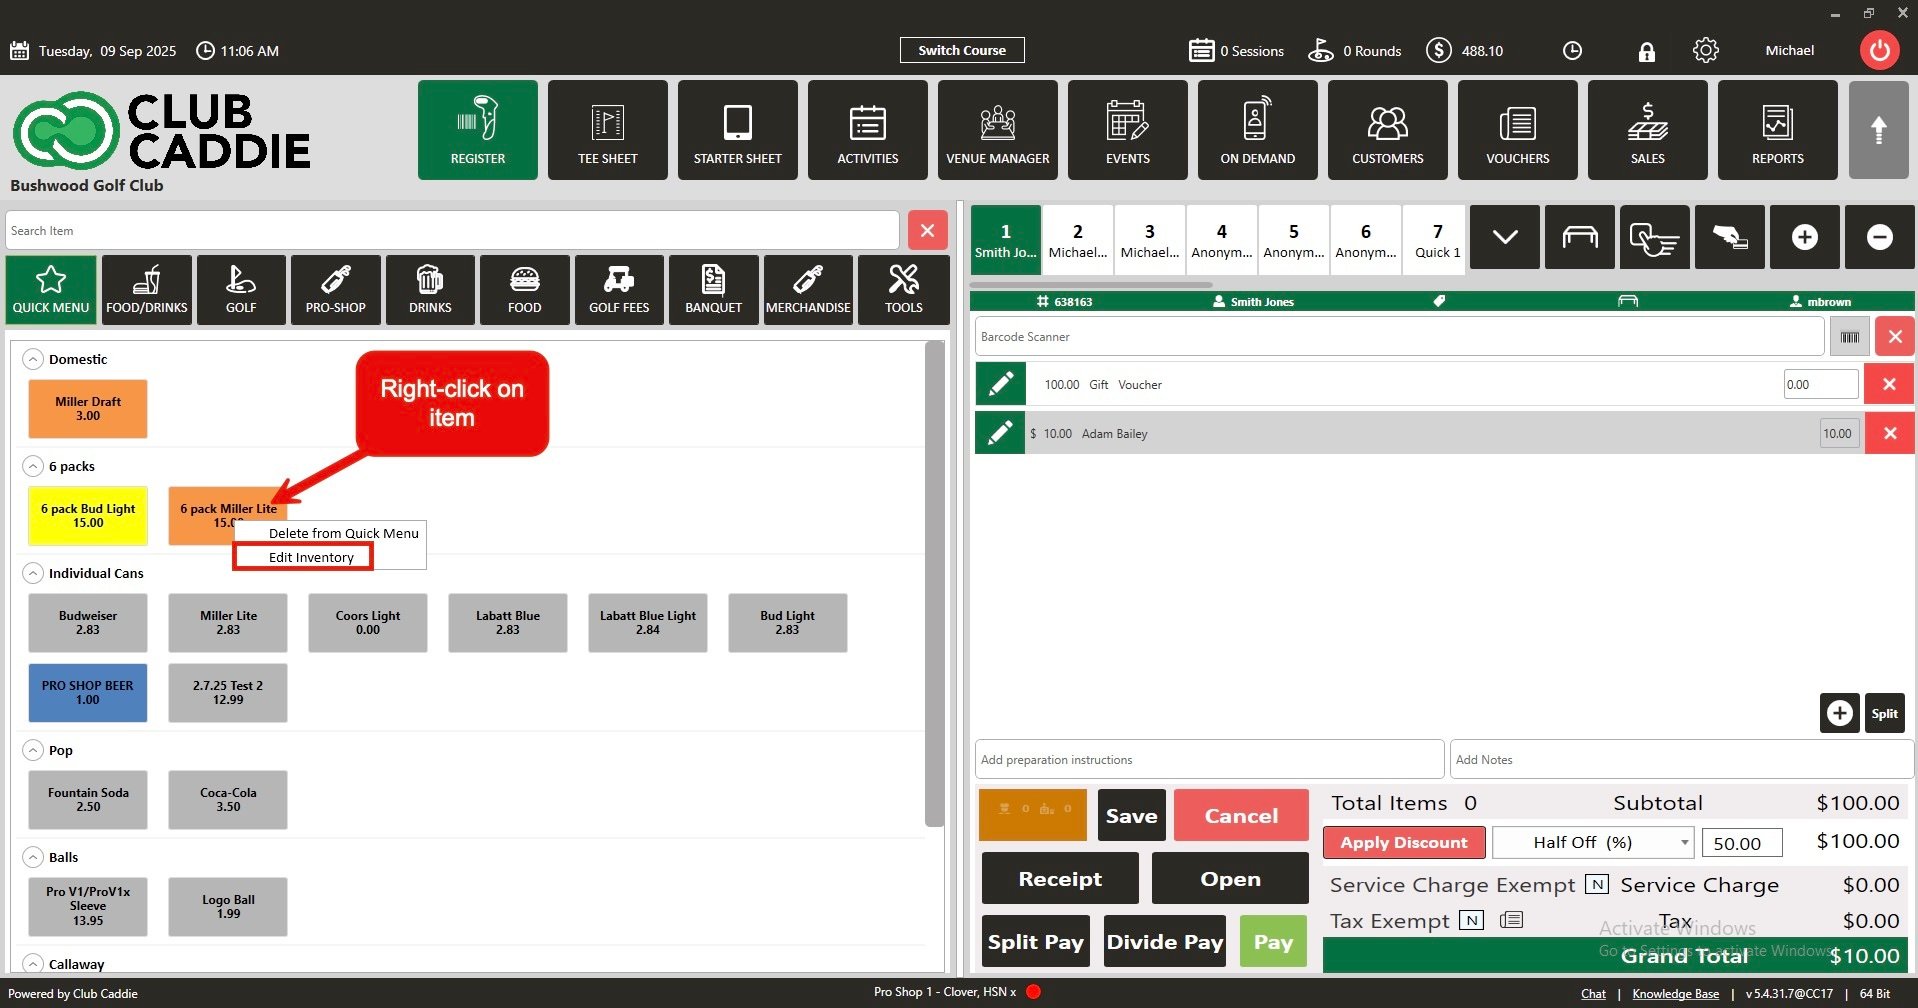
Step 3: The system will generate a new EDIT ITEM OF INVENTORY window. To make the modifier default, toggle ON and toggle OFF to disable. Click Update.