.png?width=200&height=89&name=CC%20%20fiserv.%20(3).png)
Step-by-Step Guide:
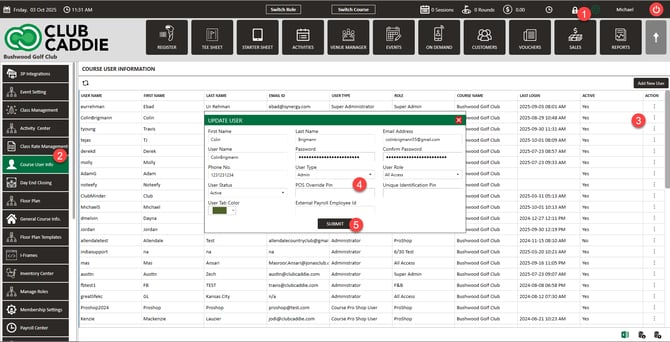
Step 1: To set a pin for each employee by navigating to your Settings > select Course User Info > select an employee to populate their profile > create and enter a 4 digit code for that particular employee under Unique Identification Pin > Click Submit. Then, log out and back in to start using this feature.
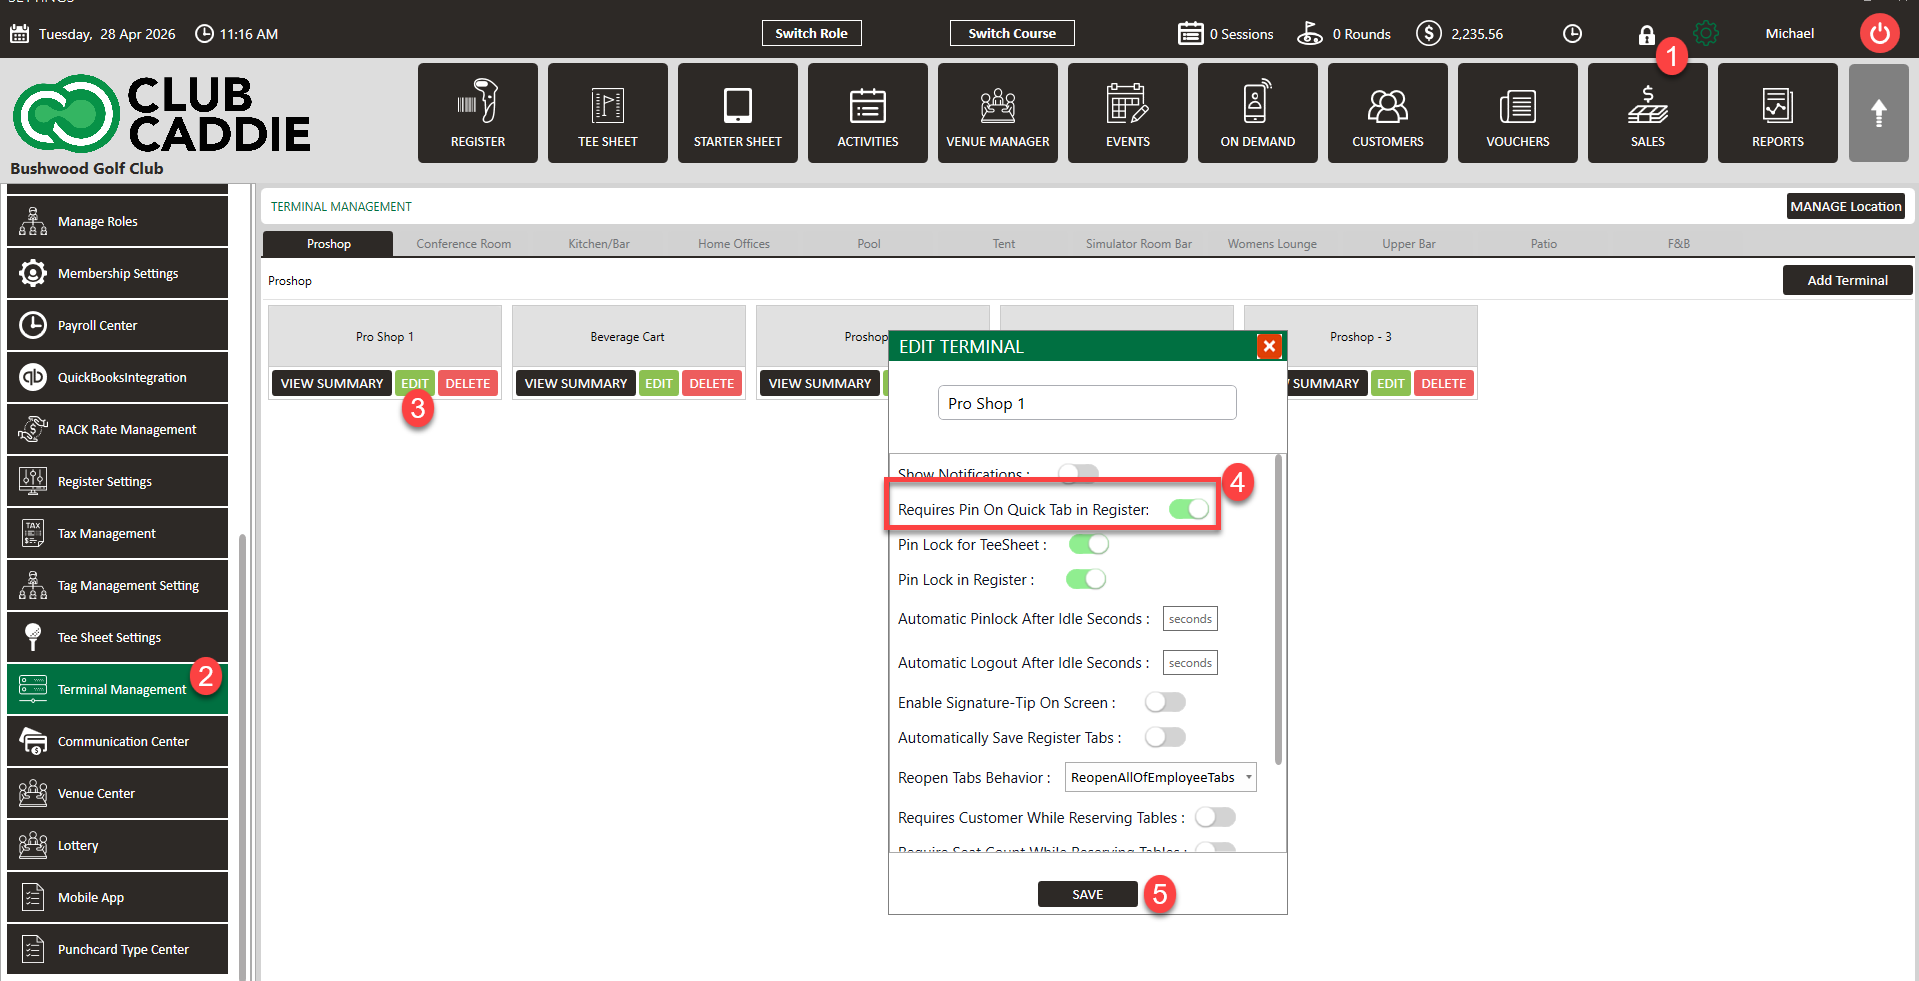
Step 2: If you want to require employees to use Pin Lock for Quick Tabs, you will need to toggle that feature on. Navigate to Settings > Terminal Management > click on Edit on the terminal that you want this feature enabled > Toggle on Requires Pin on Quick Tab, then click Save.
Before creating a new tab, the employee will select the lock icon in the top right of the screen, enter their 4-digit pin, and then start the tab. That tab and transaction will now be assigned to that employee.
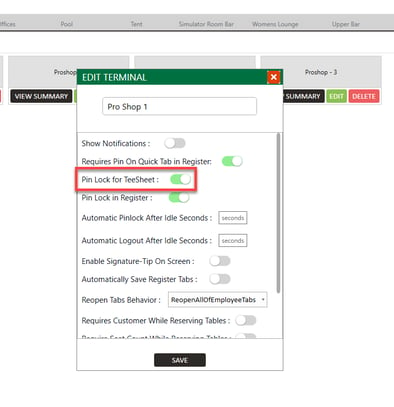
Step 3: Pin Lock for the Tee Sheet - If you want staff to enter their PIN each time they book, edit, pay, or check in a tee time, locate Pin Lock for TeeSheet and toggle it on. Save your changes. When enabled, any action on a tee time will prompt for the staff member's Employee PIN, and the Changelog will record the employee name associated with that action.