.png?width=200&height=89&name=CC%20%20fiserv.%20(3).png)
Step by Step
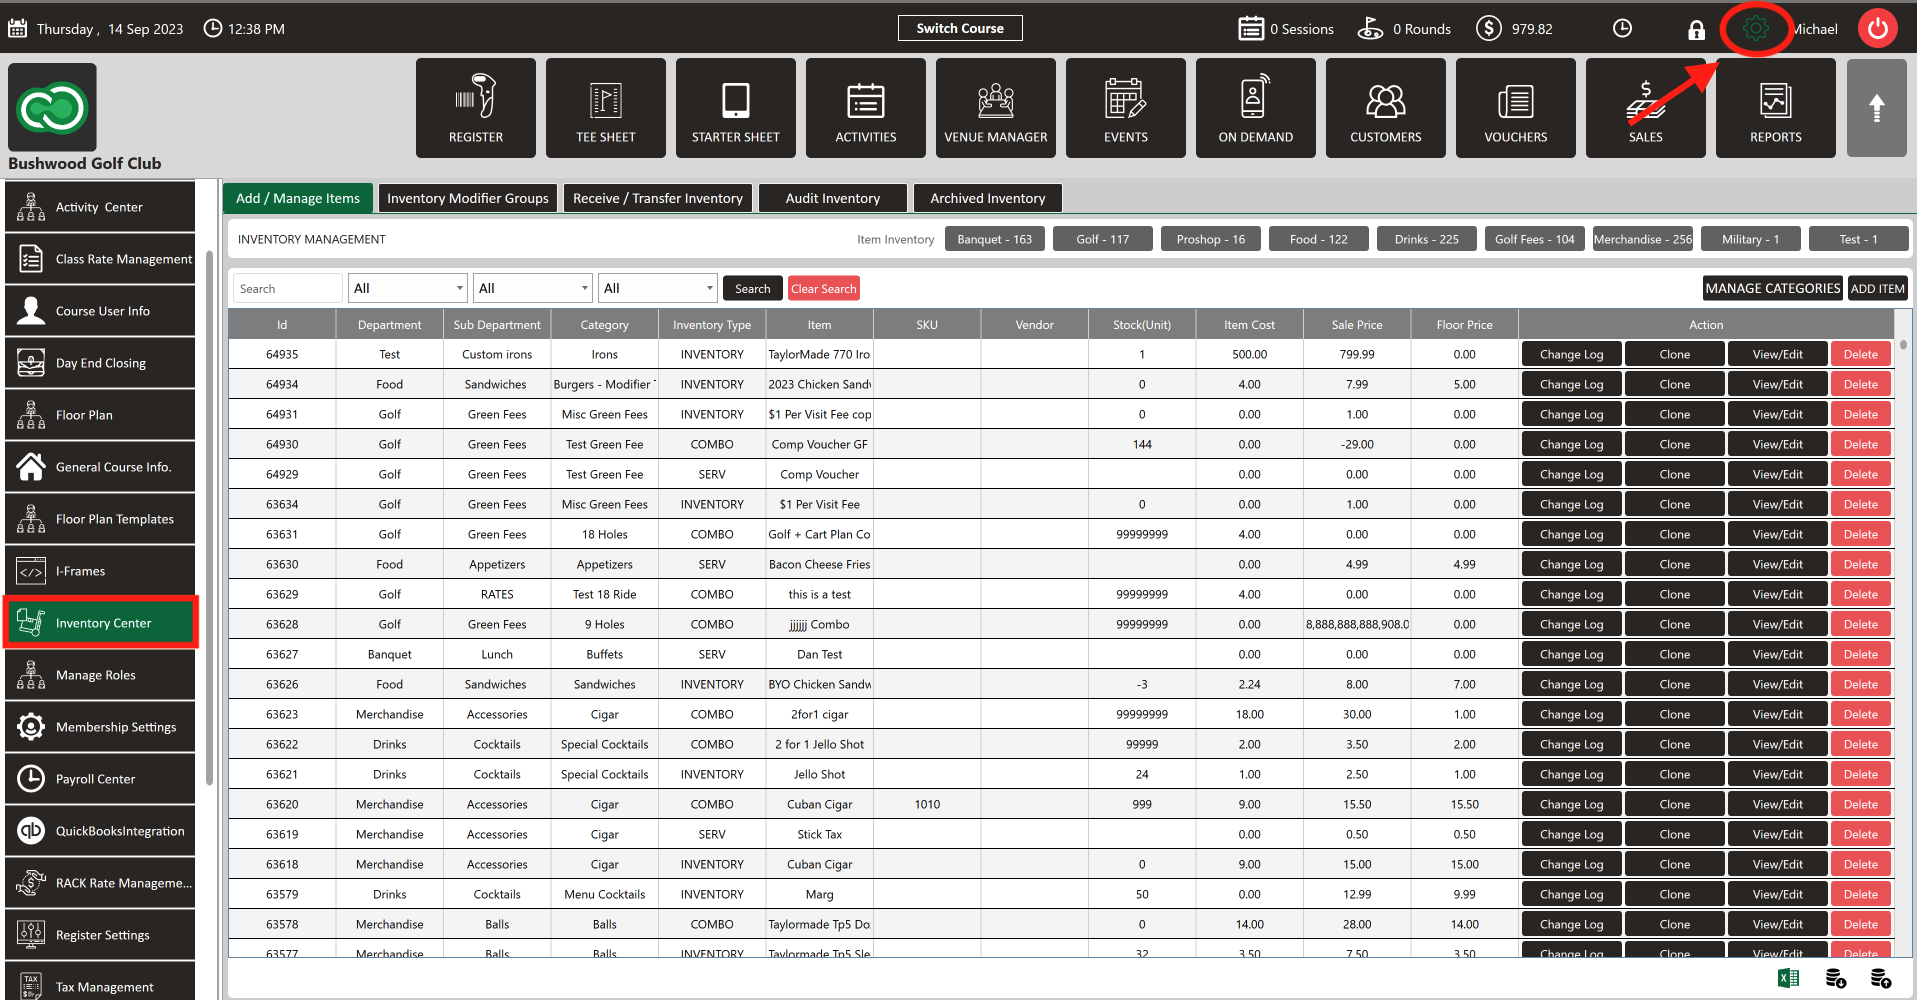
Step 1: Click the "Settings" gear wheel icon from the top right corner of the window. Select " Inventory Center" from the left-hand menu.

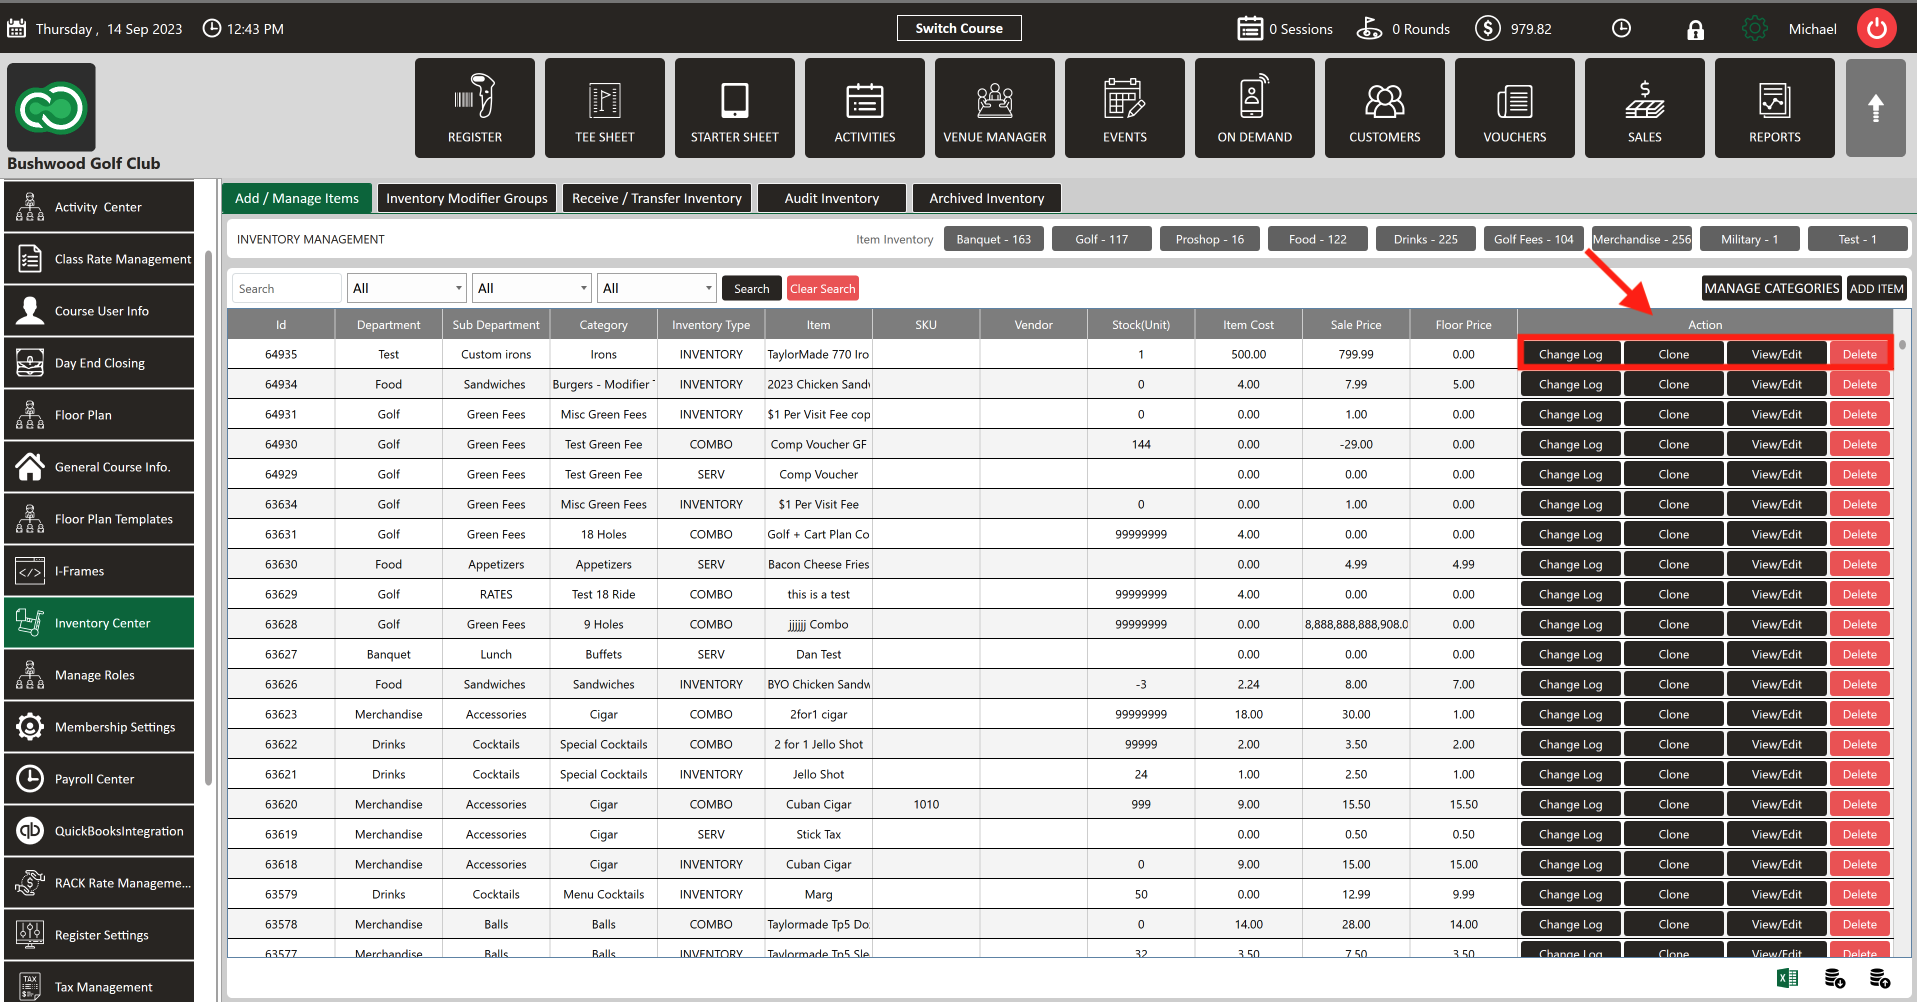
Step 4: Click " View/Edit" to modify the existing item. Click " Delete" to delete an item. To see the activity of the item click " Change Log." To clone an existing item click "Clone."
Step 5: In the bottom right-hand corner of screen are the import/export options. Click the green Excel button to export the data to Microsoft Excel. The data can be bulk imported or exported by clicking the appropriate button.
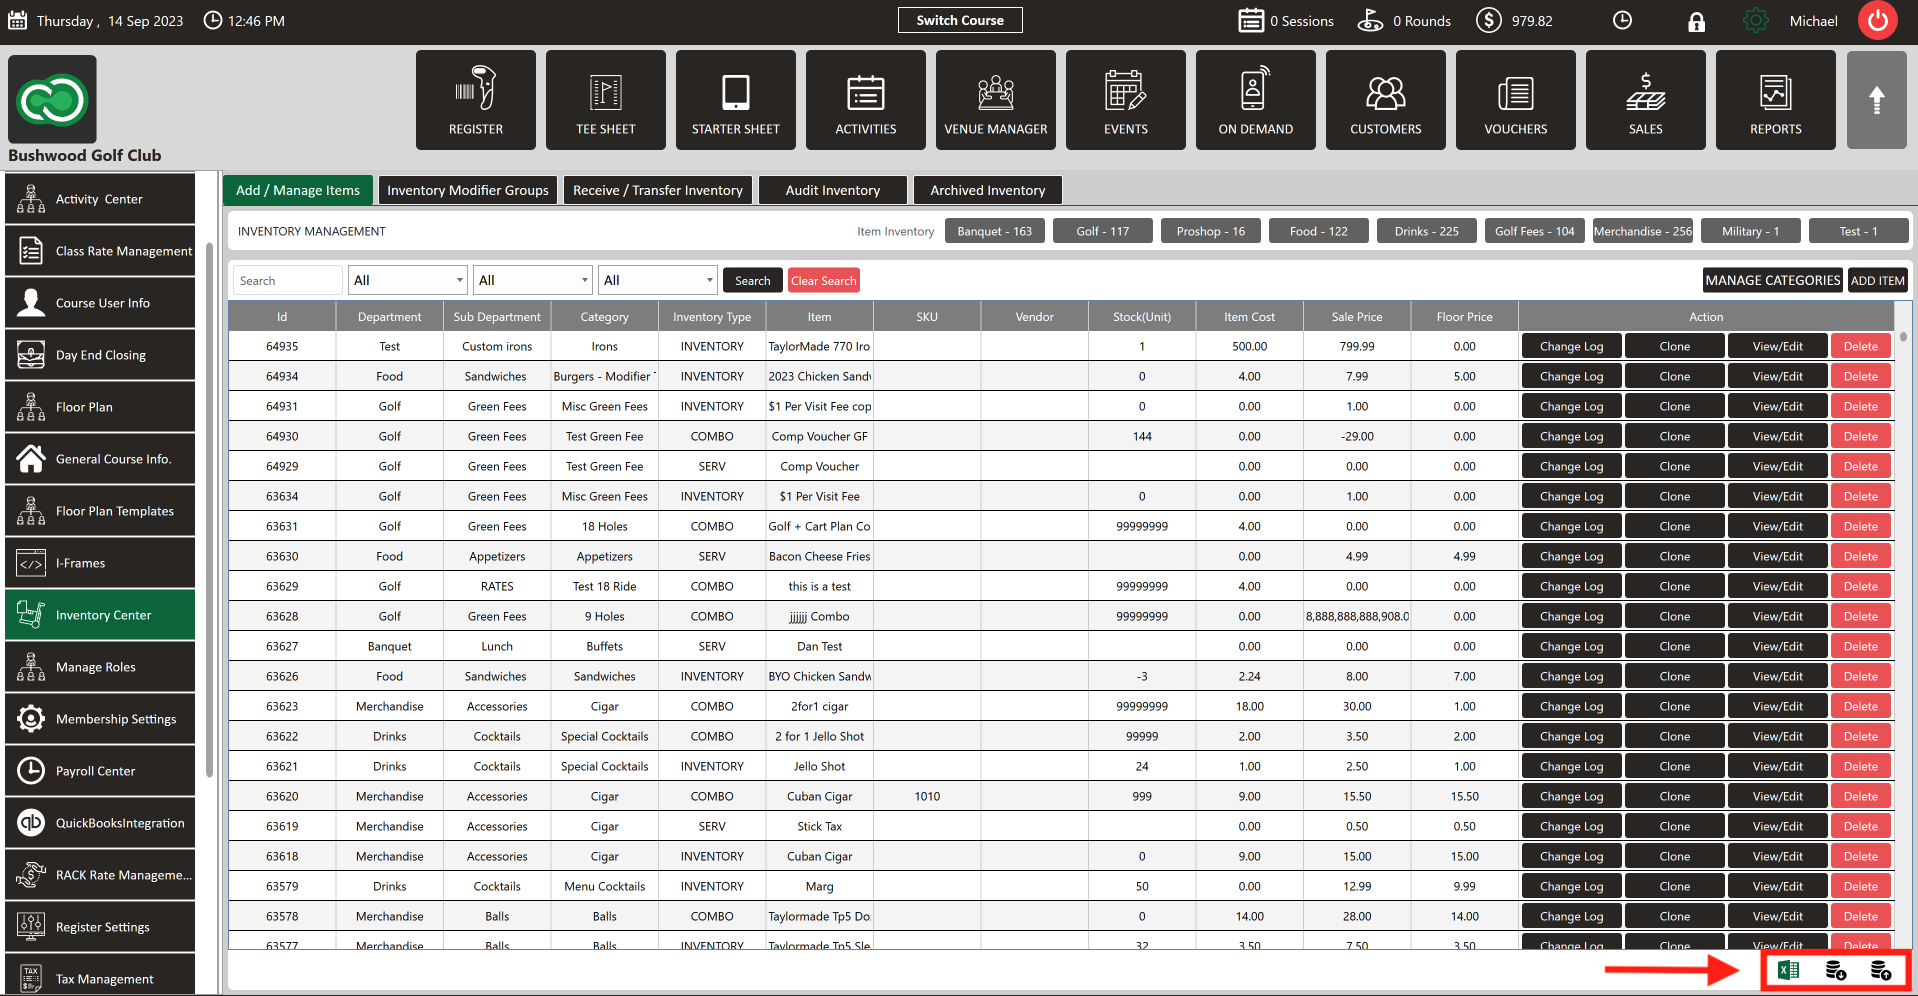
Step 1: Click the "Settings" gear wheel icon from the top right corner of the window. Select " Inventory Center" from the left-hand menu.
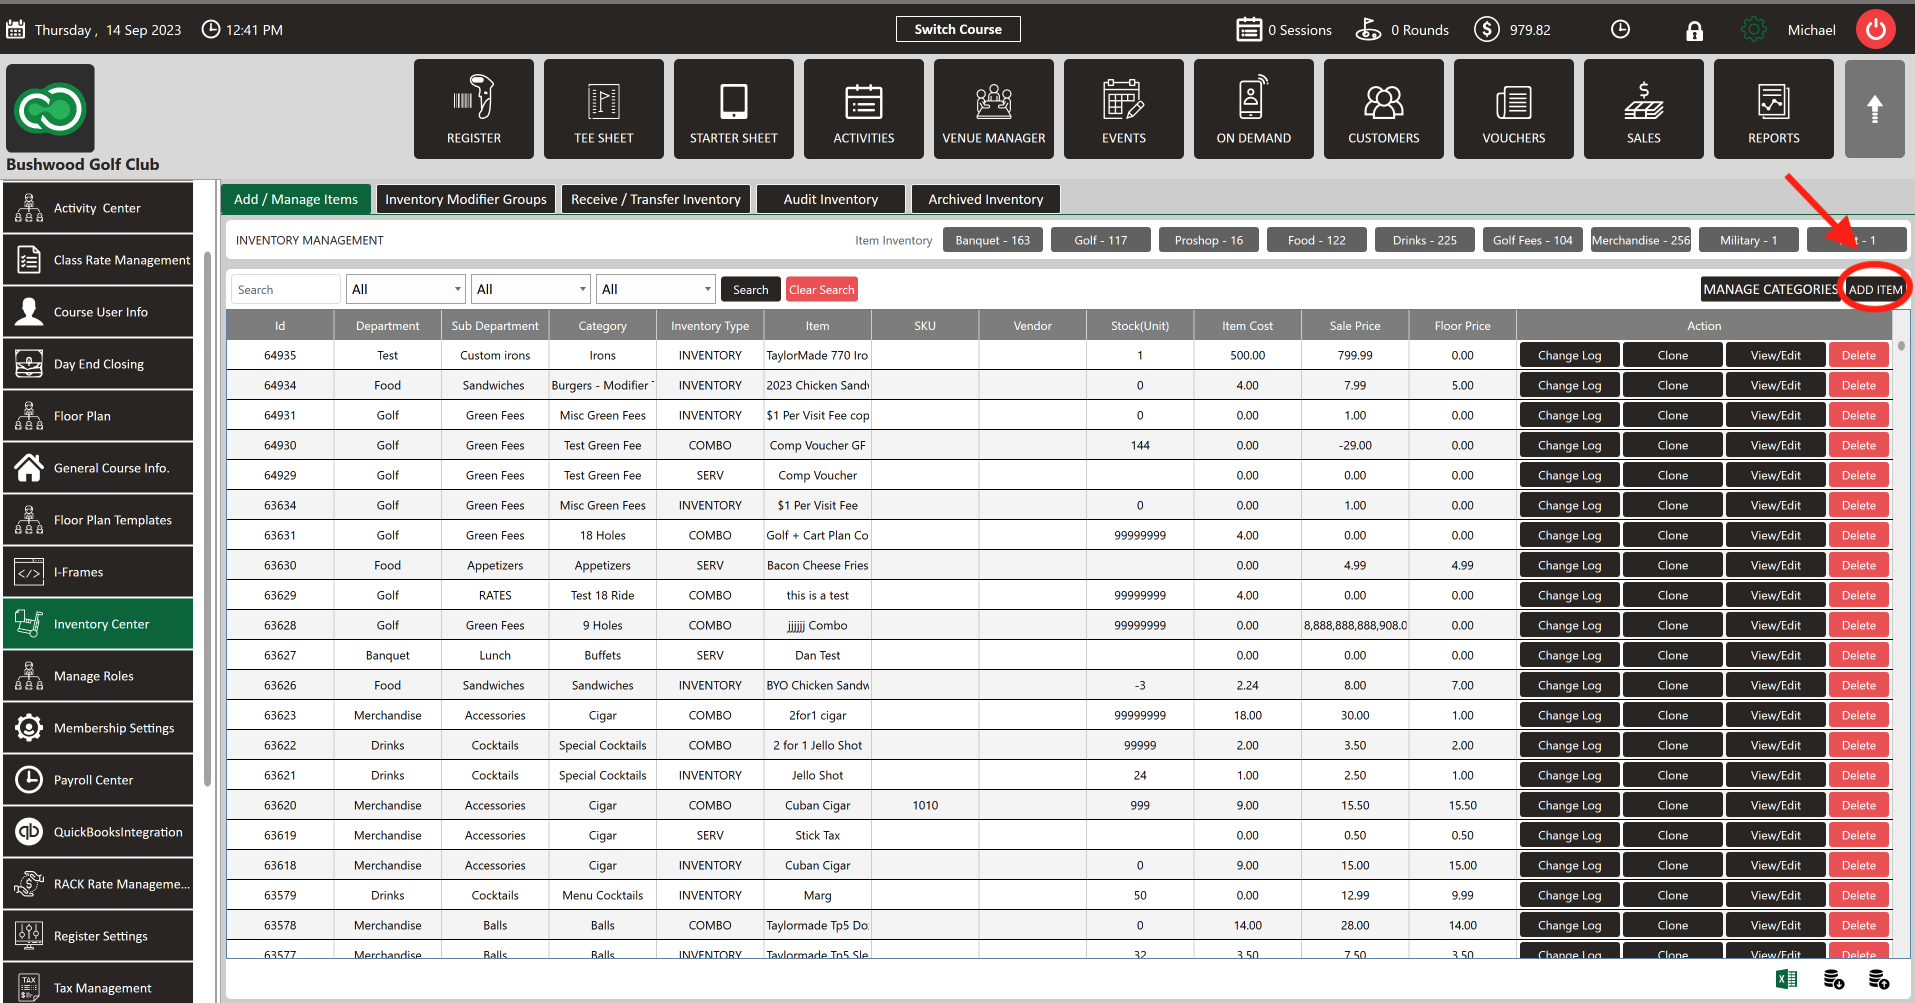
Step 2:
Select the
Add/ Manage Items
tab. Under this tab, is a list of existing items.
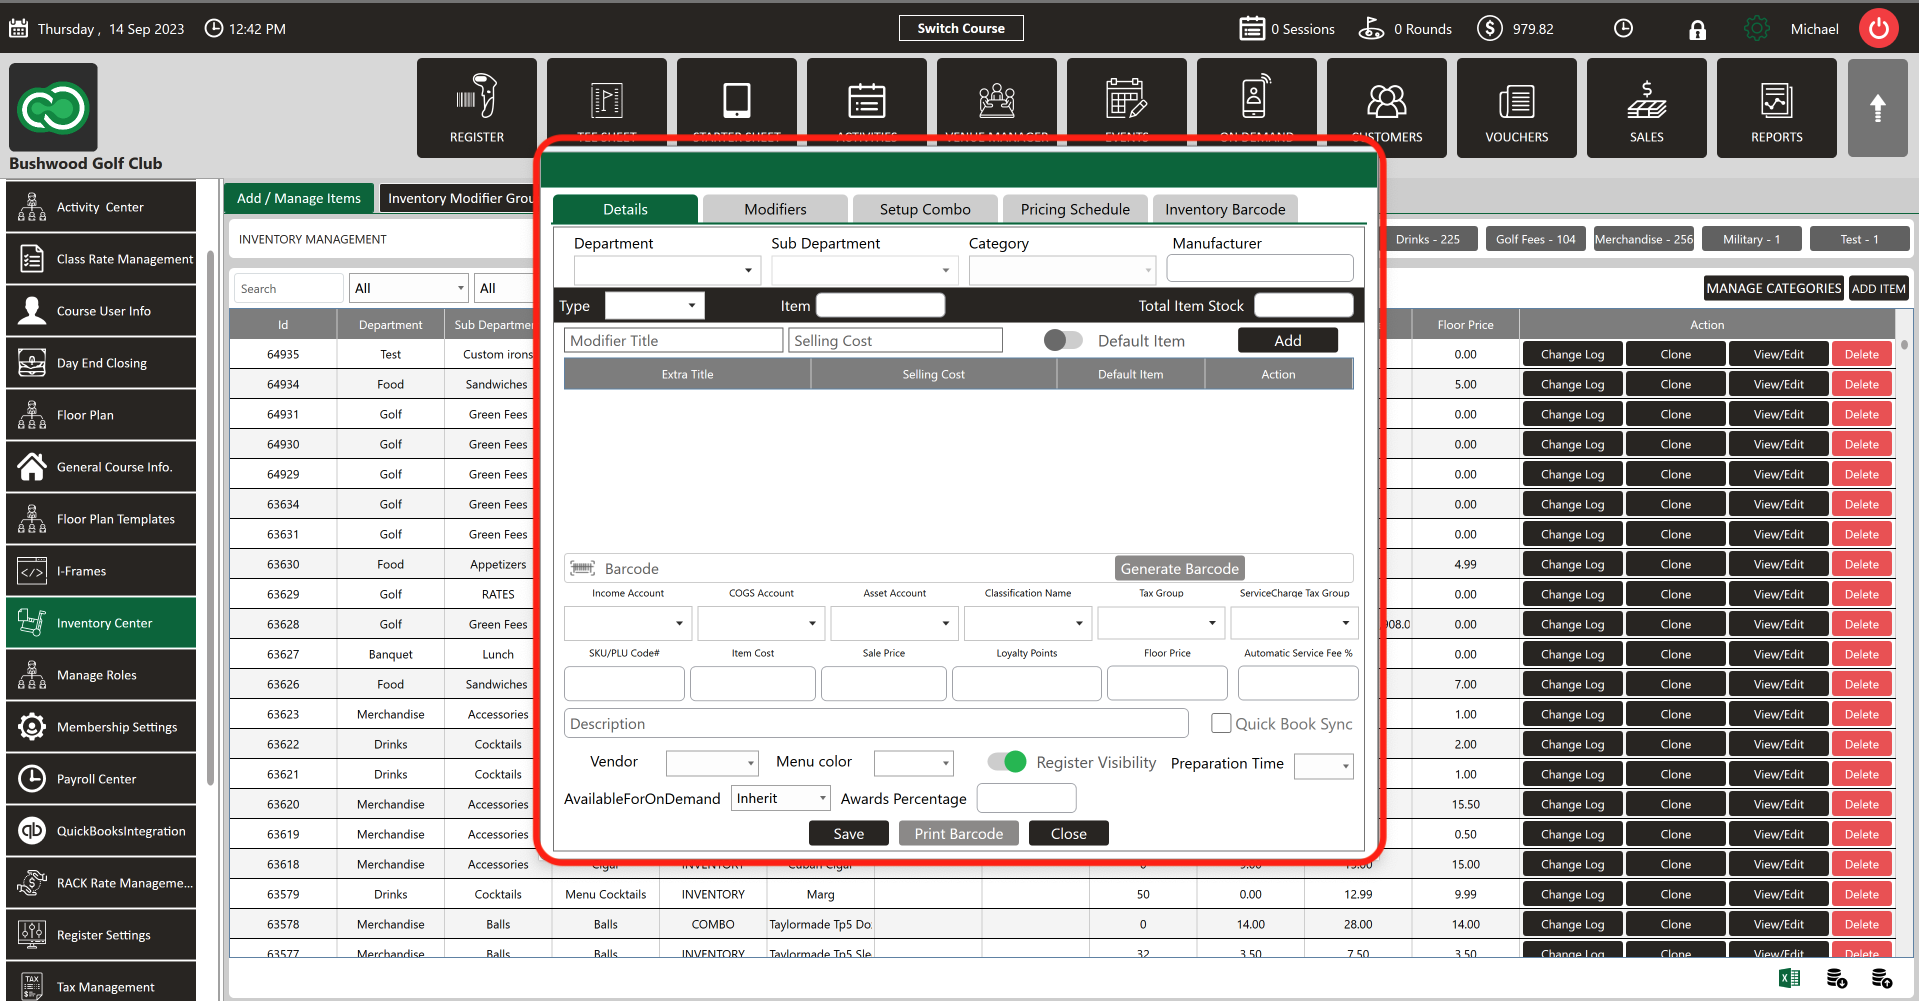
Step 3: Click
ADD ITEM to add a new item to inventory. The system will generate a new
ADD ITEM TO INVENTORY window. Fill in all the info then click
Save. The item will be added to the Inventory.
Step 4: Click " View/Edit" to modify the existing item. Click " Delete" to delete an item. To see the activity of the item click " Change Log." To clone an existing item click "Clone."
Step 5: In the bottom right-hand corner of screen are the import/export options. Click the green Excel button to export the data to Microsoft Excel. The data can be bulk imported or exported by clicking the appropriate button.