.png?width=200&height=89&name=CC%20%20fiserv.%20(3).png)
Step By Step:
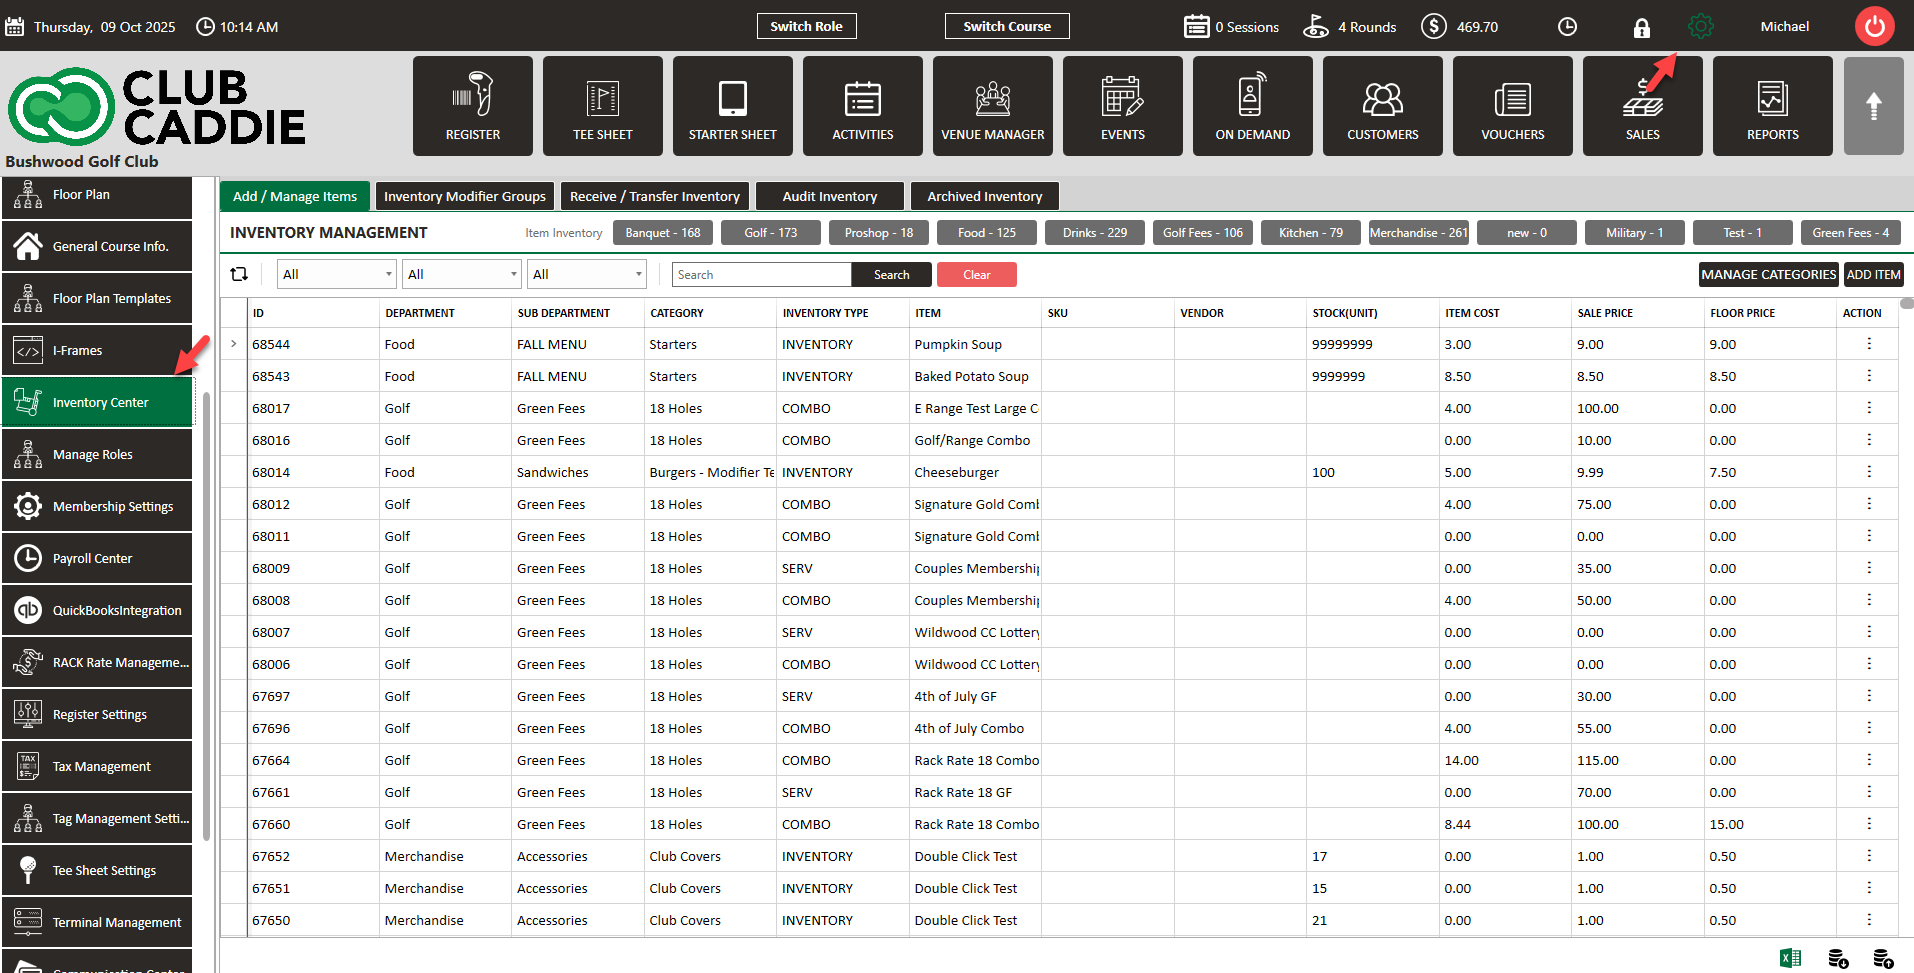
Step 1: Click the Gear wheel icon from the top right corner of the window. Select Inventory Center from the left row of the window.
Step 2: Click Receive Inventory to receive the inventory. The system will open a new RECEIVE INVENTORY window.
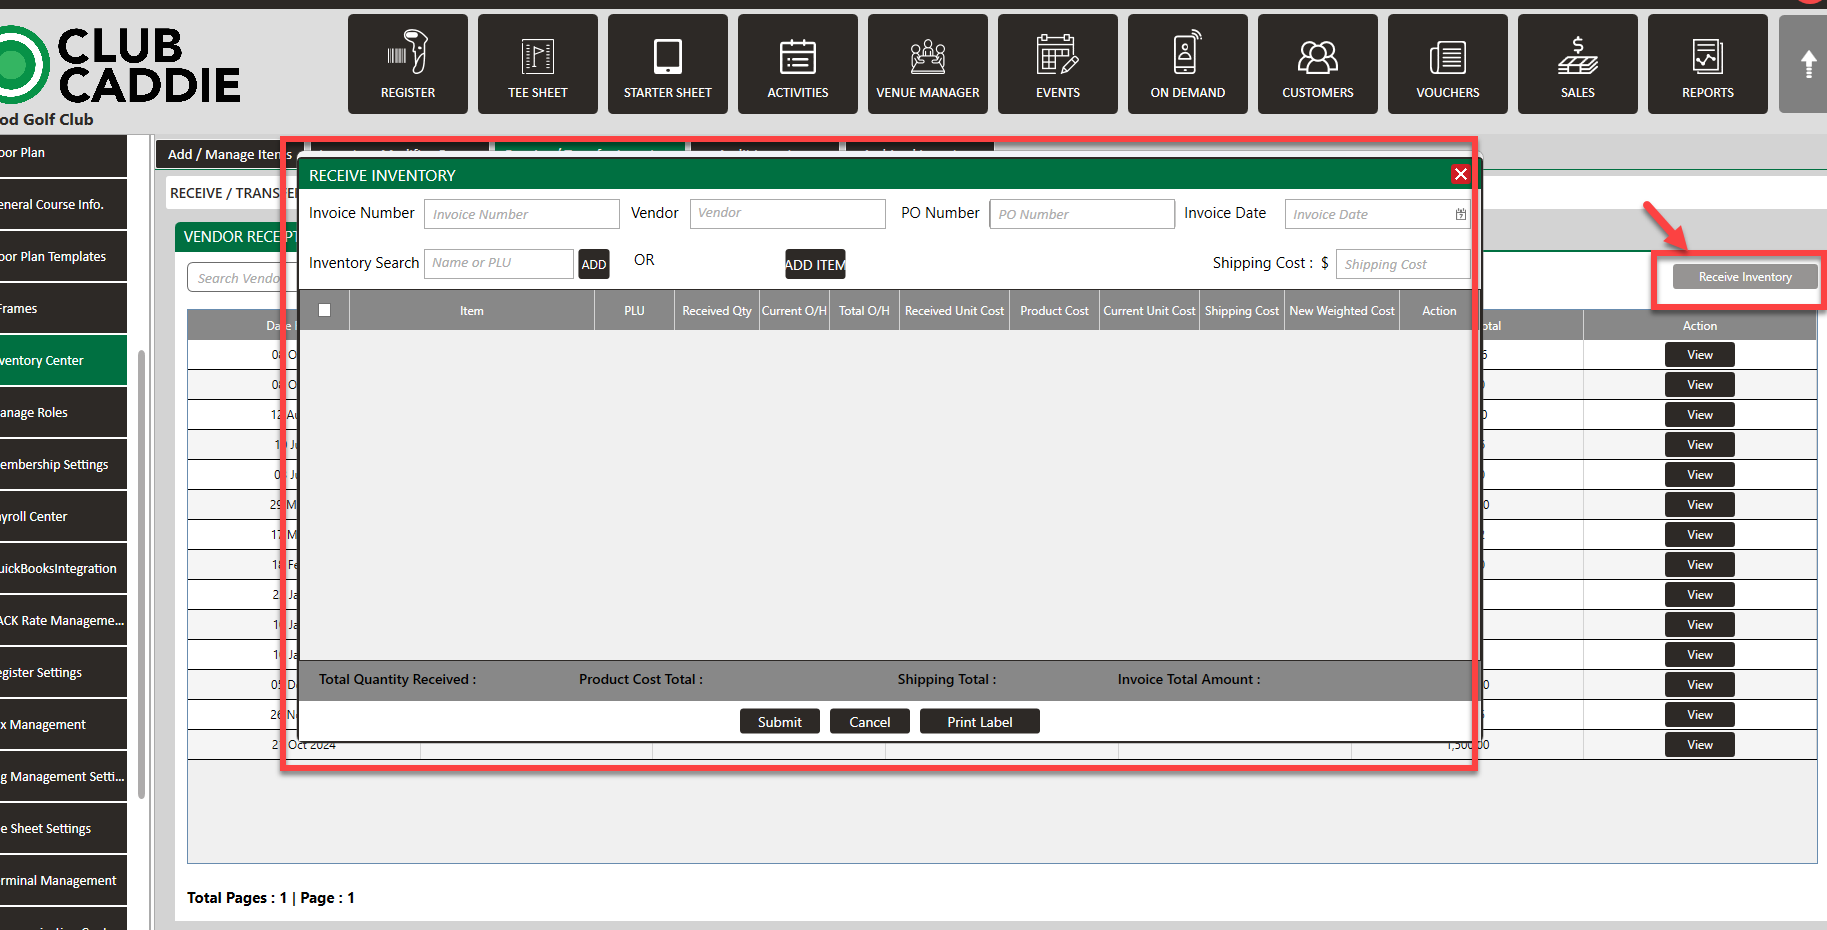
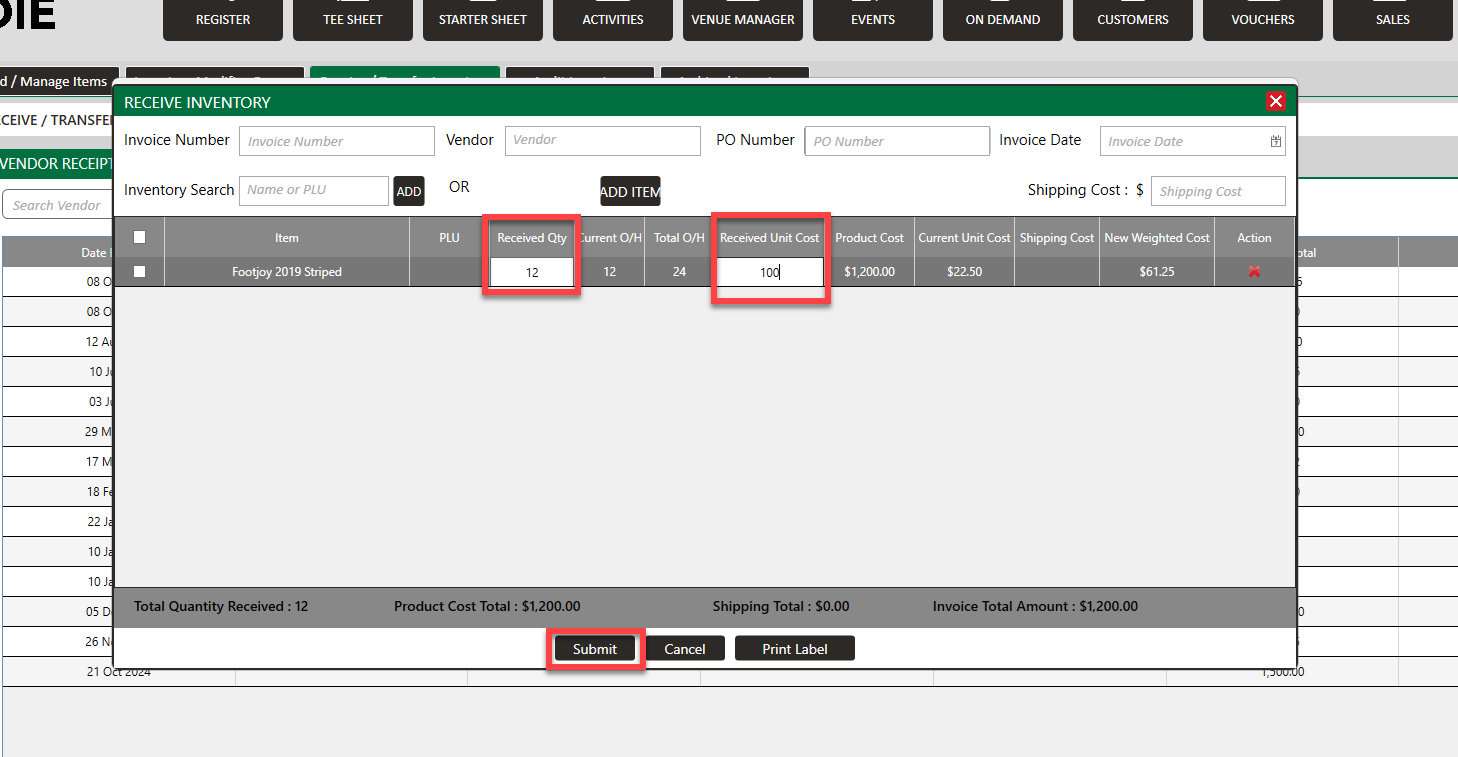
Step 3: In the RECEIVE INVENTORY window, search for the inventory by item name and PLU code then click Add. Enter the Received Qty and Received Unit Cost then click Submit.
Step 4: Click View to see vendor receipts. The system will open a new VENDOR INVOICE window. Receipts can be filtered by Day, Week, Month, and Year or a selection can be made by date from the date selector for a specified period.

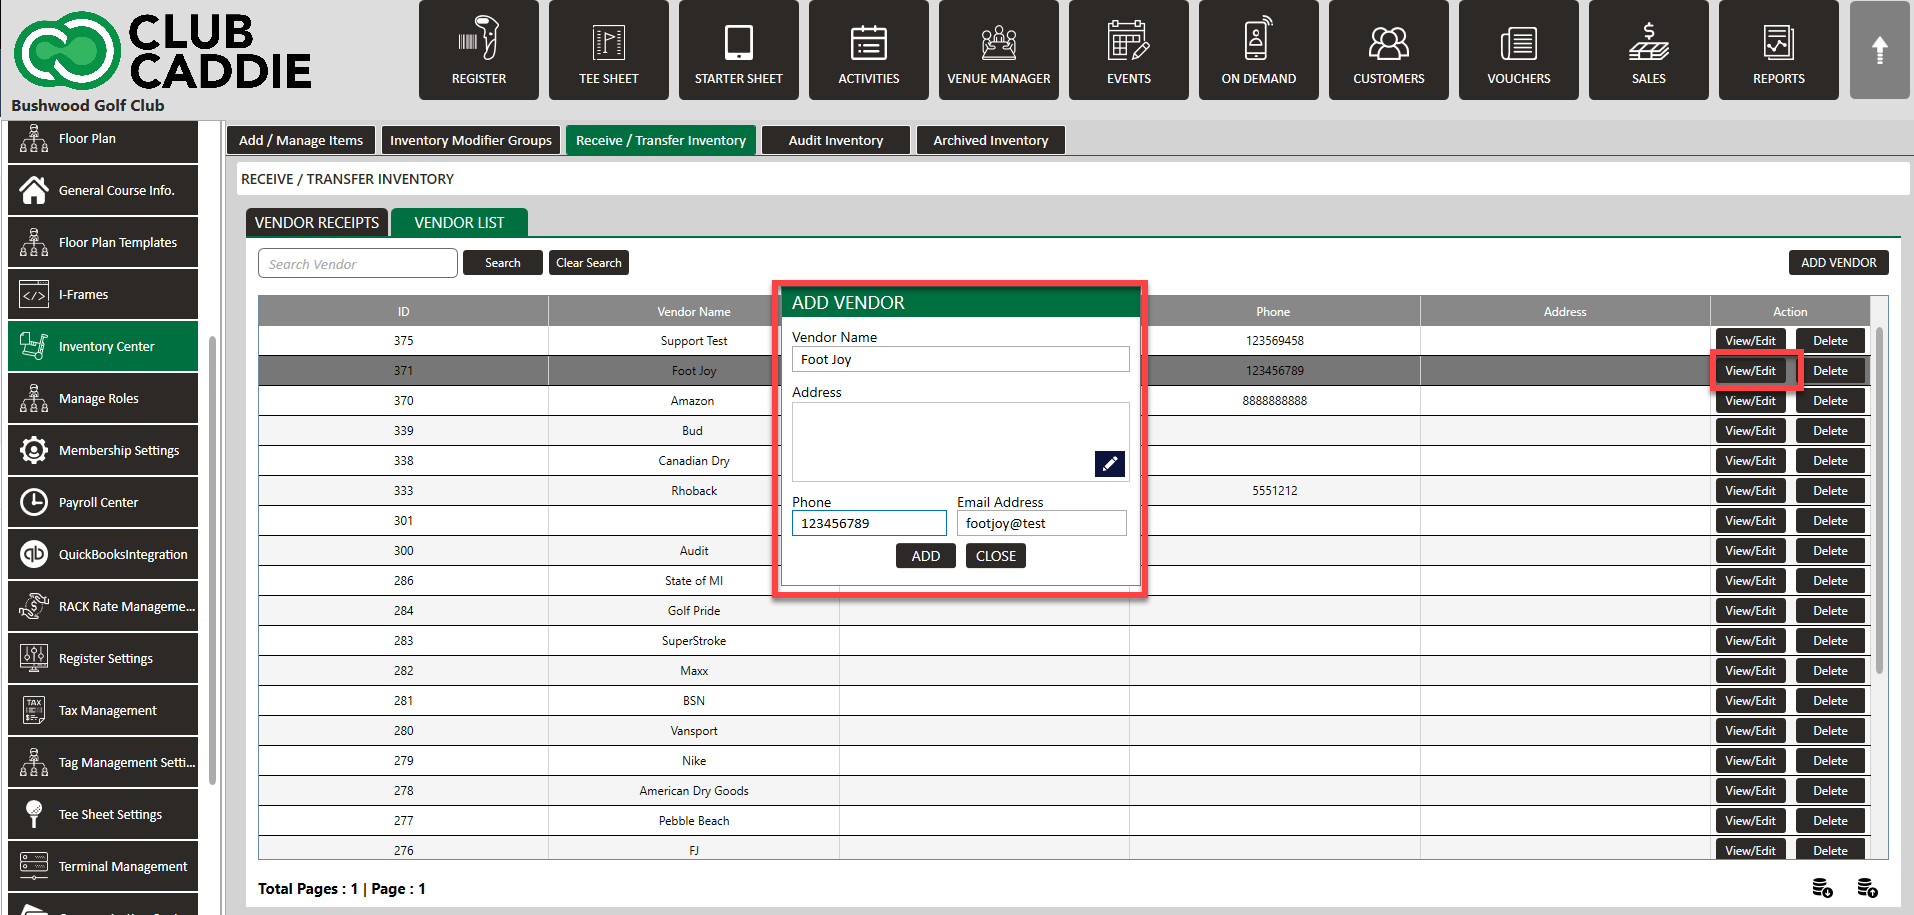
Step 5: Click the tab VENDOR LIST to see a list of vendors. A search can be performed by the vendor by name and then click Search.
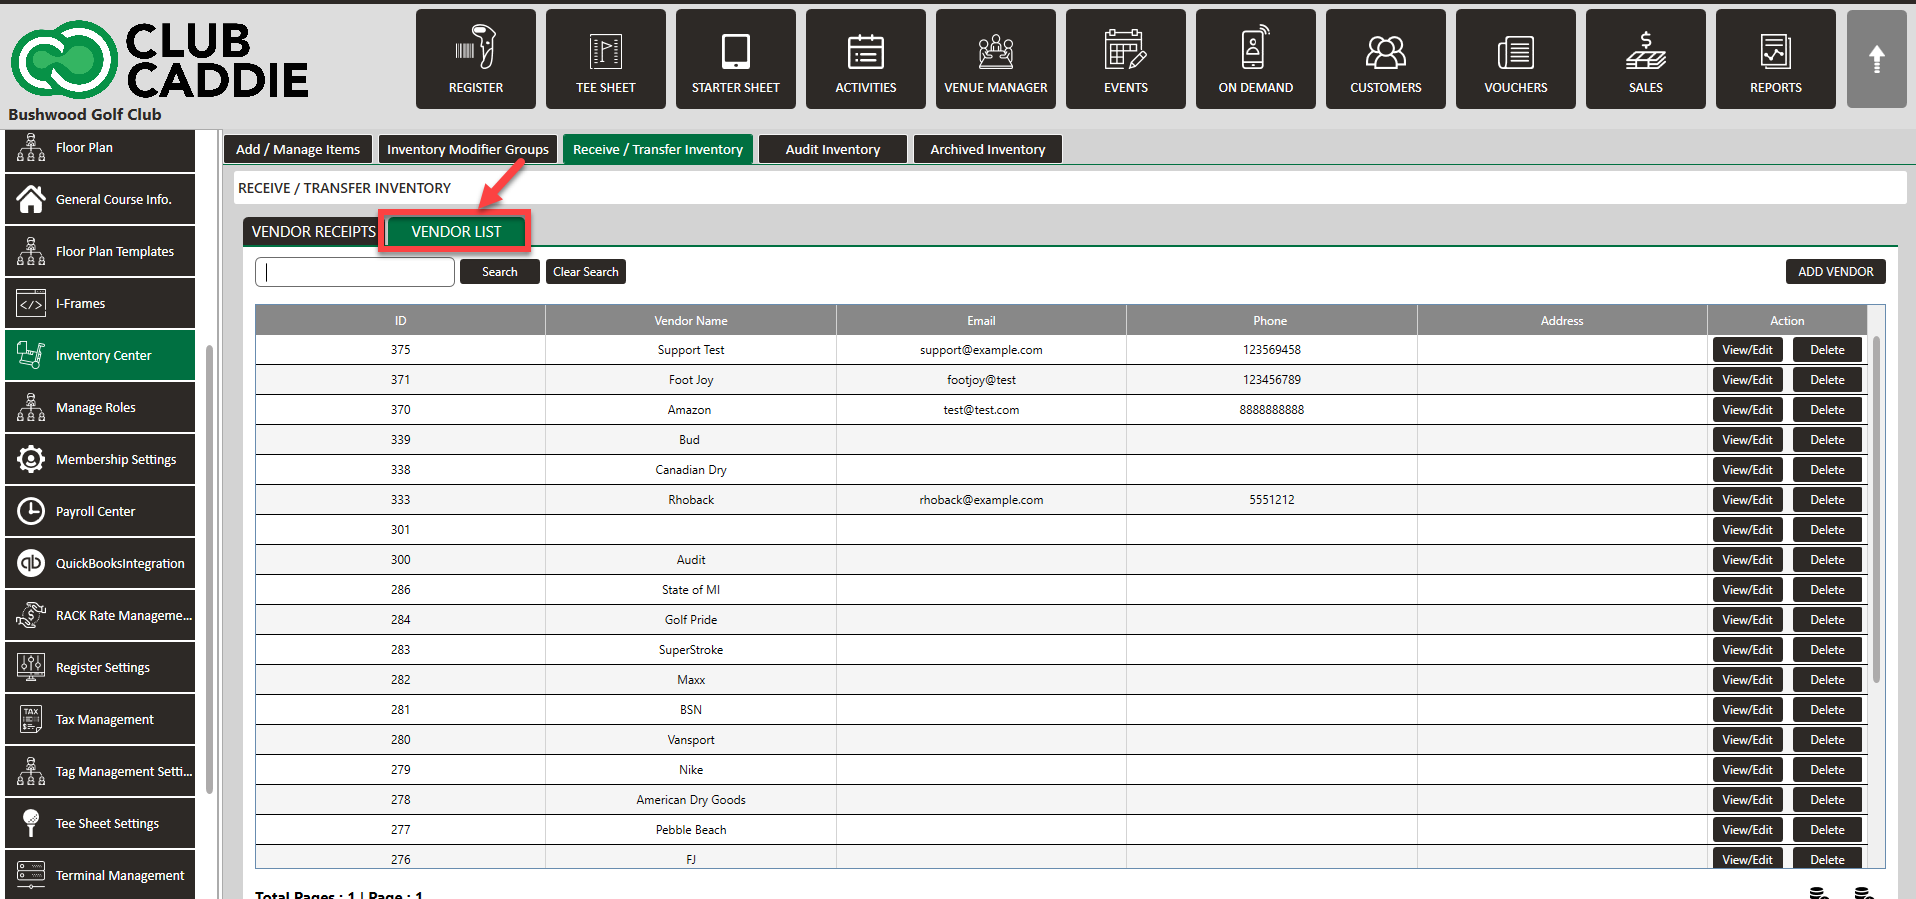
Step 6: Click Add Vendor to add a new vendor. To modify an existing vendor, click View/Edit. To delete the vendor click the Delete button.
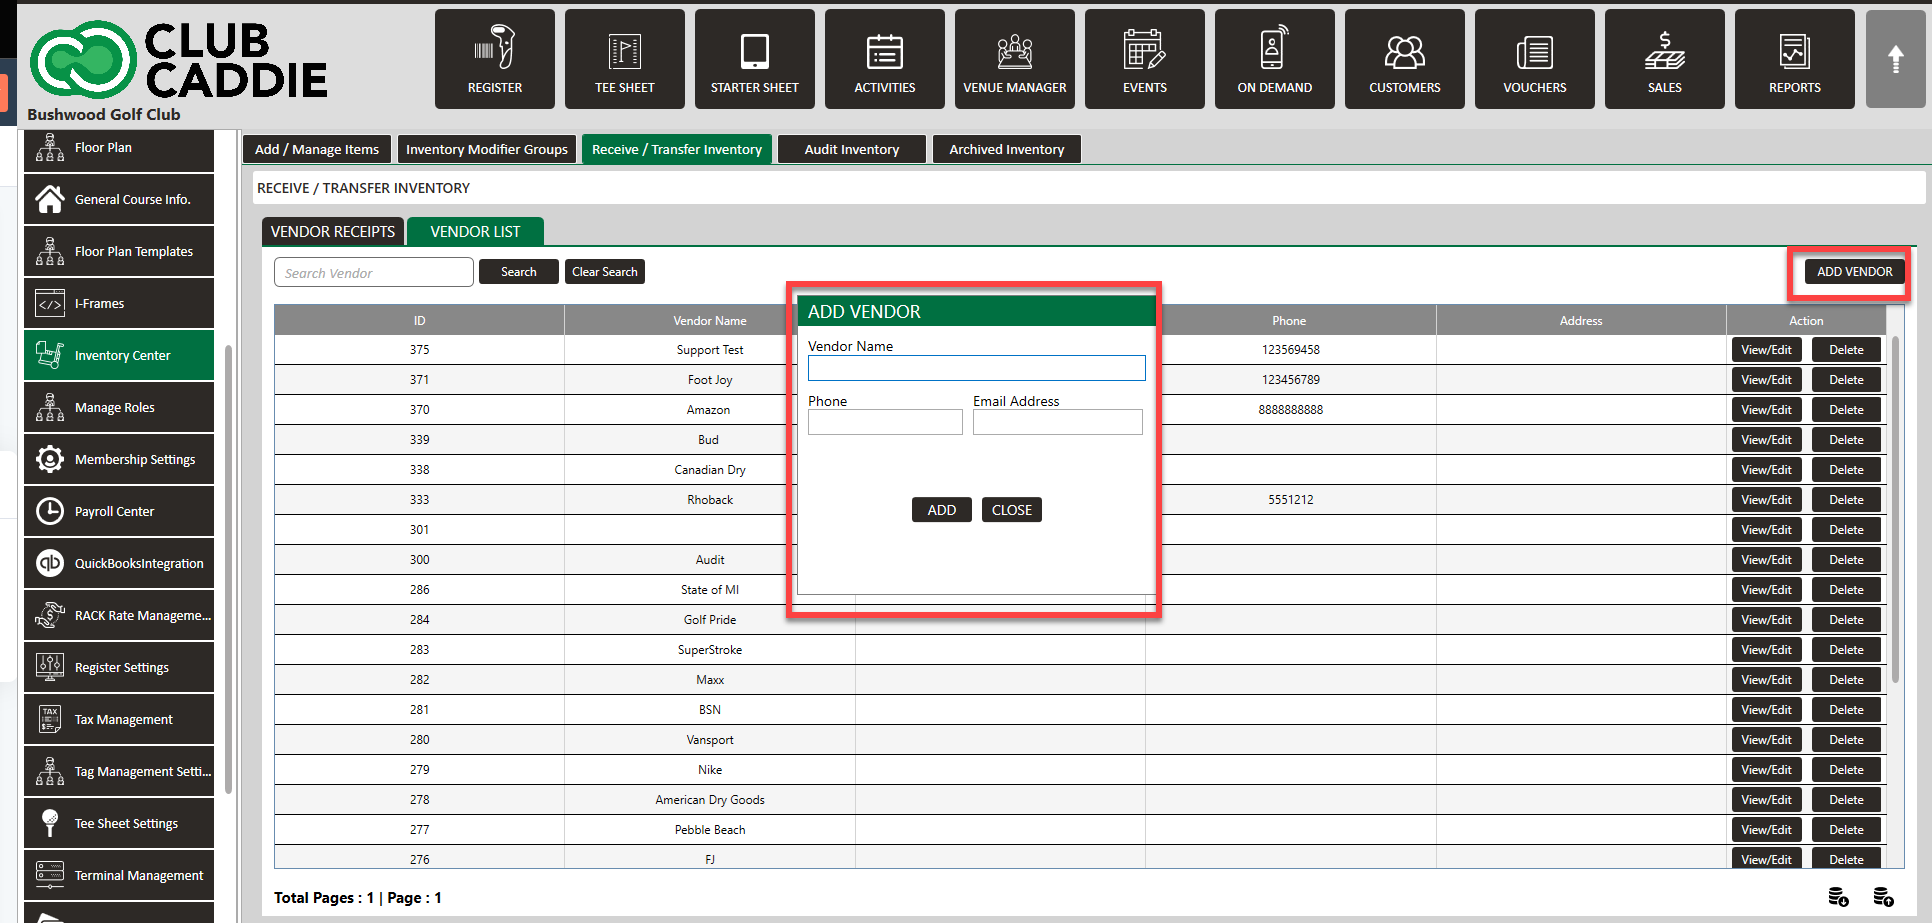
View/Edit: Will allow you to add address information once saved.