Settings : Setting or Adjusting an Item's Loyalty Points
This article contains step-by-step instructions on how to set loyalty points to items.
Step-By-Step:
There are two ways to set Loyalty Points to items.
A. Set through the Inventory Center.
B. Set through Register.
A. To set through the Inventory Center
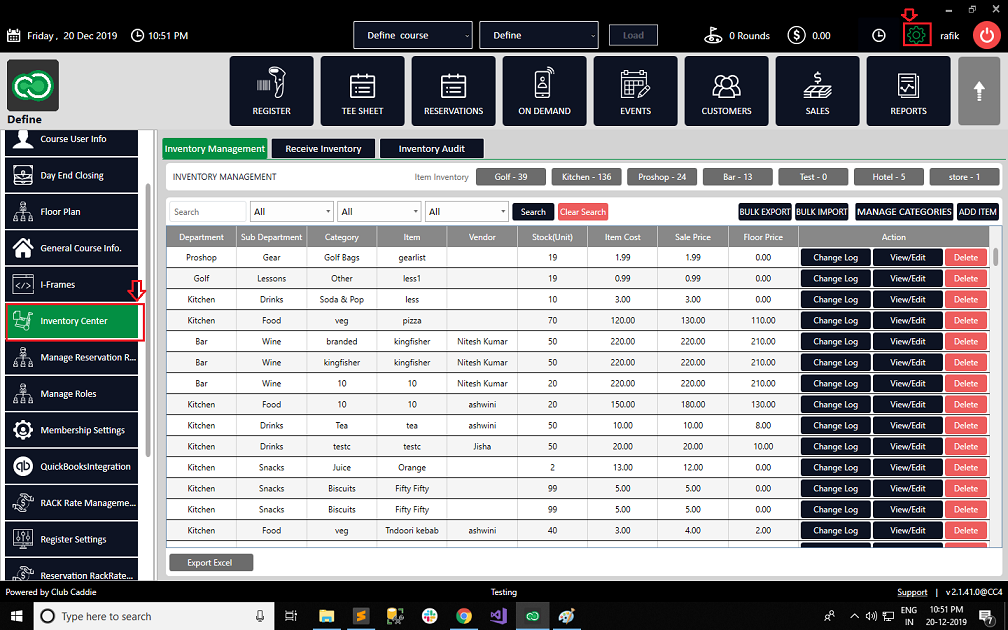
Step 1: Click the Gear Wheel icon from the window's top right corner. Select the Inventory Center from the left-hand menu.
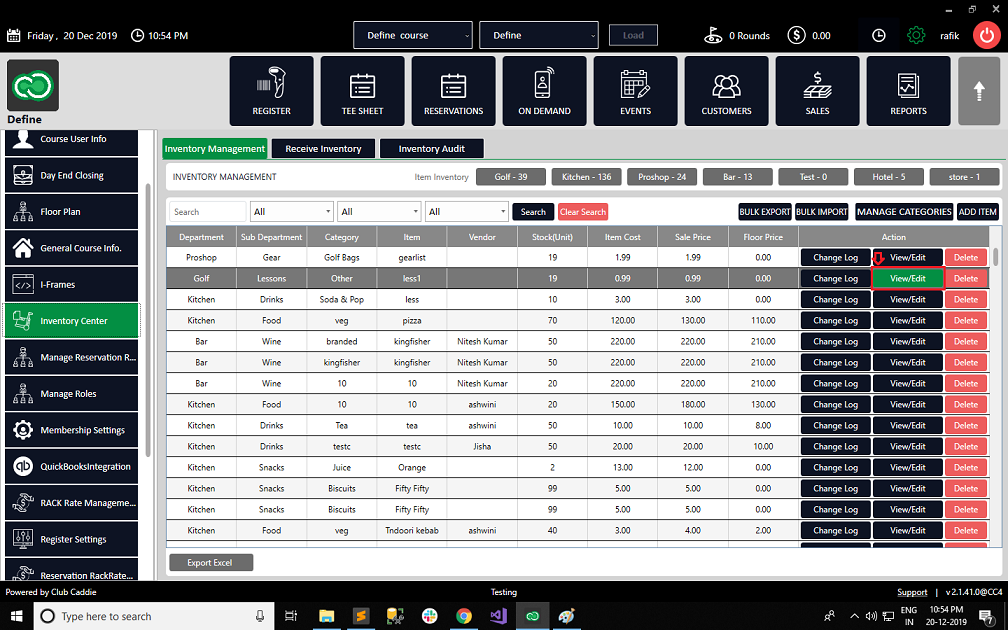
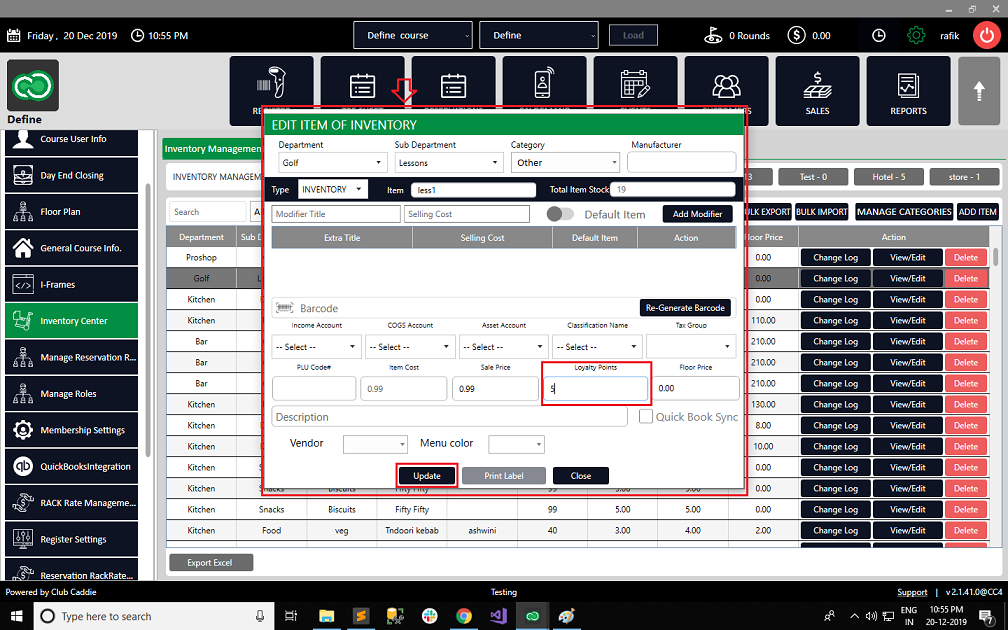
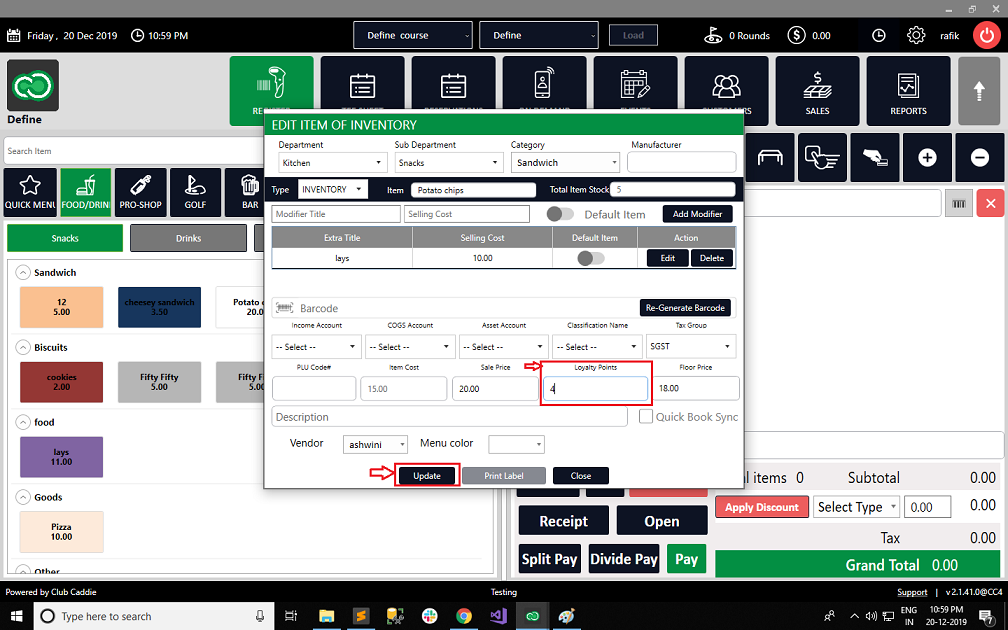
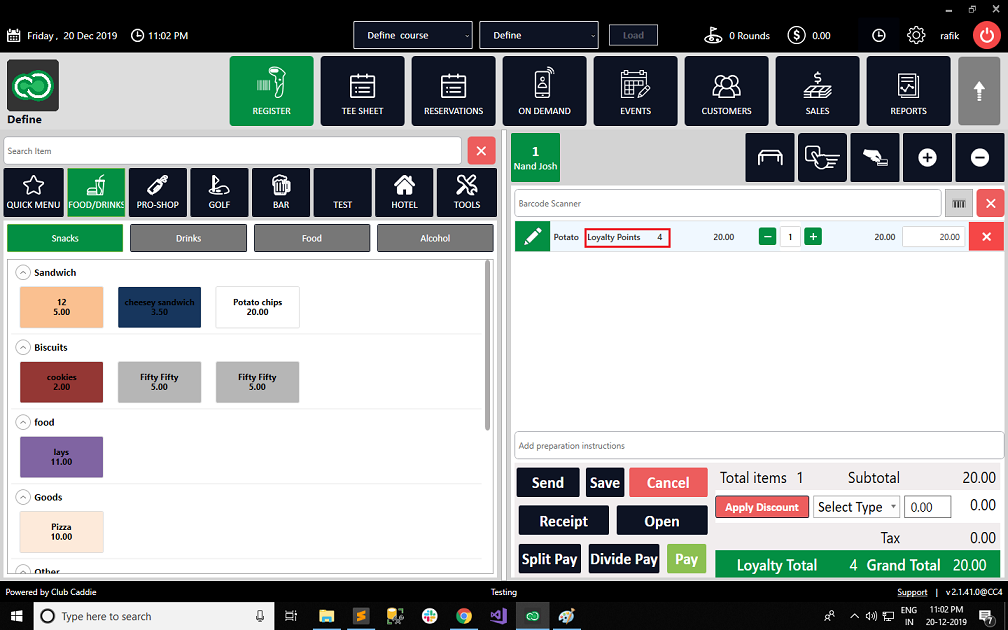
Step 3: The system will generate an EDIT ITEM OF INVENTORY window. Set the Loyalty Points then click Update. Loyalty points will be set for that item.
B. To set through Register.
Step 1: Select the REGISTER module from the module navigation menu.
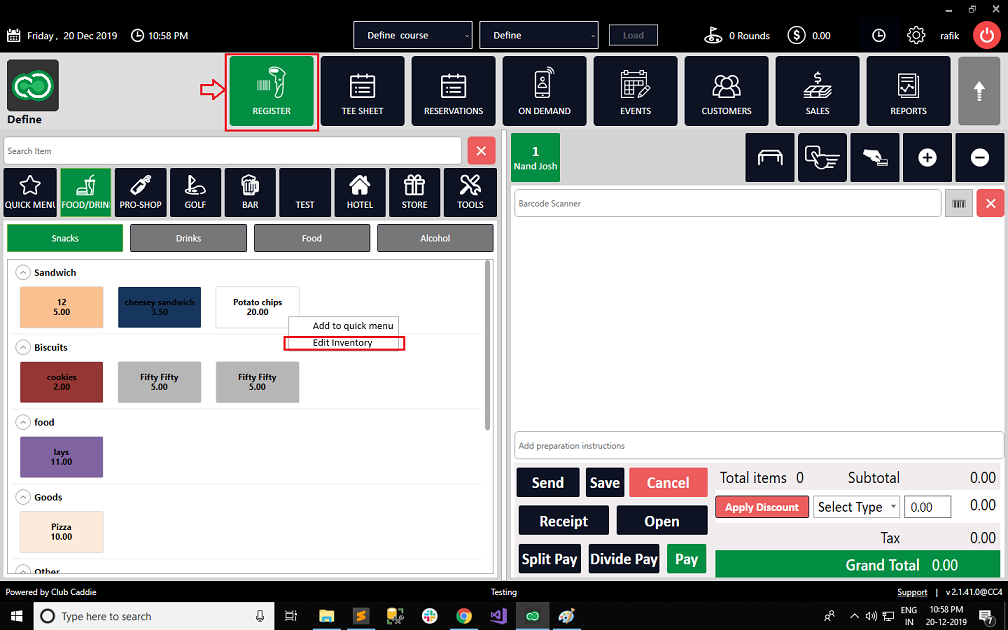
Step 2: On the left-hand menu is the inventory window. Right-click on the item for which you want to set Loyalty points. Select Edit
Inventory from the drop-down.
Step 3: The system will generate an EDIT ITEM OF INTERVENTORY window. Set the Loyalty Points then click Update. Loyalty points will be set for that item.
A. Set through the Inventory Center.
B. Set through Register.
A. To set through the Inventory Center
Step 1: Click the Gear Wheel icon from the window's top right corner. Select the Inventory Center from the left-hand menu.
Step 2: Select Inventory Management. The system will show a list of items within the department and sub-department. Click View/Edit of the item for which you want to set loyalty Points.
Step 3: The system will generate an EDIT ITEM OF INVENTORY window. Set the Loyalty Points then click Update. Loyalty points will be set for that item.
B. To set through Register.
Step 1: Select the REGISTER module from the module navigation menu.
Step 2: On the left-hand menu is the inventory window. Right-click on the item for which you want to set Loyalty points. Select Edit
Inventory from the drop-down.
Step 3: The system will generate an EDIT ITEM OF INTERVENTORY window. Set the Loyalty Points then click Update. Loyalty points will be set for that item.
.png?width=200&height=89&name=CC%20%20fiserv.%20(3).png)